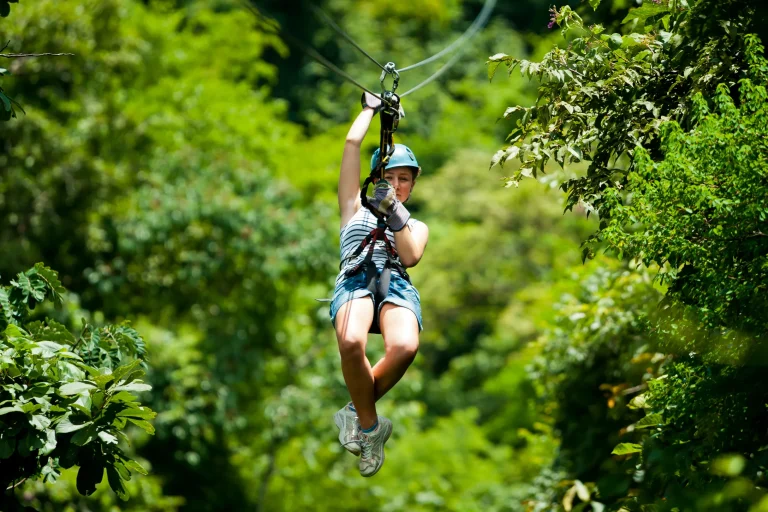
What you might not know is that your zipline “start time” isn’t when you actually launch. You’ll want a 60 to 90 minute drive from Waikīkī, then arrive 30 minutes early for parking, waivers, a weigh in, and a quick locker drop. The lot can feel like a bumpy gravel puzzle with limited spaces. Book an 8 to 10 AM slot and you’ll hear fewer horns and more wind in the trees, but there’s one timing trick that saves your whole day…
Key Takeaways
- Budget 60–90 minutes to drive from Waikīkī to Hale‘iwa or Keana Farms, plus extra time during 7–9 AM and 3–6 PM traffic.
- Arrive at least 30 minutes early for parking, waivers, restrooms, lockers, and required weight check before harness fitting.
- Plan about three hours on-site for training, farm-road transfers, snack stops, and the full zipline tour with photo debrief.
- Book a morning start (8:00–10:00 AM) for calmer winds, easier parking, and fewer tour-bus crowds.
- Expect an unpaved, bumpy gravel lot with minimal signage; rely on GPS for the hidden entrance and allow extra time to exit.
Half-Day North Shore Zipline Schedule (Sample Timeline)
If you treat a North Shore zipline like a quick errand, you’ll feel the clock tapping you on the shoulder. For a half-day North Shore zipline, sketch a simple timeline. Leave Waikīkī with 60 to 90 minutes of drive time, then add a cushion for slow country lanes. Park on the unpaved lot, bounce a bit, and walk in. Arrive 30 minutes early for weight check and waivers. Build in buffer time for check-in and any last-minute paperwork so you’re not rushed at the start.
On-site, expect about three hours. You’ll gear up, practice braking, and ride farm roads between lines. You’ll hear wind in the ironwoods and camera clicks at snack stops. Call that morning to confirm weather holds. After you unclip, plan 60 to 90 minutes back, plus a Hale‘iwa meal. North Shore zipline tours reward roomy schedules always.
Best Tour Start Times to Avoid Traffic + Crowds
Usually, the smoothest North Shore zipline day starts with a morning launch around 8:00 to 10:00 AM, when the roads feel looser and the air stays calmer. Grab a morning slot and you’ll beat the midday tour buses and catch crisp light on the ridgelines. You’ll also find parking less tense too. Morning tours also tend to deliver calmer air and brighter ridgeline light than afternoon runs, which can feel more humid and busier.
Book an 8–10 AM North Shore launch for calmer air, lighter roads, crisp ridge light, and easier parking.
- Roll out before the 7–9 AM crush so your North Shore drive feels like a coastal glide, not a brake-tap parade.
- Plan to arrive at least 30 minutes early for waivers, weigh-in, and lockers, then listen for the first zip echoing through the trees.
- Call the operator that morning to confirm wind or rain holds, so you’re not guessing from a dripping windshield.
Aim for early, and your group launches on time.
Waikiki → North Shore Drive Time (Realistic Ranges)
Even with a clean GPS route, the drive from Waikiki up to the North Shore still takes a real bite of time. Expect 60 to 90 minutes to reach Haleiwa or Keana Farms, 40 to 60 miles depending on traffic. In peak commute windows, 7 to 9 AM or 3 to 6 PM, add 15 to 40 minutes. If you’d rather skip the drive, transportation from Honolulu is available for some North Shore zipline tours.
Morning tours feel easier, with fewer brake lights. Add buffer time and arrive 30 minutes early for waivers, check in, and the bumpy lot. Use GPS and call the operator before you go since the entrance is easy to miss. If you swing through Waimanalo for views, add 15 to 30 minutes to your Waikiki to North Shore drive time and adjust your parking and timing.
Fastest Route to Keana Farms (Turn-by-Turn Overview)
You’ll start in Waikīkī and slip onto the H-1 onramp, then cut to H-3 toward Kāneʻohe as the tunnels swallow road noise and the green ridges pop into view. Stay on course to the Kāneʻohe exit and head for Kamehameha Highway, where the air gets saltier and the pace turns easy as you aim for the North Shore. From there you follow HI‑83 toward the farm, and you’ll want GPS for the last turns because the entrance hides a bit and the bumpy, unpaved parking lot keeps you honest. This route keeps the day focused on a North Shore zipline with minimal driving so you can spend more time on the tour and less time behind the wheel.
Waikīkī To H-1 Onramp
If Waikīkī is still rubbing sleep from its eyes, slip onto H-1 West and start the clean, fast run toward the North Shore. Roll past the last surf shops, then merge onto H-201 for a quick beat and follow the signs back to H-1 West toward Pearl City. Before you commit, take a quick look at the HDOT Lane Closure Map so an overnight or early-morning freeway closure doesn’t surprise your timing. This early stretch is where parking and timing plans pay off, so aim to be moving before 7:00 to 7:30 AM, or wait until the rush thins. Keep your coffee capped because lanes shuffle and locals move with purpose.
- Blue morning light on the Koʻolau ridgeline in your mirrors.
- Tire hum turning steady as the freeway opens up.
- A mental check to call CLIMB Works before you drive farther toward Wahiawā and beyond.
H-3 To Kāneʻohe Exit
From the heart of central Oʻahu, H-3 eastbound sets you up for the quickest shot to Keana Farms when the roads behave. Take the H-3 to Kāneʻohe exit (Exit 3) for Kāneʻohe and Kahekili Highway. The tunnels pop you into Koʻolau air. Follow Route 63 south about 6 miles toward Kāneʻohe. Then turn onto Kamehameha Highway (Route 83). Set GPS to the exact address. If you’re starting in Waikiki, Transportation from Waikiki can be an option for reaching a North Shore zipline tour without driving. This is the fastest route to Keana Farms, shaving 10–20 minutes when traffic’s light. Signs near Keana Farms are easy to miss, so allow extra time to spot the parking entrance. Mid-morning and late-afternoon can stretch the drive to 60–90 minutes. If winds look wild, call CLIMB Works first.
| Point | Quick vibe |
|---|---|
| Exit 3 | Mountain mist |
| Route 63 | Smooth flow |
Kamehameha Highway To Farm
Kamehameha Highway serves up the classic North Shore approach when H-3 feels moody or you’re starting in Waikīkī. Take H-1 west, hop on H-2 north, then follow Kamehameha Highway (99/83) past Haleʻiwa’s surf shops until GPS points to Keana Farms. Under normal traffic you’ll drive about 60 to 75 minutes, but commute hours 7–9 AM and 3–6 PM can add 15 to 40 minutes.
- Watch cane fields flash by and hear trade winds rattle your rental’s mirrors.
- Slow for one-lane bridges and sleepy chickens near roadside fruit stands.
- Turn onto the access road, ease over the bumpy dirt entry, and park.
If you haven’t booked yet, consider a Reserve Now, Pay Later option so you can lock in your North Shore zipline tour date while staying flexible. Call Climbworks before you go. Wind holds happen. Arrive 30 minutes early. Bring water and scan carefully for minimal signage.
Scenic Route via Waimānalo: When It’s Worth It
If you take the scenic route through Waimānalo, you’ll add about 15 to 30 minutes, but you’ll trade speed for bright coastline, green ridges, and those quick pull-over photo moments. It’s worth it when you’re not racing the clock and you’re steering clear of peak traffic from 7 to 9am and 3 to 6pm, or that “relaxing drive” turns into a slow crawl. Call the zipline crew before you leave if wind holds look likely, then run GPS and budget extra time for the unpaved, slightly bumpy entrance and tight parking at Keana Farms. If you’re pairing your day with the North Shore Adventure Combo, pad your arrival window so you’re not rushing between the zipline and farm food stops.
Extra Time, Extra Views
Take the long way up the coast through Waimānalo and you’ll add about 15 to 30 minutes to your drive, but you get paid back in ocean views and mountain backdrops. The Waimānalo route feels like a reset button. Plan for extra time so your parking and timing still match the zipline check-in, since you’ll want to arrive 20 to 30 minutes early.
- Bright blue water flickering beside the road and salt on the breeze.
- Ironwood shade, soft sand, and a quick photo stop that turns into a grin.
- Green ridges rising behind you while waves thump like a drum.
Along the way, build in a few minutes for scenic viewpoints and photo stops so the detours don’t cut into your check-in buffer.
If you’re on a tight schedule, don’t be the designated driver here. On windy or rainy days, call the operator first.
Best Times To Detour
That Waimānalo loop feels like a mini road trip, so the timing matters as much as the view. If you’ve got extra time, take the Waimānalo detour and let the coast do the talking. You’ll add about 20 to 30 minutes each way, but you get bright water, green ridges, and fewer honks than the main highway. The North Shore ziplining tours are a popular add-on for a full-day adventure, so give yourself extra buffer if you’re going this way.
Plan morning departures before 9:00 AM. The light is crisp, the winds behave, and the single lane stretches feel relaxed. Make it a full day by pairing the route with Keana Farms or a late lunch on the North Shore. Skip it if you’re tight on time or facing afternoon rush on your drive back. Call the zipline operator first if weather looks shaky at last minute.
Download Before You Go: Offline Maps + Backup Signal
Before you head out of Waikīkī and the GPS bars start to fade, download offline maps for the North Shore and save your route to CLIMB Works at Keana Farms near 2065 Kauhikoa Rd. Cell service can blink out along the rural coast, so save two backups too: the scenic Waimānalo loop and the H‑1→H‑2→Kamehameha Hwy run. If you’re coordinating with friends who aren’t driving, confirm the operator’s pickup options ahead of time so everyone arrives on schedule. Waves may distract you, but you’ll stay.
- Pin the CLIMB Works Zipline entrance, the parking lot, and the nearest gas station so you’re not hunting for a tiny sign.
- Cache Hale‘iwa as your reset point, with turn‑by‑turn voice guidance ready offline.
- Screenshot your meeting spot and plug in a charger, then text your group and the operator your ETA and a simple rendezvous plan.
Wind/Rain Rules: What Can Pause or Cancel Ziplines
Offline maps keep you on track, but the North Shore still gets the final vote once the wind starts pushing the palms around. If high winds roll through, operators may place the course on hold or shut it down, especially on long, exposed lines like the 1-mile Keana Farms run where guides sometimes do midline retrievals. You might hear the cables sing and feel gusts tug at your helmet. Light rain often isn’t a deal breaker, but fast squalls, downpours, or any lightning can pause launches until it passes. Even if it’s raining, many tours will still run unless conditions turn unsafe under their weather policies. Book an early slot when the air is calmer and the clouds behave. Before you commit, read the cancellation and rescheduling policies so you know whether you’ll get a later time, credit, or a refund.
Call-Before-You-Drive Checklist (What to Ask Staff)
Why roll up to the North Shore with salty hair and a full tank if the wind’s already making the cables hum? Before you drive, call the operator and ask if your run is actually going. Wind holds can flip plans fast. Confirm your exact tour time is still posted and whether group size changes might nudge the start later.
Picture your prep like this:
- A quick yes or no on today’s schedule and any delays.
- Confirm parking details, like signs, surface type, shuttle options, and how early you should arrive.
- Check-in rules: waivers done, scale weigh-in, restrooms or lockers, and the recommended check-in lead time, usually 30 minutes.
Arriving early also gives you time to complete check-in steps before the group heads to the first line.
Then ask about photos, costs, phone tethers, and when Dropbox links land.
Parking at Keana Farms: Gravel Lot + Arrival Tips
Once you’ve confirmed the tour’s a go, set your sights on the parking at CLIMB Works Keana Farms because it’s part of the adventure. The entrance comes up fast and it isn’t signposted, so keep GPS on and watch for the gravel drive. If you’re booking a private experience, note that private tour pricing can vary based on what’s included.
| What you’ll notice | Quick tip |
|---|---|
| Uneven gravel lot | Drive slow, mind the ruts |
| Limited marked spaces | Park tight, leave doors room |
| Peak mornings fill up | Aim for an early slot |
You’ll roll onto a gravel lot with a bumpy entry and crunchy stones underfoot. Arrive at least 30 minutes early so you can snag a spot, sign waivers, and stroll to check-in without rushing. If wind or rain has shuffled the schedule, call CLIMB Works before you commit to the drive.
How Early to Arrive (and Why 20–30 Minutes Matters)
If you give yourself a 20 to 30 minute head start, the whole zipline morning feels smoother from the first crunch of gravel under your shoes to the last click of a helmet buckle. Aim to arrive 20–30 minutes early because check-in requires pre-filled waivers and a few quick prep moments before you head out to zip. The extra buffer also helps you find the right driveway since lots can be unmarked, GPS-led, and a little bumpy. If you’re booking close to your tour time, confirm your same-day booking details so your arrival buffer still covers any last-minute check-in steps.
- You roll in with time to breathe as wind moves the trees.
- You park without circling, even if a shuttle or short walk slows you down.
- You stay calm when North Shore traffic stretches your Waikīkī drive by 40 to 60 minutes, especially at 7 to 9am.
Check-In Steps: Waivers, Weigh-In, Lockers, Bathrooms
Arriving early buys you a calmer start, and check-in is where that extra time pays off. Plan to arrive at least 30 minutes before your tour so you can handle waivers without rushing or holding up the group. Bring printed pages or a phone screenshot if the company sends them ahead. Next comes the mandatory weight check on the on-site scale. Staff record your number to match you with safe gear, no judgment, just math. Hit the restrooms before you line up, then use the mini-lockers for keys, wallets, and anything loose that might jingle. Ask about locker size when you book. At the desk, mention medical or mobility concerns so guides can plan. After check-in, stay close for helmet and harness fitting too. Guides will also confirm your gear uses backup safety systems like redundant attachments and braking controls before you head to the first platform.
What to Wear for an Oʻahu Zipline (Shoes, Layers)
Start with closed-toe shoes that grip the dirt and wet wood since most Oʻahu ziplines won’t let flip-flops on the course. Choose footwear with good traction for mud and slick surfaces so you stay steady on approach trails and platforms. Dress in light layers you can peel off as the morning air turns warm and the ridge wind whistles at the platforms. Keep hair tied back and stash anything loose in a secure pouch so your helmet and harness sit clean and you don’t watch a bracelet try to take flight.
Closed-Toe Shoes Required
Almost every Oʻahu zipline tour requires closed-toe shoes, and you’ll be glad for the extra protection the moment the harness buckles click and the platform boards thump under your feet. It’s closed-toe shoes required, not a suggestion. Bring closed-toe sneakers or light hikers with grippy soles for launches and short walks between towers. Skip flip-flops or sandals. Operators can refuse boarding, and uneven dirt and gravel parking lots don’t forgive toes. For comfort on breezy ridgelines and shaded forests, plan on shorts and layers that you can adjust between runs.
- Socks hug your heels and cut blisters.
- Dew beads on grass, but your feet stay comfy.
- Pebbles crunch on bumpy trails as you head to the next line.
Quick-dry uppers help after rain squalls or ATV transfers too. Confirm footwear rules when booking and arrive wearing them to speed check-in.
Light Layers For Wind
Throw on a thin windproof layer and you’ll feel the difference the moment you step onto the first tower. North Shore mornings look sunny yet the breeze bites, and the helmet wind ramps it up on 1 to 2 minute zips. A light rain jacket packs small, slides under your harness, and won’t flap like a cape. Packing a light rain jacket is one of the essentials to bring for a North Shore zipline tour.
| When | What you wear | Why it helps |
|---|---|---|
| Morning | Thin windproof jacket | Blocks helmet wind |
| Midday | lightweight layers | Easy to vent between runs |
Bring it even if the forecast says clear. Stick with close fitting activewear so nothing snags on hardware. If you’ve got long hair, tie your hair back before you clip in. You’ll hear palms rustle, feel cool air on your arms, and still stay comfortable.
Secure Accessories And Hair
Once you’ve got that light wind layer zipped, take a quick look at everything that could flap, swing, or tangle when the pulley starts to sing. Tie long hair back and tuck flyaways under a cap or helmet strap. Secure loose clothing like scarves or a hoodie drawstring so it won’t whip your chin on takeoff. Skip dangling jewelry and big earrings. You’ll hear the cable hum and feel the harness snug, so keep your hands happy with the provided gloves or thin grip gloves. Most tours also include helmets and gloves, so you can focus on fit and comfort instead of packing bulky safety gear.
- Phone goes in a zippered pocket, not your palm.
- Sunglasses get a strap or they stay in the car.
- Keys ride flat against you, quiet as a shell.
Closed-toe shoes help you land steady every time.
What to Pack: Water, Phone Lanyard, Motion Prep
Because the North Shore can flip from bright sun to a quick shower in the time it takes to clip in, packing smart keeps your zipline focus on the rush and the view. For 2 to 3 hours, bring at least 1 liter of water per person. Add more if it’s sunny. Stash ID, cash, and keys in a tiny zip pouch. Secure your phone to the provided lanyard or a zippered pocket. Photos often arrive via Dropbox minutes after. You’ll hear the canopy drip and the cables hum, so keep both hands free.
| Pack | Purpose |
|---|---|
| Thin rain layer, sunglass strap | Fast weather and wind |
| motion-sickness remedies | Calm ATV rides; go last |
If nausea hits, sit back on the ATV and keep snacks simple.
Gear Fitting + Safety Briefing: Timing and Comfort Tips
Even if you’ve already filled out your waiver online, you’ll want to arrive at least 30 minutes early so you can step on the on-site scale, hit the bathrooms, and stash keys in the mini-lockers before the harnesses come out. During gear fitting, your guide tightens straps and clicks buckles until the harness feels like a hug, with only a couple inches of give. Helmet next, then a quick check that makes satisfying tap-tap sound. You’ll also get safety tips on brake cues and hand signals, plus a practice run from a low platform.
- Closed-toe shoes on dirt and gravel, laces snug.
- Thin layers and gloves to cut chafe on 2,400 ft lines.
- Phone tethered or zipped, unless launches go hands-free.
Leaving the North Shore: Return-Drive Timing + Dinner Stops
After you clip out and hand back your helmet, the clock starts moving faster than you’d think. Your tour runs about three hours, but you’ll still need time for the ATV ride back, a quick debrief, and packing those photos. Plan to roll out at least 30 minutes after the end, and add a few minutes to bounce out of the bumpy lot at Keana Farms.
The drive back to town often slows in the afternoon. From 3 to 6 PM, budget 60 to 90 minutes, not the easy morning run. Want a Haleʻiwa dinner? Try leaving by 2 or 3 PM for Giovanni’s Aloha Shrimp or Pioneer Saloon. If you’ve got slack, detour through Waimānalo for ocean cliffs and ridges, plus extra time.
Frequently Asked Questions
Is There an Age Minimum or Height Requirement for the North Shore Zipline?
Yes, you’ll face age requirements and height restrictions. Most North Shore ziplines start at about 7 years old, and kids 7–14 need child supervision with an adult. Height minimums often hover near 4’8″, but operators vary.
What Is the Tour’s Weight Limit, and How Is It Measured?
Naturally, gravity demands paperwork: you’ll face a 250–275 lb maximum capacity (often 270). Staff weigh you on-site at check-in, with your intended layers/packs, plus a quick torso measurement for harness gear accommodation, call ahead if close.
Are Gopros or Selfie Sticks Allowed During the Zipline Tour?
You can bring action cameras if you secure them with a tether and use hands freemounts like helmet or mounts. You can’t use selfie sticks or poles; staff will make you stow them at check-in.
Can I Bring My Own Snacks, and Is There Food Available Nearby?
Absolutely, you can bring snacks; it’ll feel like you’re fueling a marathon in the sky. Bring small, non-messy bites in a secure pouch, don’t pack coolers, note food allergies, and hit local vendors nearby after.
What Is the Cancellation or Rescheduling Policy if I’M Running Late?
Call the operator ASAP if you’re running late; late arrivals often count as no-shows 5–15 minutes after check-in cutoff. You might reschedule to the next slot if space fits the reschedule window and refund policy.
Conclusion
You’ll enjoy the zipline more when the drive feels unrushed. Leave Waikīkī 60 to 90 minutes before your slot and roll in 30 minutes early for the gravel lot, waivers, weigh in, and that tiny locker for your keys. Aim for an 8 to 10 AM launch. Haleʻiwa can pull in about 20,000 visitors on a busy day, so lunch lines grow fast. Head back before sunset and let the ocean breeze cool you off.