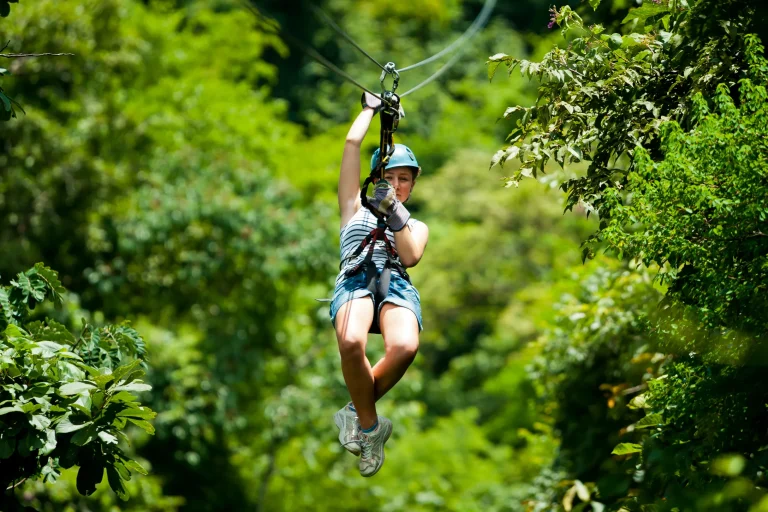
Is it really true you can turn the drive from Waikiki to North Shore ziplines into a mini photo safari without running late? You head east and grab a fast shot at Makapuʻu as the wind snaps your shirt and the sea turns neon. You pause at Halona when the blowhole pops and salt hits your lens. You swing by Kualoa for Chinaman’s Hat and a clean ridgeline. But the best stop might be the one you almost miss…
Key Takeaways
- Stop at Halona Blowhole Lookout for dramatic sea bursts and cliff views; plan 10–20 minutes and park only in designated areas.
- Detour to Waimānalo Beach Park or Bellows Beach Park for bright turquoise water, wide sand, and easy shoreline compositions with restrooms.
- Use Kahana Bay pullouts for jungle-draped valleys and a sweeping crescent beach; entrances are narrow, uneven, and lightly signed.
- Take quick Kamehameha Highway windward pullouts for bluer water and cliff panoramas; use marked turnouts and keep stops brief.
- Near Keana Farms, rely on GPS for the easy-miss gravel entrance and nearby pullouts; arrive early for check-in and extra parking time.
Plan Your North Shore Ziplines Drive
Before you even clip into a zipline harness, the drive from Waikiki to CLIMB Works at Keana Farms sets the mood. You’ll roll out on H-1 to H-2, then cruise Kamehameha Hwy for a scenic drive along Oahu’s,North Shore. Give it about an hour, or 60 to 90 minutes when traffic gets moody. Plan a morning start so the windward coast lookouts show off deeper blue water with less glare. Pull into marked turnouts, hop out, and listen to palms rattle while you frame the coastline. Don’t try to shoot from the road. Build in a few extra minutes for parking and check-in so you’re not rushed before your tour time. GPS helps because the entrance can sneak by. Leave buffer time for the return trip, especially 3 to 6 pm. If you’ve got time, swing through Waimanalo for wider vistas too.
Choose the Best Route From Waikiki
Kick off from Waikiki and point your wheels toward the Kamehameha Hwy via H-1 to H-2, because this route serves up the best coastal vistas on the way to CLIMB Works at Keana Farms. For transportation from Waikiki, expect 60–90 minutes in light traffic, but add 15–40 during the 7–9am and 3–6pm rush. You’ll ride past windward pullouts where waves slap the reef and the Koʻolau ridges glow. Let a passenger grab shots so you don’t miss viewpoints. If you’ve got extra time, swing through Waimanalo for beautiful scenery and bluer water away from Honolulu’s haze. Use GPS to spot the unmarked Keana Farms entrance and take the bumpy unpaved approach slowly. If you prefer not to drive, Transportation From Honolulu is available for the North Shore Zipline Tour. The final ridge-top views feel like a sneak peek before you park.
Time Your Arrival for Check-In and Wind
If you time your arrival like you’re chasing the calmest skies, the whole zipline morning feels smoother. Book 8:30 to 10:00 AM, then plan to reach the Zipline Area 30 minutes early. The drive from Waikiki often runs 60 to 90 minutes, and check-in moves through waivers and weight checks fast when you’re not rushed. Aim to build in buffer time so you can handle check-in and waivers without feeling hurried. Call CLIMB Works before you roll out, because high winds can pause a tour or bring you back midline. Add 15 to 30 minutes for shuttle timing, and extra buffer if you drive and hunt for rough, lightly marked parking.
- Restrooms and lockers at basecamp
- Pre-filled waivers on your phone
- Helmet fitting and scale check
- Wind in the trees and quieter platforms
- Breathtaking Views before warming gusts kick in
Know Photo Rules on North Shore Ziplines
Before you clip in, you’ll want to know exactly what you can carry because some lines let you use your phone only if it’s tethered while others make you stash it and buy the glossy action shots at basecamp. Follow the guides and keep your camera strap tight, secure your glasses, and slide your device into storage between runs so it doesn’t rattle in the wind like loose keys. If you’re allowed to shoot mid-ride, use sharp action shots techniques by locking focus ahead of time and choosing a faster shutter mode to freeze motion. When you call to reconfirm your tour, ask about any new photo rules and weather limits since gusts can change what you’re allowed to do.
Camera And Phone Tethers
Clip your phone or camera onto a real tether and you’ll feel a lot freer to enjoy the whir of the line and the cool air off the trees. On most North Shore tours, camera allowed means one rule: it stays strapped to you securely on platforms and in flight, always. Choose a strap that fits your comfort and keeps your device secure, wrist lanyard or harness clip both work well.
- Wrist lanyard snug against your skin
- Neck strap tucked under your helmet straps
- Carabiner clip fixed to your harness loop
- Zippered pocket for the wait between lines
- Quick check-in test so it won’t snag the brake
CLIMB Works follows the same standard. Use a secure strap and keep loose items stowed. When guides say it’s safe, pull out your tethered camera, grab a shot, then tuck it away again. Later you’ll thank yourself.
Operator Photo Packages
Let the guides do some of the shooting while you focus on the glide, the treetops, and that clean rush of wind past your ears. On many North Shore lines, CLIMB Works photographers capture you in the best spots. Think cedar trunks, bright sky gaps, and that grin you didn’t know you had.
After the last landing, you can browse the pro shots at basecamp and buy a package that fits your group. If your tour offers phone lanyards, use one and you can still take pictures during approved scenic pauses. Keep your device in a zippered pocket between lines when they ask. Check in early and learn the helmet fit and strap setup. Call ahead to confirm photo rules so you’re not guessing. It helps to remember the tour flow from check-in to landing so you know when cameras are allowed and when hands need to stay free.
Wind And Weather Limits
- Gusts rattle cables like guitar strings
- Mist beads on gloves and lenses
- Trade winds rise after lunch so book morning Time
- Strap your camera with a lanyard
- Stash phones between lines or hand to guides
Tours may pause in high winds when gusts exceed safe operating limits and make launches and landings unstable.
You’ll get a briefing and harness check plus tips for glasses and zippered pockets. Follow it and you’ll shoot safe before you drive.
Stop at Halona Blowhole Lookout
A burst of seawater shoots up from the lava shelf at Halona Blowhole Lookout, and you’ll hear it before you see it. When the swell hits, the blowhole thumps and a plume can jump 30 to 50 feet. Salt hangs in the air and stings.
This small paved viewpoint sits on Oʻahu’s southeast coast, a 10 to 20 minute pause on your drive to the Shore Zipline on the North Shore. Parking is limited, so arrive early or late for golden light and breathing room. If you’re continuing to the ziplines, plan for cooler temps and better light by going earlier in the day. From the platform you can spot the crescent of Sandy Beach and, on clear days, faint Molokaʻi and Maui. Stay behind the rails. Winds gust, rocks slick, and rogue waves don’t care about cameras. You’ll still get Stunning Views.
Grab Quick Sandy Beach Coastline Shots
Two quick pullouts along Kamehameha Highway can turn your drive north into a mini photo mission. You’ll see water that looks bluer than Honolulu, especially in morning light on windward beaches. You’ve got about 60 to 90 minutes from Waikiki, so time it. Stop only at marked turnouts, hop out fast, and keep traffic flowing.
- Salt-bright sand in a long crescent near Haleiwa
- Ironwood trees combing the edge like green fringe
- Distant surf breaks stitching white lines on deep blue
- Cliff-top panorama that sweeps shoreline and mountains
- Gravel pullouts by Keana Farms, so strap your camera
A wide lens or phone panorama helps you fit the beautiful North into one frame. Skip the tripod if the lot is tight, and always follow parking signs. On big-swell days, the Waimea Bay buoy has clocked 11.5 ft significant wave height with a 14-second dominant period, so expect dramatic whitewater lines offshore.
Shoot Makapuʻu Cliffs From the Lookout
At Makapuʻu Lookout about 400 feet up, you’ve got a clean, wide perch for framing the jagged Makapuʻu Cliffs and that bright turquoise Pacific, with Rabbit Island sliding into view on clear days. Time it for early morning or late afternoon so the rock faces glow and shadows behave, and swing your lens offshore in winter because you might catch a humpback blowing in the distance. For quieter pull-offs and cleaner frames, plan around weather and crowds on Oahu’s North Shore so you’re not fighting peak-time traffic on the way to the ziplines. Set up wide and then go tight with a 200–400mm, strap your camera for the wind, and claim a steady spot near the paved lot before the crowd and gusts try to photo-bomb you.
Best Lookout Vantage Points
Rising above the roadway, Makapuʻu Lookout gives you a clean, elevated stage for photographing the Makapuʻu Cliffs without scrambling over sharp lava rock. At about 410 feet up, you’ll spot phenomenal views of the cliff faces and offshore islets before you roll on to zipline tours. Use the paved platform and railings to steady a wide-angle frame that catches dark foreground lava and the Koko Head coastline. The PacIOOS SWAN model provides a 5-day, hourly nearshore wave forecast for Oʻahu that can help you anticipate when surf will be exploding at the base of the cliffs.
- Aim a 200–400mm lens at seabirds riding the wind
- Track white surf exploding at the base
- Scan beyond the reef for winter whales
- Watch clouds sweep across ridges
- Grab parking early so you’re not circling like a lost booby
With telephoto reach, you can study wave patterns and textures on the cliffs, then head out smiling today.
Timing For Golden Light
Often, the Makapuʻu Cliffs look their best when you time the light instead of rushing the stop. For warm golden-hour side light, reach the lookout 30–45 minutes before sunset, which runs about 6:00–6:45 PM most of the year. In winter, sunset can slip to 5:45–6:15 PM, so leave Waikiki early because the drive takes 60–90 minutes. If you’re following a Zipline Morning plan on the North Shore, aim to do this lookout either early on the drive out or later on the return before your beach afternoon.
| When | Arrive | What you’ll see |
|---|---|---|
| Morning | 20–40 min after sunrise | Soft peach on the east face |
| Evening | 30–45 min before sunset | Amber edges and glittering ocean |
| Any day | 10–15 min early | Time to hike up and pick a frame |
Check exact times for your date, then scout your angles before peak light. That short 20–40 minute window goes fast like a wave set and you’ll catch the hush.
Camera Setup And Safety
Golden light gives Makapuʻu Cliffs that warm edge, but the trade winds don’t care about your timing. Before you lift your camera, clip on a wrist or neck strap. CLIMB Works only allows secured cameras, and you don’t want your phone skittering toward the drop. If you decide to film a quick clip, use a two-point tether so your phone stays attached even if your grip slips in a gust. Shoot from the paved platform with a 16–35mm wide angle, so you skip the loose rock. Add a polarizer at midday to cut glare and thicken the ocean blues. Stay on marked paths, keep back from the edge, and use burst mode while you brace.
- Check wind and rain in Waikiki
- Zip loose gear in a bag
- Lock caps and filters to a lanyard
- Pack water and bug spray
- Listen for gusts before each frame and hear the surf
Detour to Waimānalo for Wide Beaches
Just past Honolulu’s bustle, you can swing through Waimānalo and trade traffic noise for wide white sand and windward blue. The detour adds about 10 to 20 minutes, but you get a long Shore that feels beautiful open. At Waimānalo Beach Park, the surf hushes and the view stretches forever, with fewer crowds than Waikiki. Park, hit the restrooms, and give yourself 20 to 30 minutes to walk the firm sand and frame panoramas. If the light’s right, you’ll catch sunrise or sunset color bands sliding across the sand.
Before continuing toward the ziplines, make sure you’re wearing shoes with good traction to handle slippery mud and keep your footing comfortable.
On Kalanianaʻole Highway, use makai pullouts for quick shots. The water often looks deeper blue here, and you can spot offshore reefs and windward cliffs. It’s a calm reset before farms take over up north.
Catch Quiet Views at Bellows Beach Park
Slip off the main H-3 or H-1 route and you’ll reach Bellows Beach Park in about 10 to 15 minutes, right when the morning still feels hushed. You step into soft sand and hear ironwood needles whisper. From the lot or the grassy bluff, you can shoot low sunrise angles and long panoramas over deep blue water. Consider it one of the best beaches to pair with a North Shore zipline tour when you want a quiet reset before the next stretch of road.
- A wide horizon that makes your tripod feel useful
- Tide pools that add sparkle near your frame
- Ironwood shade for quick lens swaps
- A small parking area and nearby restrooms, no extras
- Windy gusts and surprise surf, so clip straps and stay back
If you packed water, you can linger longer. You’ll leave with calm light and a quiet grin before the road gets busy.
views,beautiful island
Photograph Chinaman’s Hat at Kualoa Park
You’ll get a clean view of Chinaman’s Hat from Kualoa Regional Park, and the best angles show the little islet framed by the Koolau ridgeline and the mountain-backed coast. For the warmest shots, pull into the small turnout on Kamehameha Highway near the Kualoa Ranch entrance about 60 to 90 minutes before sunset and let that golden light skim the bay. Park, step out, and start testing your framing, because a quick breeze can nudge your camera and remind you it’s still Hawaii. Along the nearby North Shore zipline trails, you’ll also pass pockets of native plants that thrive in this coastal landscape.
Best Viewing Angles
Where should you point your lens to make Chinaman’s Hat look its best at Kualoa? Try a few angles before you head on to your zipline, because the views shift fast with every pullout. Keep your shutter ready and steady. Watch the treetops and shoreline too, North Shore drives and zipline areas are good for spotting native birds between photo stops.
- Kualoa Park pullout on Kamehameha Highway near mile 22 for a clean framed island with Koolau cliffs behind.
- Turnout just north of Kualoa Ranch for bay reflections in the foreground, especially at higher tide.
- Kualoa Beach Park lot then a short walk to the grass for pandanus and ironwood silhouettes that add scale.
- Lookout by the ranch entrance road to stack ridgelines, farm plots, and Mokoliʻi in one wide sweep.
- Small Waimanalo viewpoints for a telephoto squeeze of island, blue water, and distant headlands.
Golden Hour Timing
After you’ve tested a few angles, let the clock help you land the best light. At Kualoa Park, your golden hour timing sweet spot is about 45 to 15 minutes before sunset. The sun rides low, painting Mokoliʻi’s ridges in copper while the ocean turns a deeper blue. Show up 30 to 60 minutes early so you can breathe, listen to the shore break, and watch shadows slide across the islet. If this is your first stop before flying, a quick Confidence Plan mindset can help you stay calm and focused while you shoot.
| When | What to do |
|---|---|
| 60–45 min | Scout foreground cliffs and shoreline lines. |
| 45–15 min | Shoot RAW, bracket ±1–2 stops, f/8–f/11. |
| Last 15 min | Switch lenses: 70–200mm to isolate, 16–35mm to go wide. |
Keep your tripod steady on uneven ground and look forward to the color shift each minute. It’s a fast, friendly lesson.
Parking And Access
Along Kamehameha Highway, Kualoa Regional Park makes the “quick photo stop” feel almost too easy. You’ll pull into a big paved lot and you’re basically at the shoreline, but weekends can pack it fast. Show up before 9:30 a.m. for a close space and softer light on Mokoliʻi, before the North breeze pushes in haze. You can hear waves slap the rocks while morning joggers pass and nod quietly. If you’re weighing whether the day’s zipline is worth it, it helps to consider the pros and cons before you commit to the drive.
- Paved lot entrance right off the highway
- Flat, stroller-friendly path to the sand
- Chinaman’s Hat rising like a green cap offshore
- Restrooms and picnic tables for a quick gear check
- Roadside backup parking if signs allow, don’t block gates
Treat it like a mini tour stop: park, tighten straps, walk the short path, and shoot.
Pull Over for Kahana Bay Jungle Views
Kahana Bay feels like a green postcard you can step into. Between mile markers 16 and 18 on Pali Highway or Kamehameha Hwy, you’ll spot gravel pullouts with views. From roadside you can frame a long crescent beach, ironwood trees, and steep valleys draped in jungle. On a clear day the water pops deep blue, brighter than Honolulu, and you can hear surf and wind in the palms. These lookouts also hint at the North Shore forests and farms landscapes you’ll glimpse once you start ziplining.
Come early or late afternoon so the light rakes across the canopy and traffic thins on the 60 to 90 minute run from Waikiki. Use GPS because signs are scarce, and entrances stay narrow and uneven. Wear closed toe shoes for short muddy paths. Clip your camera strap and tether your shades for the drive back.
Make a Quick Laʻie Scenic Stop
Just before you settle into the long North Shore cruise, Laʻie gives you an easy 10 to 20 minute scenic breather that won’t derail your 60 to 90 minute drive from Waikiki. You’ll spot blue-green water that looks brighter than it does in town, plus ridgelines that frame the coast. Treat it like tour time,day on Oahu and keep it simple.
Laʻie is a quick 10–20 minute coastal breather on the Waikiki-to-North Shore drive, with brighter water and ridge-framed views.
- Slip into a designated turnout and park fully off the road
- Expect unpaved, bumpy ground under your shoes and tires
- Clip a strap on your camera, wind can sneak up fast
- Grab apple bananas or macadamia nuts for a quick snack
- Go in the morning for softer light and lighter traffic
Then you’re back on the highway and rolling toward Keana Farms ziplines.
Snap Sunset Beach Before North Shore Ziplines
You’ll want to pull off at the Sunset Beach lookout on Kamehameha Highway about 30 to 45 minutes before sunset, when the long crescent of sand and booming surf look like they were staged for your camera. Park in the small gravel lot, follow the short sandy path, and claim an elevated view while the light warms up and the traffic hasn’t. Frame the shoreline in golden hour and keep your timing tight, because parking goes fast and those waves don’t wait for anyone.
Golden Hour Beach Framing
Often the best photos on the way to North Shore Ziplines happen when you plan your timing, not your luck. Show up at Sunset Beach 30 to 45 minutes before sunset and let the warm light wrap the crescent sand and the reef break. Walk the short bluff trail near Kamehameha Highway and aim for a clean panorama that hints at Banzai Pipeline in the distance. Your tour guide can wait a beat, but your frame won’t.
- Ironwood needles whisper above you
- Lava rock adds gritty foreground texture
- 70 to 200mm compresses surfers on the reef
- 16 to 35mm pulls in shoreline curve
- Strap on, shoot f/8 to f/11, ISO low, 1/125 to 1/250s, rights reserved
Check your highlights as the color shifts fast.
Quick Parking And Timing
Swing into Sunset Beach Park for a quick reset and a fast burst of photos before the ziplines call your name. Parking is limited and unmetered roadside, so grab a spot, feel sand underfoot, and shoot the surf for 10 to 15 minutes. Aim to arrive 45 to 60 minutes before your zipline check-in, because the drive from Waikiki can stretch 60 to 90 minutes.
For quick exits, use the pullouts on Kamehameha Highway for reef and wave shots, but don’t block cars. Give each stop five minutes, then roll on. Coming from Haleiwa, add 10 to 20 minutes for the detour and unpaved parking. For silhouettes, arrive 20 minutes before sunset and depart on timed pacing. Call ahead if winds may delay operations.
Find Keana Farms and CLIMB Works Parking
On the drive up Oahu’s windward coast, Keana Farms and the CLIMB Works zipline check-in feel close and far at the same time, about 60 to 90 minutes from Waikiki. Use GPS because the entrance signage is easy to miss, and you don’t want to loop back on Kamehameha Highway.
Keana Farms feels near and distant, 60–90 minutes from Waikiki. Use GPS; the entrance is easy to miss on Kamehameha Highway.
- A narrow driveway tucked by pasture fences
- Slightly bumpy gravel parking with red dust on shoes
- Trade winds that can pause tours, so call before you go
- Restrooms and mini-lockers for water bottles and keys
- Waivers done, quick weigh-in, then harness fitting and phone lanyards
Arrive early, park, and walk in with steady steps. Pack a light jacket if rain rolls in. You’ll hear roosters and see the Koʻolau ridgeline rise behind the farm.
Frequently Asked Questions
What Camera Lens Is Best for Sweeping Coastal Lookouts on This Drive?
You’ll get the best sweeping coastal lookouts with a wide angle zoom (16–35mm or 10–22mm). Pack a short telephoto for telephoto compression of headlands and surf, and add a polarizer to cut glare in sun.
Are Drones Allowed at Any Scenic Pullouts or Beach Parks En Route?
Sometimes yes, often no, you’ll see postcard views beside strict rules. At many scenic pullouts and beach parks, drone regulations restrict launches; you’ll need prior authorization or meet permit requirements, plus FAA limits and landowner permission.
Where Can I Find Restrooms and Water Refill Stations Between Stops?
You’ll find restroom locations and water refills in Waikiki, at Dole Plantation’s bathrooms and refill station, and in Haleiwa near shrimp stands. Use Keana Farms/CLIMB Works bathrooms and lockers before check-in; rural pullouts won’t help.
Which Photo Stops Are Accessible for Wheelchairs or Limited Mobility?
Like a road to a view, you’ll get wheelchair access at Haleiwa Lookout’s paved, level parking. You can use mobility aids there; stick to car-level views at gravel pullouts, and call Keana basecamp ahead first.
What Are the Safest Pullouts for Sunrise Photos With Minimal Traffic?
You’ll find safest low-traffic sunrise pullouts at Kaneohe Bay overlook, Windward Lookout, Keana Farms designated parking, Waimanalo Bay signed turnout, and Haleiwa Alii Beach Park entrance pullout. Use Early Morning Strategies and Traffic Avoidance Tips: arrive 30–45 minutes early.
Conclusion
You’ve timed it right. A gust hits Halona as the blowhole fires and your zipper bag snaps shut at the same moment. Up the road Kahana Bay turns jade under passing clouds and you catch a quiet rooster chorus from a nearby yard. In Laʻie a church bell rings just as you spot a clean line of surf. Then Sunset Beach glows and you roll into Keana Farms with sandy shoes and a full card. Now clip in.