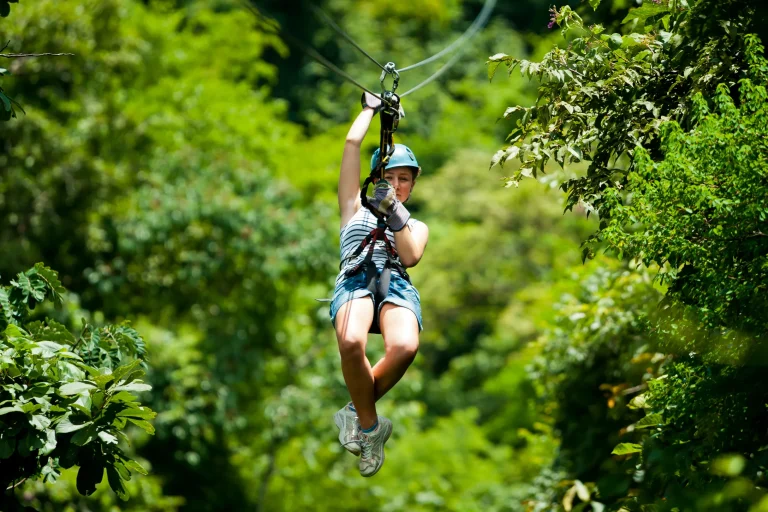
You’re about to clip into a harness and step onto slick wooden platforms where rain beads up and mud grabs at your soles. You’ll want snug trail shoes with real tread, plus shorts or leggings that stay put when the straps tighten. A fitted top helps too, since wind can whip through the treetops and cool you fast. The tricky part is balancing comfort, grip, and what you can carry without losing it mid-zip.
Key Takeaways
- Wear closed-toe trail runners or hikers with deep tread; double-knot laces for secure traction on wet platforms and muddy trails.
- Choose mid-length shorts, capris, leggings, or fitted pants; avoid tiny inseams and stiff denim that pinch or bunch under harness straps.
- Wear a fitted, breathable top and keep it tucked; skip loose tanks, crop tops, scarves, and dangling accessories that can snag.
- Layer for breezy treetops and misty mornings with a thin fleece or windbreaker; avoid bulky coats that restrict movement under the harness.
- Pack light and secure items in zip pockets or a flat small backpack; tether your phone and do a pocket check before each line.
North Shore Ziplining Outfit Checklist
Start with your feet, because North Shore ziplining is part hike, part climb, and part smooth landing on a wooden platform. Pick close-toed shoes that stay securely on your feet, and lace them tight before you hear the first pulley hum.
Next, think harness comfort. Choose shorts or pants at knee length or longer so the leg loops don’t pinch when you lift off. Wear a fitted, breathable top and keep it tucked so straps sit flat instead of twisting. Dress in layers, since misty mornings and breezy treetops can feel cooler than the beach. Don’t forget essentials to pack, including water, sunscreen, and a way to secure small items. Pack sunscreen, plus a hat or shades that won’t fly away. Bring a small backpack that fits under the harness for water and a phone you can clip in.
Ziplining Shoes With Grip (No Sandals)
You’ll want closed-toe shoes with real grip since wet wooden platforms and metal stairs can get slick and noisy underfoot. Pick lace-up hikers or trail runners with treaded soles so you stay steady on muddy approaches, and make sure they’re snug because nothing ruins a zip like a shoe trying to bail midair. Skip slip-ons, sandals, and Crocs since guides won’t allow them and you’ll be happier with traction than toes in the breeze. For extra comfort on longer tours, choose pairs with cushioned midsoles and reliable traction designed for mud and wet surfaces.
Closed-Toe Shoes Required
Footwear is your ticket to the North Shore ziplines, and closed-toe shoes aren’t optional. On this course, shoes are required for every rider. Guides check at the gate, and if your toes can peek out, you might watch the canopy tour from the bench. Pick closed-toed shoes that feel like supportive footwear, not beach gear. Hiking shoes or athletic sneakers work well for short forest walks and uneven steps. Look for durable soles with good tread so you don’t skate on damp platforms or gritty landings after a rain. Since tours often run in wet conditions under the company’s rain policy, traction matters even more than you think. Leave sandals, flip-flops, and Crocs in the car, even if they’re your island uniform. On course you’ll hear pulleys hum and boards thump underfoot. With the right grip, you focus on views, not your footing.
Secure Laces, No Slip-Ons
On a zipline platform, where rain beads on the boards and the pulley starts to sing, secure laces matter as much as nerve. You’ll step from muddy trails to narrow landings, so you want your shoes to stay put. Wear closed-toed shoes,secure laces,good tread,locking cinch,no slip-ons. That means no sandals, Crocs, or flip-flops, even if the ocean’s calling.
Double-knot your laces before you clip in, or choose a shoe with a locking cinch that won’t loosen when you swing your legs. Rangers do quick checks and can turn you away if your footwear looks risky. Good footing also helps you stay balanced while guides manage backup brake systems at the landing. Skip bulky boots that stiffen your ankles. Lightweight trail shoes or cross-trainers feel nimble and steady. Add moisture-wicking socks on wet days. You’ll hear gravel crunch and boards squeak.
Treaded Soles For Traction
Most days, the difference between a smooth landing and a slippery shuffle comes down to your soles. Wear closed-toed shoes with treaded soles so you can step from damp wood to metal grates without skating. Trail or hiking shoes win here. They bite into dirt, roots, and stair treads, and they stay put when the platform creaks under you. Zipline tours typically provide key safety items like helmets and gloves, but your shoes are on you, so pick a pair built for grip and secure landings.
| Surface | What you feel | What works |
|---|---|---|
| Wet platform | slick boards | deep lugs |
| Dirt trail | soft grit | multi-directional tread |
| Metal stairs | hard edges | grip depth 3–5 mm |
Skip sandals, Crocs, and smooth soles. Parks want secure footwear for climbs and landings. Lace or cinch tight so your tread keeps full contact and you finish every run smiling. Choose a light pair with heel-to-toe stability for fatigue.
Ziplining Bottoms: Leggings vs. Longer Shorts
Because the harness leg loops do the heavy lifting, your bottoms matter more than you’d think once you’re clipped in and stepping off the platform. On the North Shore, you’ll feel mist in the trees and hear cables hum quietly above the ravine below, so pick bottoms that move with you. Leggings or moisture-wicking pants in close-fitting fabric slide under straps and stretch for ladder climbs. If you’d rather wear shorts, choose longer shorts that reach near the knee and fit snug so they don’t bunch when the harness that goes around your hips gets tightened. If anything pinches, chafes, or goes numb once you’re cinched in, speak up for a harness fit check before you launch.
- Prefer long pants, capris, or leggings over tiny inseams
- Skip heavy denim and stiff pockets that fight the straps
- In cool wind, add thin thermal layers under pants
Harness Comfort: Inseam, Seams, Chafing Fixes
Once you’re clipped in, your harness doesn’t care about fashion. It cares about inseam length, smooth seams, and whether anything bunches where the leg loops press and squeak as you shift your weight. Pick knee-length or capri coverage, go for snug moisture-wicking fabric, and keep a liner short or anti-chafe balm handy so you can fix hot spots fast with staff before they turn into a full-on rub fest. For a smoother first trip, follow these first-timer tips so you can stay comfortable and focus on the ride.
Ideal Inseam For Harness
Often, the easiest way to make a harness feel like part of the adventure, not a distraction, is to start with the right inseam. On North Shore lines, you’ll sit back into the harness and the leg loops land high on your thighs. Give them fabric to grab. Pick shorts or pants with a 6 to 8 inch inseam, think knee length or capri, so you’re not flashing skin when you glide past palms and hear pulleys hum. This comfort-first approach is especially helpful for active older adults who want an easy pace from platform to platform. Wear close-toed shoes so your feet stay happy on ladders and platforms.
- Choose close fitting shorts, leggings, or hiking pants in moisture wicking fabric.
- Skip anything under a 4 inch inseam.
- Keep pockets and bulky stitching away from where the harness wraps before you step off.
Seams, Chafing, And Fixes
Even if you’ve nailed the right inseam, a zipline harness can still turn tiny seams into big distractions when the leg loops press under your thighs and the pulley starts its steady whir. Skip bulky pockets and rough inner hems. Pick smooth hiking pants or close-fitting leggings with flat seams and moisture wicking fabric so sweat doesn’t turn into chafing. Before you clip in, test a squat and listen for creaks. Adjust until it feels quiet. Guides trained in beginner comfort can also help you tweak leg loops and waist belts so nothing pinches before you launch.
| Problem | What you feel | Quick fix |
|---|---|---|
| Seams | hot rub under loops | anti‑chafe balm |
| Bare skin | pinchy bite | 4-inch shorts or capris |
| Bunching | waist belt pinch | tuck shirt, add bandana |
If a spot flares mid-course, slide a thin liner or snug bike shorts under loose shorts and keep flying.
Ziplining Tops That Won’t Ride Up
While you’re stepping into a chest-and-back harness and hearing the first trolley clink on the cable, your top needs to stay put. Wear a fitted t-shirt or tuck it in so straps don’t grab fabric and creep it upward. Choose breathable, moisture-wicking material with a little stretch, like a polyester spandex blend, so you can reach for the line without tugging at your hem. Before you clip in, ask the guide to explain the safety briefing rules in plain English so you know exactly what to do if your clothing snags or shifts.
- Pick snug sleeves and a longer length that stays under the harness.
- Skip crop tops, loose tanks, and billowy button-ups that bunch and scratch.
- Tie back long hair and ditch scarves or dangly extras that can snag.
If the North Shore air feels cool at check-in, keep layering simple with a light zip that fits close against your skin, easy.
Ziplining Layers: Thin Jacket, No Bulk
Once you’ve got a top that stays put under the harness, think about what goes over it when the North Shore morning air feels crisp at check-in. Reach for a thin jacket or light fleece that slides under straps without bunching. You’ll hear wind in the trees and feel shade on the first platforms, then warm up on the hike.
During longer waits on sunny platforms, sun and heat can sneak up on you, so consider layers you can vent fast without fighting the harness.
Skip no bulky coats or puffy down. They pinch under the harness and limit your reach on the brake line. Pick breathable moisture-wicking fabric like a softshell or thin windbreaker. Choose zippered pockets, elastic cuffs, and a snug hem so nothing flaps mid-zip. In spring showers, bring a packable rain shell you can pull on fast and stash again before the next run starts.
Phones, GoPros, Bags: What’s Allowed
Before you clip in and hear the first pulley chatter above the trees, sort out what you’re bringing along. Small backpacks are fine if they sit flat and don’t pinch your harness. Your guide can help cinch straps so nothing swings while you glide over ferny gullies. If you want video, use a tether and consider secure phone filming practices so your device can’t slip free on the line.
> Before you clip in, pack smart, keep it small, flat, and snug so nothing swings over ferny gullies.
- Clip phones to a secure strap or a zipped pocket, and don’t try to film one-handed mid-ride.
- Use a chest-mount GoPro so your hands stay free for the brake and the view.
- Skip loose bags, scarves, and dangly accessories; stash extras and leave locked in your vehicle.
Keep it light: keys, a small camera, water, plus sunscreen and bug spray. Do a quick check before each line. You’ll thank yourself when the landing platform comes up fast.
Frequently Asked Questions
Are There Weight or Height Limits for North Shore Zipline Tours?
Yes, you’re subject to weight limits and height limits on most North Shore zipline tours. Operators set passenger restrictions as rider requirements for safety harnesses. Expect 250–300 lbs max and 48–54 inches minimum; confirm before booking.
Can Kids Zipline, and What’s the Minimum Age Requirement?
Kids can zipline on North Shore tours; you’ll need them 7–10 years old. Operators fit child harnesses, often require guardian supervision for younger riders, allow age exceptions, run safety briefings, and offer kid friendly routes.
What Happens if It Rains, Will the Tour Be Canceled or Rescheduled?
If it’s light rain, you’ll likely still zipline, following the operator’s rain policy, bring waterproof gear. For storms or high winds, expect tour delays or cancellation after safety checks, then choose rescheduling or refund options today.
Do I Need to Book in Advance, and How Early Should I Arrive?
You’ll want advance booking, it’s your ticket before the canopy fills up. Reserve 24–48 hours ahead, a week in peak season. Arrive within a 30–45 minute arrival window to check in; avoid late cancellations for sure.
Are There Lockers or Changing Rooms Available at the Zipline Site?
You won’t find locker availability; leave valuables locked in your car. Changing facilities are limited to stalls, so use your vehicle. Privacy options are minimal. For gear storage, carry a pack; towel service isn’t provided.
Conclusion
You’re ready for North Shore ziplining once your shoes grip, your shorts or leggings stay put, and your top stays tucked under the harness. Bring a thin shell for the cool rush above the canopy and stash it in the locker. Here’s a wild number: a 30 mph glide can make the air feel about 10°F colder. You’ll hear cables sing and leaves clap below. Then you’ll land smiling, not pinched.