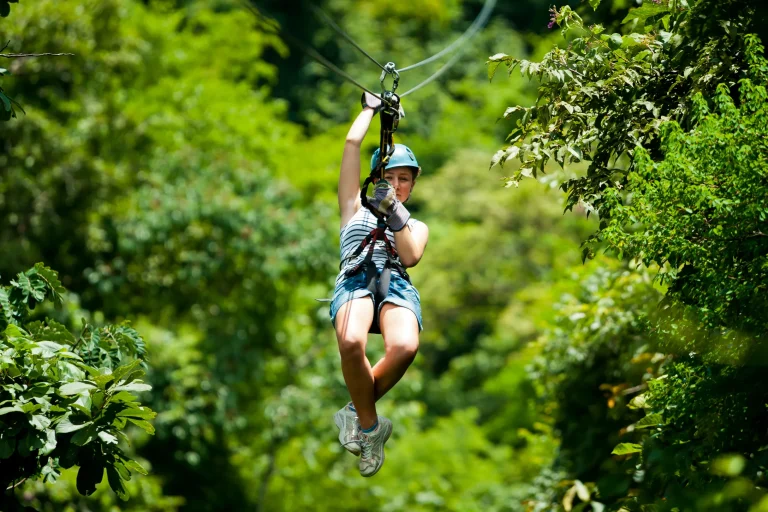
Oʻahu’s North Shore ziplines can stretch close to 2,400 feet, and you’ll feel every second of that glide as the wind snaps your shirt and the valley drops away. You can chase height on platforms near 150 feet at Keana Farms, or trade speed for movie-set ridgelines at Kualoa Ranch where suspension bridges sway under your shoes. You can even stack courses at Coral Crater for a choose-your-own thrill day. The question is which kind of fear you want first.
Key Takeaways
- CLIMB Works Keana Farms packs eight fast dual lines, three sky bridges, multiple rappels, and an ATV ridge ride into 2.5–3 hours.
- Keana Farms features Oʻahu’s longest spans (up to ~2,400 ft) and platforms near 150 ft for sustained high-speed glides.
- Kualoa Ranch Jurassic Zipline delivers seven lines and two bridges with huge Kaʻaʻawa Valley views for a “movie set” adrenaline boost.
- Coral Crater offers six zips plus adventure tower or ATV combos, making it easy to dial intensity and add photos.
- Book early-morning slots for steadier winds and sharper views, and confirm weight/height limits (often ~250–280 lb) before arrival.
Best Oahu Zipline Tours (Quick Picks)
Clip in and look down. You’re standing on a platform that creaks a little in the trade winds, and the green North Shore spreads out like a quilt.
For the biggest rush, ride the North Shore Zipline at CLIMB Works Keana Farms. You’ll spend 2.5 to 3 hours on eight dual lines, three sky bridges, and a couple of rappels, plus an ATV ride up the ridge. Some runs stretch nearly half a mile and top speeds stay steady as you hum over the treetops. Want movie-scale views instead? Kualoa Ranch’s Jurassic Zipline flies through Kaʻaʻawa Valley on seven lines and two bridges. For a flexible thrill day, Coral Crater mixes six zips with an adventure tower or ATV combos and you’re still smiling. A great zipline tour balances length, speed, views, and guides so the adrenaline never outruns the experience.
How To Choose a Zipline Tour Fast
To match your thrill level fast, scan for the longest spans and highest platforms, like 500 to 2,400 feet and up to about 150 feet high, so you can feel that clean drop and hear the wheels hum. Then check the limits and logistics: confirm the weight and size caps at booking and pick an early morning slot for steadier winds and sharper ridge and ocean views. Finally, keep it simple and smart by comparing braking style and safety habits, and plan for 2 to 3 hours once you add the briefing, short hikes, and a few nervous laughs. For maximum airtime, prioritize tours that stack multiple rides and feature longest lines so you get epic views with fewer stops.
Match Thrill Level Fast
If you want to match your thrill level fast, start by shopping the numbers, not the marketing. Hunt the longest zipline spans, high platforms, and speed claims. Climbworks Keana Farms delivers lines up to about 2,400 ft and platforms near 150 ft, so the trolley hums and your gut lifts. You’ll feel wind slap your cheeks. Use the easy/moderate/advanced framework from difficulty levels to sanity-check whether those big numbers match your comfort zone.
| What you want | What to look for |
|---|---|
| Long glide | 500 to 2,400 ft |
| Big drop | 100 to 150 ft |
| Bonus jolt | rappels and sky bridges |
Pick canyon or dual track routes for open views and clean clearance. Add rappels and bridges for that boot soles on grate moment.
Check Limits And Logistics
While the rainforest views might sell you first, the fine print decides whether you actually fly. Check weight caps and harness ranges before you book. Many North Shore courses sit around 250 to 280 lb. Kualoa lists 70 to 280 lb, waist 22 to 50 inches, and thigh 18 to 28. Some Hawaii operators also require participants to fall within posted weight rules at check-in for safety and braking control. Confirm height and age minimums too, often 4’8″ to 6’9″ and ages 5 to 7.
Then map the day. Ride time may say 2 to 2.5 hours, but you’ll spend 3 plus with check‑in time, briefing, short hikes, and photo stops. Ask about phone rules and lockers. Some operators ban devices on the lines and sell photo packages, so budget for those. Scan weather, waivers, and cancellation terms, because wind and lightning win.
What Feels Most Thrilling on a Zipline?
You feel the biggest rush when you’re flying fast off a high platform with nothing but open air and a green ravine below, and the wind snaps loud in your helmet. Speed and exposure hit hardest on long, clean spans, but the fun spikes when you add tricks like a steep launch, a controlled rappel, or a shaky suspension bridge between lines. If you get to race a friend side by side or use hand braking, you’ll notice how control and a little friendly chaos make the whole ride feel wilder. For an extra jolt, choosing double ziplines can add a competitive edge by letting you race side by side instead of riding a single line.
Speed, Height, And Exposure
Because a zipline thrill comes from more than just speed, the best rides mix long spans, real height, and wide-open exposure. When you launch from a high platform, your stomach floats for a second, then the cable hums and you settle into a long glide. At Climbworks Keana Farms, lines can stretch up to 2,400 feet from platforms around 150 feet high, so you feel sustained speed instead of a quick zip. On the North Shore, platform height usually refers to how far the launch or landing decks sit above the ground at that point, not the total vertical drop over the whole ride. Canyon-style drops make half-mile runs fly, while short 200 to 400 foot lines end before you even exhale. You’ll also feel the rush when the line clears a ravine and the valley opens below. Even at moderate speed, that view adds bite. Pick a run with minimal braking and stay screaming longer.
Tricks, Rappels, And Bridges
If speed and height set the baseline, the real heart-racers come from what happens between the launches. You step onto a sky bridge and the planks flex under your shoes. Wind taps the cables and the canyon drops away 150 feet below. After three bridges you clip into the Zipline again and hear the trolley hiss as you roll out.
Then come the rapels. On many thrill courses you do two controlled descents. You lean back, feel the rope bite through your glove, and watch your boots skim the rock face. Side by side lines let you race a friend on spans near half a mile. Hand braking or a guide catch decides how sharp the finish feels. Long glides stay fast till stop. If you ever stall mid-span, guides follow established rescue procedures to get you moving or bring you safely back.
Difficulty vs. Fitness: What “Hard” Means Here
What does “hard” really mean on a North Shore zipline tour? It usually isn’t brute strength. It’s longer spans, higher platforms, and faster runs that make your stomach float. Think lines stretching about 2,400 feet and decks roughly 150 feet up, with wind rushing past your helmet.
- Short hikes on gravel, roots, and steep bits between launches
- Lots of standing during safety talk and practice
- Repeated small climbs that test cardio more than muscles
- Big open views that can rattle you if heights get loud in your head
- A steady, trail-ready fitness level so you stay relaxed and focused
You’ll also be introduced to backup safety systems like brakes and harness checks before you ever step off the first platform.
If you can walk uneven paths for 2 to 3 hours, you’ll handle the Hard stuff and still laugh at the last landing, every time.
Tour Limits: Height, Weight, and Harness Fit
Before you even hear the first trolley click and feel the trade wind tug at your helmet, the tour checks that you’ll fit the gear the way it’s meant to fit. You’ll see posted height requirements, usually about 4’8” to 6’9”, and you should confirm the exact range before you book. Height rules exist to protect harness alignment and ensure the braking system works as designed.
| Check | Typical range | Why it matters |
|---|---|---|
| Height | 1.4–2.05 m | Keeps you aligned on the line |
| Weight | 27–127 kg | Sets braking and rigging setup |
At check-in you’ll step on a scale to confirm weight limits and the setup. Staff measures your waist and upper thigh, 22–50 inches and 18–28 inches, then cinches the harness snug. Age rules may apply too. Pregnancy, spine, heart, or joint issues mean consult a doctor first.
What To Wear: Shoes, Clothes, and Sunscreen
On the North Shore, the dress code feels simple once you picture the scene. Red dirt, ironwood shade, and bright ocean glare mean you’ll want gear that moves with you and stays put.
- closed-toe shoes with grip, like sneakers or hikers
- fitted activewear or quick-dry layers, not baggy
- a light sun shirt and reef-safe sunscreen before you arrive
- hair tied back and jewelry off or snugged down
- sunglasses or prescription glasses with a secure strap, then stash extras in basecamp lockers
Skip flip-flops, even if they’re your island uniform. Choose fabrics that don’t flap in the wind and won’t catch. You’ll feel cooler, look sharper in photos, and spend less time hunting for dropped stuff along the dusty trail. For footwear, prioritize traction and grip that can handle mud and uneven ground while staying comfortable.
Safety on Oahu Ziplines: Gear and Briefings
Once you step into basecamp and smell that warm red dirt, the safety routine kicks in and it’s part of the fun. Birds chatter overhead. You sign the waiver, then step on the scale so the crew can fit your safety harness and confirm you’re within limits, 70 to 280 pounds. Next comes the mandatory safety briefing, a ground school with clear rules. Guides show you how to clip in, where your hands go for braking, and what stop signals mean. They review emergency steps before you touch a platform. You’ll also get a quick rundown of the tour flow from check-in through the final ride, including check-in to landing logistics. You’ll wear a helmet, gloves, and a full-body or sit harness with locked backup clips. Staff do strap tugs and double checks. If you’ve got medical issues or you’re pregnant, ask a doctor first.
Phones, GoPros, and Lockers: What’s Allowed
Before you clip in, check the fine print on phones and GoPros because many North Shore ziplines won’t let personal devices ride the lines with you. You’ll usually stash your stuff in a basecamp locker, so bring a lock if they ask and plan to leave valuables behind while you chase the wind and that faint jungle hum. If your tour allows it, choosing the best GoPro mount, helmet, chest, or handheld, can help you capture steadier footage while keeping your hands free. If you still want memories, ask about staff-shot action photos you can pick up after, and if anything like glasses is allowed, you’ll strap it down tight before launch.
Personal Devices On Course
Even if you’re tempted to film every swoop through the ironwood trees, most North Shore zipline operators don’t allow phones, cameras, or GoPros on the lines, so you’ll stash them at basecamp and focus on the rush. Most tours treat personal devices like loose change. You’ll use lockers at basecamp for phones, keys, and anything that can fly. Some operators allow a tethered GoPro, but many enforce a strict no-camera rule, so confirm at booking or check-in. If a tour does allow filming, use a secure phone tether to keep your device attached and prevent drops mid-ride. Glasses need straps, and guides will fine-tune your helmet before you launch and hear the cable hum. Without a screen, you’ll feel salt air, see leaf shadows, and hear pulleys clack. Your hands stay free for high-fives.
- Check rules
- Use lockers
- Empty pockets
- Strap eyewear
- Follow guide
Photo Packages And Pickup
Gear rules can sneak up on you at check-in, so plan to leave your phone, camera, and GoPro behind while you ride. Most operators won’t let personal devices onto the lines, and you’ll hear the wind and the pulleys without a screen to grip.
Instead look for the new camera systems at the base camp. They snap action shots as you step off platforms, zip over treetops, and land with that harness thump. After the tour, you’ll swing by base camp again to view and buy photos. If they offer online or add-on photo packages, you still pay and pick up details there, so keep your card or some cash handy. Choosing a photo package can be the safest way to come home with high-quality memories when DIY footage isn’t allowed on the lines. If you wear glasses, ask your guide about helmet fit and secure straps.
Locker Use And Tips
At check-in, it’s smart to lock things down and travel light. Before you hear the pulley buzz in the trees, stash everything loose. lockers are available at basecamp,personal devices (phones,cameras,and GoPros) are not allowed on the line, so don’t try to sneak a selfie. For your own safety, only use a zipline phone strap if your tour explicitly allows phones on the line. Guides will remind you to empty pockets, secure keys, and zip up wallets before you suit up. Many basecamps now use a photo system that snaps action shots you can buy back at basecamp. If you wear glasses or shades, bring a snug strap and let your guide fine tune your helmet fit. Confirm locker fees when you book, arrive early, and relax.
- Lock it tight
- Strap your shades
- Empty your pockets
- Buy the action shots
- Ask about locker fees
When To Book: Sellouts, Mornings, and Weather
Because North Shore zipline tours sell out fast in peak season, you’ll want to lock in your spot 4 to 8 weeks ahead, and closer to 2 or 3 months if you’re traveling around major holidays. Book 4–8 weeks ahead for peak season and holidays (2–3 months if traveling during major holiday periods),Morning time slots are recommended.
Pick morning for cooler air and steadier breezes. Tours run in light rain, but they’ll cancel for lightning or high winds, so check the weather policy first. Confirm weight limits and camera rules when you book since staff may weigh you at check-in and may ban phones on the lines. Some operators offer a Reserve Now, Pay Later option, so you can lock in a peak-season time slot without paying in full upfront. Reconfirm by email within 24 hours, then arrive early for waivers, gear fitting, and the safety briefing.
CLIMBworks Keana Farms: Longest Dual Lines
Once you’ve got a morning slot on the calendar, CLIMBworks Keana Farms gives you a big-reward reason to set that alarm. You’ll clip in for Oʻahu’s longest dual runs, flying side by side on eight lines that stretch from 500 feet to nearly half a mile. Platforms rise to about 150 feet, so you feel the wind and hear the farm rustle below. A quick 10-minute ATV ridgetop ride drops you at Koʻolau launch points for panoramic ocean and mountain views. Plan 2.5 to 3 hours, with guides handling gear, checks, and clear coaching. Bring closed-toe shoes and expect a snug harness. It’s a standout among North Shore zipline tours for thrill seekers who want both speed and big scenery.
Book a morning slot for Oʻahu’s longest dual zips, eight side-by-side runs, ridgetop ATV views, and wind-high platforms.
- Eight dual zips for friendly racing
- 2,400-foot top run
- Three sky bridges
- Tandem options for lighter kids
- Strict weight and age rules
CLIMBworks: UTV Ride, Sky Bridges, Rappels
If you’re craving more than a smooth glide, CLIMBworks Keana Farms layers in a little off-road grit and a few heart-thump moments. You’ll bump up the ridge in a small-group UTV for 10 minutes over 2 miles to high launch points in the Koʻolau Mountains. Between runs, you cross three sky bridges and boardwalks, with salt air and sweeping ocean and mountain views. Two controlled rappels add a clean vertical drop after the dual glides. Guides fit your gear, walk you through the clips, and keep the pace moving. Set aside 2.5 to 3 hours at Keana Farms on this Zipline Tour. Some lines stretch nearly half a mile, and a few platforms hover around 150 feet, so your knees may file a complaint. If you’re weighing upgrades for groups, private North Shore zipline tours typically come with different inclusions and pricing than standard small-group runs.
Kualoa Ranch Jurassic Valley: Scenery-First Ziplining
You roll into Kualoa Ranch’s Kaʻaʻawa Valley and the jagged Koʻolau peaks fill your view, the same wide greenscreen backdrop that made Jurassic Park famous. You’ll move through a smooth flow of 7 ziplines from about 200 to roughly 1,300 feet, plus 2 suspension bridges and short nature trails, with quick hikes over uneven ground between platforms. You’ll need to match the height and harness-fit rules, plan for about 2 to 2.5 hours on course plus the drive to basecamp, and leave your phone behind since the tour’s photo system handles the action shots for purchase. This Ziplining Adventure on Oahu’s North Shore is a standout for visitors who want big scenery along with the thrill factor.
Kaʻaʻawa Valley Views
In Kaʻaʻawa Valley, Kualoa Ranch’s Jurassic Zipline Tour puts the scenery front and center as you glide past jagged green peaks and wide, movie-famous open space. You’re tucked beneath the Ko‘olau Mountains, where wind hiss and bird calls bounce off the cliffs. The basecamp sits about 23 miles from Waikīkī, so plan roughly a 37 minute drive each way and a two hour outing on site. Between platforms, you’ll walk short nature trails over gravel and a few inclines, so closed shoes help. Check in early because strict fit limits keep harnesses safe, and tours can sell out. For pairs planning a shared adventure, this makes a standout option among North Shore zipline tours for couples.
- Look for Ka’a’awa Valley backdrops.
- Watch light shift on ridges above.
- Feel cool valley breezes rise.
- Leave phones behind, just look.
- Buy staff photos at basecamp.
Course Features And Flow
Those Kaʻaʻawa Valley views keep coming once you clip in, because the Jurassic Zipline course is built for scenery more than speed. You’ll ride seven lines, from about 200 feet to roughly 1,300 feet, and each zip line drops you into a new angle of the jagged green peaks.
Between launches, the course features two suspension bridges that sway just enough to make you laugh at your own knees. Three short nature trails link the platforms. You’ll crunch over gravel and climb a few gentle inclines, then pause where the valley opens wide and the wind hushes the trees. The flow feels like a moving lookout tour with cables. Expect plenty of stops for photos and film-location spotting, not a nonstop race at all.
Requirements And Logistics
Before the first platform comes into view, a little planning keeps this scenery-first zipline day smooth and stress-free. Reserve ahead since slots sell out, and arrive early so you’ve got time for the safety briefing and waiver. At check-in, staff weigh you for harness fit and confirm limits: 4’8″–6’9″, 70–280 lbs, and the listed waist and thigh ranges. You’ll spend 2 to 2.5 hours on course, about 3 with training, crossing two bridges and hiking short gravel inclines between seven lines. You can buy photos later through the new basecamp photo system.
- Closed-toe shoes only
- Phones and GoPros stay off the zips
- Use basecamp lockers for valuables
- Pack sunscreen and bug spray
- Ask your doctor if pregnant or managing heart, spine, or joint issues
Kualoa Ranch: 7 Lines, 2 Bridges, No Devices
Start your day by strapping in at Kualoa Ranch and rolling into Ka‘a‘awa, also known as Jurassic Valley, where the Jurassic Zipline Tour strings together 7 lines from about 200 feet to a quarter-mile long and adds 2 wobbly suspension bridges for good measure. You’ll hear the pulleys buzz and the wind slap your cheeks as the cliffs rise around you.
Plan on 2 to 2.5 hours for check-in, a safety talk, and short hikes, plus about 45 minutes each way to Base Camp. Staff run strict fit checks, so you must fall within 4’8” to 6’9”, 70 to 280 pounds, and the waist and thigh ranges. Leave your phone behind. No GoPros either. A basecamp photo system catches the action later for purchase.
Coral Crater: Adventure-Park Style Ziplining
Trade Jurassic Valley’s cliffside drama for a more playful, adventure-park vibe at Coral Crater Adventure Park in the Kapolei area. You’ll clip in for a guided set of zips, up to six lines that run 300 to 900 feet. The air smells dusty like dirt and sunscreen. You hear pulleys whir and friends cheering from platforms. Plan about two hours with a safety talk. Closed-toe shoes are a must, and they’ll fit you with helmet and harness.
- Start around $100 for 3 lines
- About $190 for the full 6-line course
- Minimum age 6, typical weights 60 to 275 lbs
- Night zip options for cooler air and sparkle
- Add an ATV ride or tower climbs for a full day
Bring a camera, but ask first.
Bay View: Budget-Friendly First Zipline Tour
Slip out of Waikīkī and you can be clipped in at Bayview Zipline in Kaneohe in about 24 minutes. Bay View keeps it simple with one 400‑foot line that whooshes over the family recreation center. You pay per ride, not for a long canopy tour: $30 for one run or $40 for three, so you can test your nerve without draining your wallet.
It’s beginner-friendly, which means no long hikes, just a quick safety briefing, harness, and helmet. You’ll hear the trolley roll, feel the breeze, and land smiling like you meant to do that. Bring closed‑toe shoes. Kids must be at least 6, and weight usually runs about 60 to 240 pounds, so check rules before you book. Mini‑golf waits after. Then putt.
Frequently Asked Questions
Are There Discounts for KamaʻāIna, Military, Students, or Large Groups?
Yes, you’ll often find local discounts for kamaʻāina, military, and students, plus group packages for large parties. You should book online or call to confirm ID requirements, blackout dates, and minimum headcounts before you go today.
Do Tours Provide Transportation From WaikīKī or HaleʻIwa Hotels?
Yes, some tours do, but you’ll want to check before you book; the ride you expect might be the twist. You can snag Hotel shuttles from Waikīkī, or arrange Private pickups in Haleʻiwa, too if available.
Are Restrooms Available Throughout the Course or Only at Check-In?
You’ll usually find restrooms only at check-in, so plan ahead. Some operators add mid-course stops, but they’re limited. Confirm restroom locations when booking, since course facilities vary by site and season and your group’s needs.
Is Tipping Guides Expected, and What’s the Typical Gratuity Range?
You’re not required to tip, but guide tipping is appreciated if they keep you safe and entertained. Customary amounts run about $5–$10 per person, or 10–20% of your tour price, depending on overall service.
Can I Participate if I’M Pregnant or Have a Medical Condition?
You usually can’t zipline while pregnant, and you shouldn’t ride with heart, back, or balance issues unless your doctor clears you. Operators enforce pregnancy precautions, require medical waivers, and may refuse participation for safety first.
Conclusion
You come to the North Shore for “relaxing” beaches, then you clip into a harness and step off a platform 150 feet up. The cable hums, the valley drops away, and salt air hits your face like cool spray. You’ll pick your flavor fast. Long Keana Farms lines. Jurassic Valley peaks at Kualoa. Coral Crater extras and photos. You’ll sign the waiver, tighten the helmet, and somehow call it a vacation.