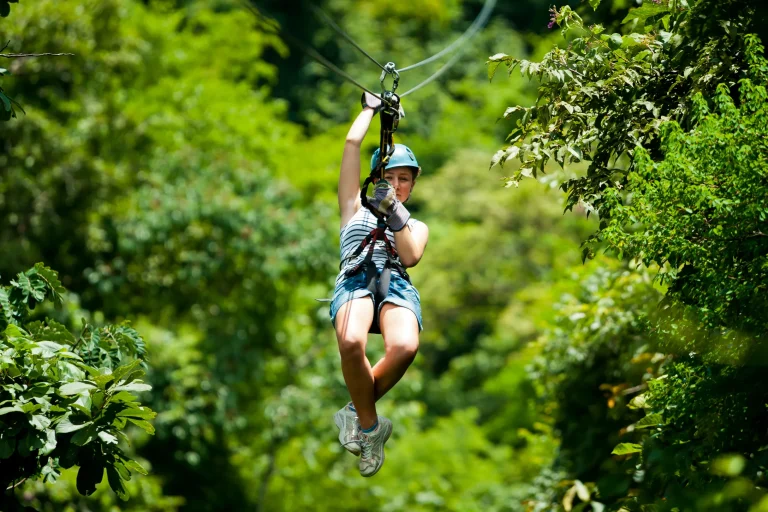
A 9:00 AM zipline check-in feels like setting your day’s timer to “go,” the kind that turns 30 minutes of waivers and helmet clicks into two hours of whoops and whirring cables. You’ll test on a training line, step onto a springy bridge, then watch green ridges slide by under your feet. After lockers and photos, you’ll chase shrimp plates and salty beach showers. But which beach fits your mood and the wind?
Key Takeaways
- Book a morning zipline slot (starts around 9:00 AM) for cooler temperatures, calmer winds, and better light before beach time.
- Arrive 30 minutes early for check-in, waiver, ID verification, weigh-in, and harness/helmet fitting.
- Plan 2–3 hours total for the zipline tour, including safety briefing, training line, short hikes, and suspension bridges.
- Wear closed-toe lace-up shoes and snug, light layers; empty pockets and store extras in basecamp lockers.
- Head to the North Shore beach after the tour; afternoon showers pass quickly, but sun and winds often increase later.
North Shore Zipline + Beach Day Timeline
Often, the easiest way to make the North Shore feel like a full-day adventure is to start with the zipline while the air is still cool and the roads are quiet. You’ll check in 30 minutes early and get a safety briefing. Plan a little extra buffer time for parking, waivers, and any last-minute check-in questions. The tour takes about two to three hours. You hike short stretches on gravel and inclines between platforms. Choose a morning slot and you’ll dodge traffic and afternoon showers.
After your North Shore zipline, use the lockers for valuables. Add bug spray and sunscreen since you can’t bring a phone on the lines. Head to Haleiwa for shrimp plates or a café lunch. Spend your Beach Day with sand, surf thump, and palms hissing. Leave time for the drive back to Honolulu.
Confirm Ages, Height/Weight, and Fit Limits
Before you lock in your North Shore zipline time, you’ll want to confirm the age rules and who has to ride with an adult so nobody gets turned away at the gate. Zipline operators also post clear zipline age limits for kids, teens, and adults, so review them before you book. Then check the numbers: most courses require you to fit within 4’8” to 6’9” and land within the operator’s weight range, plus meet harness-fit limits for waist and upper thigh. At check-in they’ll weigh you and do a quick harness check with buckles clicking and straps snug, so you can step onto the platform feeling ready.
Age And Supervision Rules
Even if you’re itching to step off that first platform and hear the cable sing, North Shore zipline tours come with clear age and fit rules that keep the ride smooth and safe. Most courses take kids at least 5 years old, and every minor must be with an adult from check-in to the last landing. Some outfits offer child rates around 10 to 12, so confirm before you pay. Stay close as your guide calls out steps and the pulley clicks overhead. Staff can decline participation per person after a quick safety check. Many operators also enforce minimum height rules because harness fit and braking safety depend on it, so ask staff how they confirm height requirements before you book. If you’re pregnant or managing recent neck, back, joint, or heart issues, call ahead and get medical advice. It beats sitting on the bench in a helmet all morning long.
Height, Weight, And Fit
Once you’ve got the age and supervision box checked, the next gate is pure physics. Your height must land between 4’8” and 6’9” so you can reach platforms and ride the line safely. Operators also watch weight limits, often somewhere around 40–70 lbs minimum and 250–280 lbs maximum, depending on the course. In Hawaii, zipline weight limits can vary by island and operator, so confirm the exact range when you book. You’ll want to know your numbers before you drive up the coast. In the trees, you’ll hear pulleys hum and birdsong.
Fit matters too. Plan for a waist from 22” to 50” and an upper thigh from 18” to 28” so the gear sits snug and doesn’t pinch when you step off. Everyone signs a waiver, and if you’re pregnant or dealing with heart or spine issues, talk to your doctor first.
Harness Checks At Check-In
Step up to the check-in desk and you’ll go through a quick gear reality check that feels a bit like boarding a tiny jungle flight. You’ll hop on a scale first, since weight limits vary by operator, often 70–280 lb or 40–270, and they’re STRICTLY ENFORCED. Staff will confirm your age with ID, then verify height, waist, and upper-thigh sizes so the harness sits snug, not pinchy. Expect a few medical questions too; pregnancy or neck, back, joint, or heart issues can pause your plan. Your guides fit your helmet, lock every strap, and even add retainers for sunglasses. Before you head out, ask how their backup safety lines and braking system work so you understand the redundancies built into the course.
- Bring ID and guardian details
- Wear closed-toe shoes and shorts
- Empty pockets before fitting
- Tell staff about injuries early
- Ask how Zipline Tour clip-in works
Choose the Right Zipline Course Difficulty
You’ll have more fun on the North Shore when you match the course to your comfort, so think about how you feel with heights and whether you want a mellow training zip or a faster run with bigger views. Compare line lengths and setups, from a quick 200‑foot practice line to longer zips that hum over the trees from remote platforms. If the course offers a choice between double ziplines and single lines, double setups can feel more stable and confidence‑boosting while single lines often deliver a simpler, classic ride. Then check the physical requirements, because some routes keep hiking light while others add stairs, uneven ground, and a little leg work that you’ll notice by the third platform.
Match Course To Comfort
If your stomach flips at the thought of dangling over the treetops, pick a course that matches your comfort and you’ll enjoy the ride a lot more. If it’s your first time, start on a beginner route with a short training line so you can hear the trolley hum and feel the harness settle before you go bigger. Many tours even offer a scaredy-cat option that lets you try the first two lines free, then decide. Most operators group tours into easy, moderate, advanced difficulty levels so you can choose a pace that fits your comfort and fitness.
- Check the tour label: “easy” or “adventure”
- Confirm fit: 4’8″–6’9″, waist 22″–50″
- Verify weight range: 70–280 lb
- Flag acrophobia, pregnancy, or joint and heart issues
- Ask guides how upgrades work after your warm-up
You’ll step off calmer, and the forest will feel close.
Compare Line Lengths
Seven lines can feel like seven different moods, and the North Shore course lets you read them by length, from quick 100 to 200 foot training zips to long, airy runs that stretch 680 to 920 feet. If you’re new, start on the 200 ft training line, then step up through 310 and 380 as your nerves quiet and the wind starts to hiss. For groups who want a more flexible pace, private zipline tours can change the overall experience and pricing compared to standard outings.
| Line range | Feel | Best for |
|---|---|---|
| 100–200 ft | quick practice | first-timers |
| 310–380 ft | steady glide | confidence |
| 680–920 ft | long, fast | thrill seekers |
On Zipline on the North, the 790 and 920 foot lines often run side by side, so you can race a friend and hear their laugh fade behind you. Save those last two lines for freestyle and bigger views.
Check Physical Requirements
Before you picture yourself floating over the trees, take a quick look at the fit and safety rules that decide which North Shore course will feel fun instead of sketchy. Operators check your harness like a puzzle piece, so you’ll confirm height,weight, waist, and upper thigh ranges, then step on a scale at check in.
- Height 4’8″–6’9″ and weight 70–280 lb, though some cap 250 or 270
- Waist 22″–50″ and upper thigh 18″–28″
- Expect a snug harness fit check and a swap to a first timer route if you’re near limits
- Ask your doctor if you’re pregnant or have neck, back, heart, or joint issues
- Remember the in between hikes and stairs, which can feel like crunchy jungle steps
During the harness check, aim for snug-not-painful and speak up about any pinching, numbness, or rubbing at key comfort cues.
You’ll hear cables sing overhead.
Pick a Morning or Afternoon Time Slot
Whether you’re chasing cooler air or a slower start, your time slot can shape the whole North Shore zipline day. Morning Zipline runs often kick off around 9:00 AM, then depart every 30 minutes until mid-day. You’ll feel the breeze on your cheeks and catch clearer views when winds stay calm. For cooler temps and better light, the North Shore zipline is often at its best earlier in the day. Afternoon slots usually roll through about 4:00 PM. They suit late starters, but the sun can bite and quick showers may pop in like surprise guests.
Whatever you choose, show up 30 minutes early for check-in, measurements, and the safety briefing. Your 2–3 hour tour time flies by with zips, bird calls, and the thrum of cables. Go morning for beach or Haleiwa bites after, or go afternoon to keep your morning free.
Book Tickets (Sellouts, Cancellation, Taxes)
Book your North Shore zipline tickets early because tours can sell out fast, especially the sweet morning slots when the air feels cool and the trees still drip from last night’s rain. You’ll often see options like reserve now and pay later plus free cancellation, but you should still read the fine print since some tours require 72 hours notice. Booking early also makes it easier to snag free cancellation and keep your plans flexible if weather shifts. Before you hit pay, watch for local tax added to the rate, and let the booking page show you the final total with fees so there are no surprise numbers in your inbox.
Sellouts And Reservations
Snag your spot early and you’ll hear the ziplines humming over the ironwood trees instead of revitalizing a sold-out page. Morning runs vanish fast because they leave your afternoon wide open for sand, shave ice, and a lazy drive through town. Some operators let you reserve now and pay later, but the clock ticks on availability. With Reserve Now, Pay Later options, you can lock in a time slot while delaying the charge until closer to your tour date.
- Make Advanced reservations for the first time slot you want.
- Watch the seat counter since each time has a max.
- Expect 4.712% tax added at checkout even if examples show $190.48.
- Look for your e-ticket email and save it offline.
- Read promo rules since some deals allow only two promo kids per paying adult.
Book when the breeze feels right. Your future self will thank you at sunrise.
Cancellation And Flexibility
If your plans shift with the trade winds, you’ll like how many North Shore zipline operators build in wiggle room. You can grab a preferred morning slot and still keep your afternoon loose. Many tours offer reserve-now-pay-later and clear refund rules. It also helps to ask about minimum age requirements and whether a guardian must ride along before you book.
| Flex tool | What you do |
|---|---|
| reserve-now-pay-later | Hold your morning slot, pay later |
| 72-hour cancellation policy | Cancel by the window, get refunded |
| Scaredy-Cat Clause | Try 1 to 2 lines, opt out |
Check each listing’s 72-hour cancellation policy before you commit. Some operators run a Scaredy-Cat Clause. You try the first line or two and may get a partial refund for you and your chaperone. Before you cancel, confirm weight and size limits. If you miss the harness range at the on-site weigh-in, refunds vanish.
Taxes And Final Cost
While the ziplines feel like pure wind and green valleys, your checkout total comes down to a few simple numbers. Rates you see for each tour get a 4.712% tax added at checkout, so that $149.00 per paying adult lands higher once you hit confirm. Child tickets ages 5 to 12 follow the same math, whether they’re $119.00 or a promo $74.50. To avoid paying full freight, look for zipline deals that still spell out taxes, fees, and restrictions up front.
- Book early because peak morning slots sell out fast
- Check the 72-hour cancellation window before you click
- Compare adult price points like $149.00 versus $184.95
- Decide on add-ons like photos or a box lunch, then tax applies
- “Reserve now, pay later” can help, but the final charge shows at confirmation
If you’re beach-bound after, budget a little extra for snacks and parking.
What to Wear for the Zipline Tour
Dress for motion and a little island surprise, because the North Shore ziplines come with short hikes, stair climbs, and breezes that can turn cool fast.
Start at your feet with closed-toe, lace-up shoes that grip dusty trails and wet boards. Guides won’t let you clip in with sandals or flip-flops, even if they feel beachy. Choose light, close-fitting layers like leggings or shorts plus a tank or t-shirt so fabric won’t slap in the wind. A snug waistband also sits better under a harness. If you like sunglasses, wear them on a secure strap so they don’t take flight mid-ride. Add a thin rain shell or light jacket for sudden showers. Bring water and sunscreen to stay comfortable between runs and during the outdoor check-in. Skip bulky jewelry, long scarves, and anything that could snag on you.
What to Bring (and What to Leave Behind)
Because the North Shore can flip from sunny to breezy in a heartbeat, packing smart keeps the day smooth from basecamp to the last platform. You’ll feel salt in the air, damp leaves underfoot, and a little mud on short hikes between lines, so bring only what helps.
Pack smart on the North Shore, sun turns to breeze fast, with salt air, damp leaves, and muddy in-between hikes.
- Bring closed-toe,lace-up shoes (water shoes acceptable) , sandals or flip-flops are prohibited and shoes may be rented on-site for about $5,Pack sunscreen,a light jacket for breezes or quick showers,and bug spray; lockers are available at basecamp for storing extras..
- A reusable water bottle for the refill station
- Any needed medication in a secure pocket
- A small snack for after the final zip
- Leave loose backpacks and big bags behind
Stick with closed-toe shoes and consider light layers so you can stay comfortable from shaded forest platforms to open-air runs.
You’ll move faster and hear the forest.
Photos, Phones, and Where to Stash Gear
Pack light, then make one more quick call before you clip in. Phones, cameras, and GoPros can’t ride with you on the lines, so don’t plan on filming that jungle whoosh yourself. Some tours may allow a tiny camera only with a locked wrist or neck strap, so ask Camp Maui ahead of time. If a device is allowed, choose a secure phone strap that locks and keeps it tethered in case you slip.
Instead, lean on the basecamp photo system. Shooters catch you midflight with palms blurring and cables humming, then you preview and buy shots back at camp. It’s the safest souvenir you’ll carry. Stash your wallet, backpack, and loose stuff in the lockers, or leave valuables in your car. Glasses are fine with a snug strap. Guides will fit your helmet around them. Want receipts or downloads? Share your email address.
Arrive Early: Check-In, Weigh-In, Harnessing
Once you roll into Camp Maui a little early, the whole zipline day starts to click into place. Arrive early, check-in first, and you’re not rushing past the fresh plumeria scent and gravel crunch underfoot. You’ll sign the waiver, then step onto the scale so they can match you to the right harness. Guides also measure height, waist, and upper thigh, and they’ll confirm you fit the usual 70–280 lb range, with some courses running 40–270. Before you head to the first platform, guides walk you through safety protocols so you know exactly what to expect from check-in to your last line.
Arrive early at Camp Maui, waiver, scale, and quick measurements, so you’re suited up and unhurried before the first zip.
- ID and reservation info ready
- Closed-toe shoes on
- Glasses strap if you wear shades
- Pockets empty for harness fit
- A few minutes for the safety briefing
Helmets go on next, straps snug, and you’ll feel surprisingly ready. Trained guides follow ACCT-like standards, and their voices set the tone.
What the Tour Is Like: Training, Hikes, Zips
After the waivers, weigh-in, and helmet clicks into place, the tour shifts from paperwork to practice and you start moving through the trees. Guides give a safety briefing, fit your harness, and send you on a 200-foot training line to practice clips and braking. Between platforms you take short hikes on uneven gravel with inclines and stairs. Then the sequence begins: seven ziplines from about 100 feet to 920 feet, plus two suspension bridges at 110 and 85 feet. Ziplining on the North feels crisp and fast, with wind buzzing in your ears. Guides manage launches and landings, and the last two lines let you add freestyle movement. When you’re scanning feedback later, use a reviews checklist mindset to separate genuine safety/process notes from vague hype. You can’t hold a phone or GoPro, but the photo system grabs shots back at basecamp.
Quick Lunch Spots Near the Course
Step off the last line and you can slide straight into lunch mode without derailing your North Shore plans. If you booked a full day, confirm whether a boxed lunch is included so you don’t double buy. Otherwise, grab a box from the basecamp café, or roll to the nearby lunch trucks for a fast sandwich and salty air. For an easy post-ride detour, pair your zipline finish with Haleiwa Eats before heading back out along the North Shore.
- Box lunch from basecamp café, eaten under shade.
- Keana Farms Café plates when you’re already on the route.
- nearby food trucks in Haleʻiwa for shrimp and rice you can hold.
- Refill your bottle at the basecamp water station.
- Pack light: wraps, trail mix, fruit, since trails stay bumpy and lockers help.
If you want a sit-down meal, Haleʻiwa cafés are a short drive and quick.
Best Nearby Beaches for the Afternoon
Shake off the harness and trade your helmet hair for salt air at one of the North Shore beaches that sit just 15 to 30 minutes from the zipline. If you want easy swimming and a sandy launch for kids, head to Haleiwa Beach Park and grab lunch from the food trucks nearby. Craving postcard water? Waimea Bay shines in summer, but you’ll skip cliff jumping and respect winter surf. For long walks and wave watching, Sunset Beach stretches out in sandy bands, and currents can bite when swells rise. Snorkel instead at Pupukea’s Shark’s Cove. Bring water shoes and reef-safe sunscreen for the entry. Round out your Northshore Zipline full day at Chun’s Reef or stop at Laniakea to spot turtles, hands off.
Traffic + Rain Timing, Plus Easy Add-Ons
North Shore beach time feels even better when you plan around Oahu’s traffic and the quick rain that likes to drift in and out. Book a Morning zipline slot and leave Waikiki early. The drive can hit 1h15m even before traffic, so aim to arrive 30 minutes ahead. Tours start around 9:00 am and run every 30 minutes. You’ll finish in about 2–3 hours, then the North opens up for sand and snacks.
Beat Oahu traffic and passing showers, book a morning zipline, leave Waikiki early, and finish by lunch for beach time.
- Pack sunscreen, bug spray, water, and closed-toe shoes.
- Watch clouds; showers pass fast, but wind builds later.
- From Turtle Bay, Waimea is about 10 minutes and 4.5 miles.
- From Waikiki, plan 40–50 miles each way.
- Add shrimp, shave ice, or a quick Haleiwa stroll after lunch.
Frequently Asked Questions
Is the Zipline Tour Accessible for Guests With Mobility Limitations?
It isn’t fully accessible if you’ve significant mobility limits, since you’ll hike uneven gravel, climb stairs, and stand. You can ask about wheelchair transfer, adaptive harnessing, and walk-along viewing; guides’ll help, availability varies when booking.
Are Guides Fluent in Languages Besides English?
Yes, you’ll often find bilingual guides speaking German, Spanish, or Portuguese, not just English. But if you worry it’s not guaranteed, ask when booking so staff can match you and enhance cultural interpretation throughout today.
Can We Book a Private Zipline Tour for Our Group?
Yes, you can request a Private booking, but it isn’t listed online. Email [email protected] or [email protected] or call North Shore Zipline Co. Ask about Group discounts, guide ratios, dates, and written pricing/cancellation terms before you confirm.
What Is the Recommended Tip Amount for Zipline Guides?
Like a safety harness, your tip should feel secure: follow a 15–20% percentage guideline of the tour price (about $22–$30 on $149). For standout help, add $5–$10 per guide. Give cash tips afterward to them.
Are Lockers or Secure Storage Available for Valuables During the Tour?
Yes, you’ll have secure lockers or check-in secure storage for valuables during the tour. You can’t bring phones or cameras on zips, so lock them up. Use waterproof pouches later, and ask about fees.
Conclusion
You’ll start with a 9:00 AM check-in and a quick gear fit, then let the guides talk you through the “small print” before you glide over green gulches and two wobbly bridges. After the last line, grab your photos and a locker haul, then drive to Haleʻiwa for shrimp or a café plate. Rinse off at the beach showers and claim a patch of sand at Waimea or Sunset. Let the trade winds do the rest.