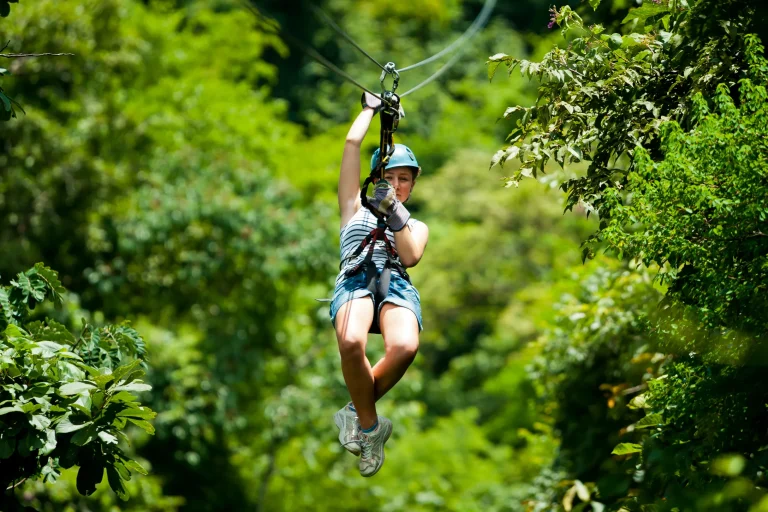
You step onto a North Shore launch platform, hear the cable hum, and feel your harness cinch snug over your hips as the guide calls “clip, lock, tug.” You’re trusting more than nerves here. You’ve got a primary brake, a backup catch, and two clipped-in connections that don’t forgive shortcuts. Wind can shut the whole run down fast, and weight limits aren’t suggestions. But what actually stops you smoothly at the end?
Key Takeaways
- North Shore ziplines use dual braking: a primary mechanical or magnetic brake plus an independent backup catch if the main stop fails.
- Magnetic brakes slow smoothly using eddy currents; friction brakes stop faster but can feel more abrupt as they convert motion into heat.
- Guides explain the braking method before launch, monitor cable sounds, and verify anchors and tension again after delays or weather holds.
- Riders wear rated harnesses with snug waist and leg straps; guides confirm fit, double-backed buckles, and comfort to ensure brakes work properly.
- Redundant attachment uses two locking carabiners and lanyards; every connection gets a “clip, lock, tug” check until the guide says “all clear.”
How Safe Are North Shore Ziplines, Really?
While the view from a North Shore zipline can make your stomach flutter, the gear and routines behind it are built to keep you steady. You clip onto high‑grade steel cable with a full‑body or hip‑and‑thigh harness rated for tons. Guides fit it snug and run a quick harness inspection before every launch, so nothing twists or pinches. You also ride with redundant attachment systems, like dual lanyards or double carabiners, so one point can’t ruin your day. At the end, dual braking systems slow you down with an automatic brake plus a backup catch. Along with safety systems, tour quality often comes down to factors like length and speed. Reputable operators log maintenance and follow ACCT or ASTM-like standards. When you follow the briefing and limits, you’ll mostly hear wind and treetops, then step off grinning, not rattled.
A Quick North Shore Zipline Safety Checklist
Before you step off the platform and let the cable hum under your wheels, run through a quick safety checklist that keeps the whole ride smooth. You’ll hear the rundown: full-body harness,dual lanyards,dual braking systems,Guides check. Feel your harness sit snug on hips and shoulders. Make sure straps lie flat and buckles don’t twist. It should feel secure but not pinch, and you should speak up if you notice numbness or pain. Keep both lanyards clipped to the safety line until you hear “all clear.” Watch the guide do clip, lock, tug, then glance at your carabiners. Spot the brake at the far platform and listen for the soft click as you roll in. Sea breeze cools your face; you wait. Stow loose gear and tether your phone. Wear closed-toe shoes so the deck grip feels solid. Your guide handles the rest.
How North Shore Ziplines Prevent Falls
You stay connected on North Shore ziplines with a dual-clip setup, so you’re always tethered by two independent connectors even if one ever quits. Before you launch, the guide does a quick “clip, lock, tug” check and you’ll hear the metal click as they keep you on a safety line until the landing platform is clear. In plain English, the briefing is explaining your redundant connections and the simple checks that make sure you’re always attached. It feels simple and smooth, like a well-run airport line, except you’re stepping into open air and the treetops are doing the waving.
Dual-Clip Attachment Systems
Step onto the platform and you’ll notice the small ritual that keeps things calm: North Shore zipline guides hook you in with a dual-clip attachment system. You feel two independent lanyards click into place, each a locking carabiner with a screw or twist gate. Those connectors are rated around 20 to 30 kN, so your body weight barely registers. Your guide does the clip lock tug on both points, a quick glance and a firm pull that makes the metal sing. If you’re filming, use a phone tether so your device stays secured even if it slips from your grip mid-ride. As you shuffle between lines, you stay double-clipped to a safety line, so there’s always a backup holding you. Behind the scenes, crews inspect clips, webbing, and stitching daily and on scheduled engineering reviews. It’s simple redundancy you can hear and feel today.
Still comparing North Shore Zipline Safety Explained: Brakes, Harnesses, And Backups?
Ask for tour ideas, hotel suggestions, or a simple trip plan that combines both.
Trip Helper
Platform Launch Safety Checks
Those two clicks of the dual-clip system set the tone, but the real fall-prevention moment happens at the platform edge. Your guide checks your harness and helmet, then runs the clip lock tug on both carabiners and gives a firm snap. You do a quick pull on a low practice line so they can see your weight sit evenly in the straps.
Until you hear “all clear,” you stay pinned to the deck by a backup tether. Before you ever leave the ground, the tour flow moves from check-in through a safety briefing and gear fitting, making the check-in to landing sequence part of the safety system. You place your heels against the boards, feel the grit under your shoes, and follow a clean countdown. A staffer stands beside you, ready to steady a wobbly knee. Before each group’s first platform launch, they log the same checks. Safety sounds like carabiners clicking every time.
Harness Fit: What “Snug” Should Feel Like
A good harness fit feels like a friendly handshake that turns into a solid seat the moment you clip in. Your snug harness should hug your waist and thighs, not pinch. The waist belt sits above your hips, not on your stomach. Tighten until you can slip only one or two fingers under the webbing, then you should feel it stop any slide.
Before you fly, your guide does a tug test at each buckle. You’ll see them fix twists, tuck tail ends, and double back straps. Expect only 1 to 2 inches of give. Step onto the low training line and let your weight settle into the leg loops. You should breathe and move your torso. If you feel tingling, speak up fast. Wear closed-toe shoes to keep your footing steady while stepping onto platforms and training lines.
Helmets and Gloves: What They Actually Protect
Because the North Shore canopy feels close enough to brush, your helmet and gloves do real work long before the first glide. The tour helmets are certified impact helmets, built for the small thumps you can’t predict. Think platform posts, a low branch, or a gentle bump during a landing or transfer. They also block tiny falling bits, like a leaf clump or a loose carabiner cap, and they keep hair and straps tucked away from spinning pulleys.
Gloves are thinner than you expect, usually leather or synthetic, and they save your palms from rope and lanyard abrasion. They improve grip, not speed control. Mechanical braking systems handle stopping with engineered devices and backups. Before you go, check snug fit, chinstrap, and no holes. Most tours provide helmets and gloves as standard provided gear, so you can focus on fit and function rather than packing specialty protection.
Clip-In Safety: “Clip, Lock, Tug” (Step-by-Step)
Helmets and gloves handle the little surprises, but your real green light on the platform comes from a simple ritual you’ll hear over the wind and the pulleys. First, your guide says Clip and snaps your carabiner (the metal clip) onto the trolley or anchor. If you’re on dual lanyards, they clip the primary line, then the backup, and they repeat the steps for each.
Next comes Lock. They look close, then feel the gate to confirm it’s shut and fully engaged. They also turn the gate away from the load path. Finally, Tug. They grab the harness-to-trolley connection and give a firm pull, then say it out loud. If you do end up stalled mid-line, guides follow rescue procedures to retrieve you safely using established backup methods. Stay in continuous belay and don’t touch anything until you hear all clear. Got it.
Tethers and Backup Lines: What’s Redundant
Even if the wind’s humming through the ironwood trees and the trolley wheels are singing on the cable, your safety net comes from redundancy. You ride with dual lanyard systems, meaning two independent connections stay on you the whole time. If one connector were bumped open, the other still holds.
- Primary tether plus backup lines, often sewn webbing or steel-core, rated for several kilonewtons.
- Two locking carabiners get a guide’s “clip, lock, tug” before every launch.
- During transfers or a pause in mid-course, a short rescue lanyard clips you to a certified anchor.
- Oahu standards demand inspection logs and quick retirement of any frayed, faded, or loose stitching.
Many operators align their procedures with ANSI/ACCT 03-2019 as a current industry standard for challenge courses and canopy/zip line tours.
That’s why you hear clicks and feel a tug before you fly.
Which Brake System Will You Use: Magnetic or Friction?
Listen for the soft whirr of your trolley and watch the platform rush closer, because your stop depends on the brake system your course runs. Most North Shore lines use dual braking, so you’ve got two independent ways to slow down.
With magnetic brakes, magnets create eddy currents that resist the trolley without touching it. You feel a smooth pull that scales with speed and weight, and the gear needs little upkeep. With friction brakes, a rubber, leather, or felt block, or a glove brake, grips the line and turns motion into heat. It can stop you fast and may jolt. Many operators pair magnetic with friction, then add backup braking like a spring stop or a guide catch. In general, active braking is applied by a system you ride into, while passive braking relies on something that catches or slows you if you don’t stop as planned. Ask which setup you’ll ride.
Landing Safely: Posture, Braking, Common Mistakes
As the platform rushes closer and the trolley hums on the line, you’ll set up a clean landing with feet together and slightly forward, soft knees, and your eyes on the deck or tree line instead of straight down. You’ll relax your grip and let the harness carry you while you follow the operator’s braking style, because untrained hand braking can turn a smooth glide into a sudden stop and a nasty rope burn. For North Shore tours, expect guides to review weight and height limits before you launch so everyone stays within the system’s safe operating range. When you slow to a near stop, you’ll stay clipped in until you hear “all clear,” then stand by pushing through your legs, not by yanking on the harness like it’s a stubborn suitcase.
Correct Landing Posture
Glide into the landing like you’re stepping onto a dock, not bracing for a crash. The landing platform looks bigger as the trees hush and the cable hums. Set your body up so the stop feels like a gentle tap, not a thud. If you’re nervous, remember that trained guides stay focused on keeping beginners comfortable with clear cues and calm coaching.
- keep your legs together, knees soft, feet pointed forward so your soles meet the platform with control.
- Keep your torso tall and lean slightly back about 10 to 15 degrees so the harness carries the load.
- hold onto the tether lightly with both hands so you stay balanced and ready for a guide’s cue.
- Look at the platform or the guide’s marker, not straight down.
Don’t lock your legs, tip forward, death‑grip the lanyard, or unhook early. Wait for all clear.
Braking Techniques Explained
When the platform rushes closer and the cable starts to sing, you’ll want a braking plan that feels smooth and predictable. Keep your feet forward and knees soft so your legs soak up the slowdown and you can plant your shoes under you.
Your guide will match you to the braking system on that line. You might slide a hand-brake on the tether, let leather-glove friction add gentle drag, or roll in for a guided catch as the crew takes you. In most zipline tours, guides explain which braking method your line uses before you launch so you know what to expect at the platform. Hold the strap with relaxed hands. A tight grip makes the deceleration choppy. Look toward the platform or treetops ahead. Your body stays aligned when you don’t stare down. If speed feels odd, signal the guide right away and keep your feet together.
Avoiding Common Landing Mistakes
Coming in hot can sneak up on you, so set your landing up like a calm, practiced step instead of a last-second scramble. You’ll hear the trolley hum on the line and feel the wind ease as the landing platform grows big. Keep your feet forward, knees soft, and stance shoulder-width so your legs take the stop. Even in light rain, most tours still run under rain-or-shine policies, so treat every landing like the platform could be slick.
- Watch the guide, tuck your chin, and aim your eyes at the landing platform, not the drop.
- Follow braking systems rules. If you hand brake, pull steady on the strap, don’t yank.
- Hold the harness or tether lightly with one hand. Skip grabbing webbing or carabiners.
- On “feet under,” plant soles flat, then step off the platform and walk out. No victory spin.
You’ll look calm too.
What Guides Check Before Every Run
Before you step off the platform, the guides run a quick routine that feels like a pit crew check, crisp and calm. You’ll hear a short safety briefing, then the clip, lock, tug: they clip both carabiners, screw them closed, and give each one a firm pull. Next they size up your harness. They snug the waist and thigh straps to a two finger gap, double back the buckles, and smooth the webbing so nothing twists. They scan the trolley, lanyards, and swivel for grit, wear, and clean seating in the pulley. Then they confirm the brakes. They point out the stop zone, name who triggers the main system, and check the backup. Helmet, gloves, footing. They also build in buffer time for check-in and waivers so no one feels rushed at the platform. “Ready?” You launch after a nod and grin.
How Often Cables and Anchors Get Inspected
Usually, the cable and anchor checks start long before you hear the first trolley rattle down the line. You’ll see a guide scan for frays, salt corrosion, and odd slack, then tug hardware to confirm it’s snug. Those daily inspections set the tone, but the rhythm keeps going all season. If anything looks off, you pause operations.
Because zipline “height” can mean either how far you are above the ground or the elevation above sea level, guides also clarify height measurement during briefings so expectations match the terrain.
- Weekly or monthly: You feel the cable with gloved hands, measure wear with calipers, and compare tension to the design.
- Torque checks: You re-tighten and verify anchor bolts so nothing creeps loose.
- Engineering visits: A rigger reviews inspection logs, runs load tests, and uses non-destructive testing on anchors.
- Replacement planning: You swap high-use coastal cables about every 3 to 5 years, or sooner if gauges say so.
Weather Rules: Wind, Rain, and Lightning Stops
Out on Oahu’s North Shore, you’ll feel the trade winds tug at your helmet, and if gusts climb into the usual 25 to 35 mph range you can expect launches to pause or the course to close. Rain might just bead on your gloves at first, but a hard downpour that blurs the canopy view or slicks the brakes and platforms can put you on a quick shelter break. Wind holds often come down to sustained speeds and stronger gusts that can affect rider stability and braking, which is why guides watch gust thresholds closely. And if you hear thunder or lightning shows up on radar, it’s an instant stop and a calm return to cover, no arguing with the sky.
Wind And Gust Thresholds
Even if the sky looks postcard calm, North Shore ziplines take wind and storms seriously because a gust can turn a smooth glide into a sideways sway you’ll feel in your harness. Guides watch treetops and listen for the cable’s low hum to change pitch, then match what they see with microclimate forecasts. If you’re planning around ocean-side conditions, the 5-day hourly forecast for Oʻahu can help you understand when breezier windows may line up with your time slot.
- Ask about wind-speed cutoffs. Many crews pause around 25–30 mph sustained.
- Respect Trade-wind gusts. If gusts jump past 35–40 mph, they’ll suspend operations.
- Notice the line. Too much lateral wiggle means unstable launches and pendulum swings.
- Wait for checks. Staff reverify tension and anchors before you clip back in.
You might hear the radios crackle and see guides flag a delay. It’s normal. You’ll often get a reschedule or refund option.
Rain, Thunder, And Lightning Stops
When the North Shore sky flips from bright to bruised in a few minutes, zipline guides don’t wait to see what happens. You’ll see them scan ridgelines, feel the wind, and check radar and PacIOOS forecasts. If lightning pops within view or a strike is forecast, they stop tours, no debate. You might hear distant thunder like a drumline, and you’ll head to shelter.
Light rain can be part of the fun, slick leaves and cool mist on your cheeks. In winter, muddy landings can also show up fast, so guides may slow things down and focus extra on footing near platforms. But heavy rain or soaked platforms change traction and braking, so launches pause. High winds also trigger holds or cancellations because crosswinds can nudge you and tweak brake feel. While you wait, guides keep you double clipped, secure gear, and restart only after inspection.
Limits That Can Disqualify You (Age, Weight, Health)
Before you picture yourself stepping off the platform and hearing the trolley sing on the cable, check the limits that can quietly disqualify you. North Shore courses run tight safety math, so confirm your weight limit and age minimum when you book, especially if you’re near the edges. Many operators also enforce height requirements to ensure the harness fits correctly and braking systems work as designed.
- Weight: Many operators cap riders around 250 lbs and set a minimum near 50 to 70 lbs. Call if you’re close.
- Age: Often 6 to 10 years. Younger kids may ride only on shorter lines with staff approval.
- Pregnancy: Usually a no. Don’t assume. You’ll need your OB and written operator okay.
- Health and fit: Recent surgery, back or neck pain, heart issues, seizures, or poor harness fit can stop you cold.
If You Get Stuck: How Zipline Rescues Work
North Shore ziplines run on tight limits for a reason, but a perfect fit on paper doesn’t always guarantee a nonstop glide. If you stall mid-line, you’ll follow the sit and wait protocol: stay clipped in, breathe, and listen to the wind hiss on the cable. Guides check your position, rider weight, and tension before they move.
They’ll bring a rescue kit with pulleys, prusiks, slings, and a block-and-tackle. A team may hike to a tower, clip into your trolley, add a secondary tether, and connect a rescue line. Then they’ll haul and lower you to the next platform or a safe belay spot. You’ll hear calm cues and maybe a joke, because drills make this routine. Look down at the ferns and ocean.
Frequently Asked Questions
Will My Phone or Camera Be Secure While Zipping?
You can keep it secure if you follow the operator’s rules: use secure pockets or lockers, attach camera tethers and phone lanyards, and stash gear in waterproof cases. You’ll often need mounts or guide photos.
Can I Ride Tandem With a Child or Partner?
Yes, you can, as long as you and your co-pilot don’t tip the sky like a seesaw. You’ll confirm tandem weight limits, get checked for seat comfort and child restraint, and practice partner communication with staff.
Are Ziplines Safe for People With Glasses or Hearing Aids?
Yes, you can zipline safely with glasses or hearing aids if you secure them. Use prescription retention to prevent loss, manage lens fogging, reduce hearing interference, and request assistive adjustments so guides repeat cues.
What Should I Wear, Shoes, Clothing, and Accessories, To Avoid Issues?
Wear Closed toe shoes with grip, and choose activewear so you don’t snag. Bring Layered clothing: top plus shell. Keep Secured jewelry minimal, tie hair back, and add Skin protection with long sleeves or guard.
Is Tipping Guides Customary, and What’s the Typical Amount?
Like a warm trade wind, yes, Guide gratuities are customary. You’ll follow Percentage norms of 15–20% or $10–$25 per guide for standout service. Respect Cash preference, and use Group tipping by splitting $5–$15 each, when possible.
Conclusion
You step to the platform and hear the cable hum in the trees. You’re clipped in with two carabiners, and you do the clip lock tug check every time. That simple 2 point backup is the quiet hero of North Shore lines. You feel the harness snug at hips and thighs. You watch guides scan brakes and anchors each morning. If clouds build you wait. Better bored than airborne. Your gloves grip like sandpaper.