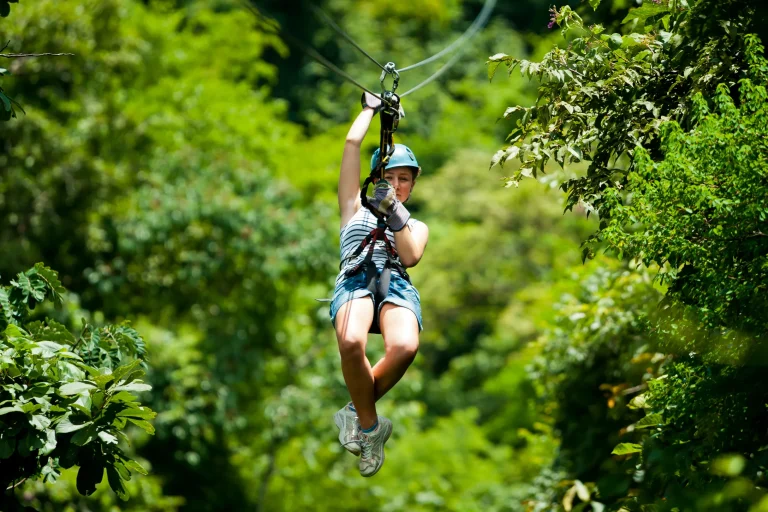
You’re about to step into a jungle roller coaster where the wind hums like a guitar string. You’ll want closed toe shoes that grip, snug shorts or pants that sit clean under a harness, and a quick dry shirt with a light rain shell you can tuck away. Braid long hair and ditch jangly jewelry unless you like surprise percussion. Bring sunscreen, bug spray, and a tethered phone. Here’s what else makes the ride smoother…
Key Takeaways
- Wear closed-toe sneakers or hiking shoes with firm tread; lace tightly for traction on wet platforms and damp forest paths.
- Dress in snug, chafe-free layers; choose fitted shorts/pants and a smooth windbreaker or long-sleeve to prevent harness rub and snags.
- Secure long hair and remove dangling jewelry; keep helmets flush and avoid anything that can snag on harness lines.
- Bring only essentials; store wallet, keys, loose phones, and bags in free check-in lockers since no storage exists after the first platform.
- If filming, use a tethered phone/GoPro mount with a backup leash; keep meds in zippered pockets and pack sunscreen, bug spray, and rain shell.
North Shore Zipline Tour Essentials Checklist
Usually, the best North Shore zipline day starts with what you pack and how you wear it. For your Oahu Zipline outing, bring reef-safe sunscreen and put it on early because the ridge sun hangs bright and you’ll feel it on your cheeks. Add sunglasses so you can scan the green valleys without squinting while cables hum overhead.
Keep your phone or GoPro truly secured with a wrist or helmet mount, or stash it in the free on-site locker. For extra safety, skip pockets and use secure phone straps that are designed to prevent drops while you’re riding the line. Loose stuff and gravity don’t mix, and nobody wants to watch their gear take a solo flight. Carry needed meds like an inhaler or EpiPen, plus a few small essentials, in a compact fanny pack or small backpack that cinches tight before you clip in.
North Shore Zipline Tour Rules: Shoes, Hair, Jewelry
You can’t ride the North Shore ziplines without closed-toe shoes, so lace up tight and leave sandals, flip-flops, and barefoot-style shoes behind. If you’ve got long hair, pull it into a ponytail, braid, or bun so it won’t snag on the harness while the trolley hums above the trees. Before you clip in, take off dangling jewelry and stash loose items like phones and cameras in a strap or a locker, because nobody wants to watch a necklace or iPhone go flying. Also, make sure you meet the tour’s weight limits before you arrive, since Hawaii zipline operators enforce minimum and maximum rider weights for safety.
Close-Toe Shoes Required
Lace up before you clip in, because closed-toe shoes are non-negotiable on the North Shore zipline course. You’ll walk forest paths to platforms, step onto grated decks, and pivot on sky bridges, so wear closed-toe shoes like sneakers or sturdy hikers. They protect your toes from muddy roots and rough wood and give you grip when the trade winds kick up.
Tie them tight and keep the fit snug. Loose sandals, flip-flops, and FiveFingers-style shoes won’t pass check-in, and you could sit out while your friends whoop overhead. If you’re under 80 pounds and ride tandem, you’ll still need solid traction for the hike in and a steady stance at launch. Your feet will thank you. Plus, damp grass feels less slippery under laces. On breezy ridgelines, bring light layers you can add or shed so you stay comfortable from the first hike to the last line.
Secure Hair And Jewelry
Closed-toe shoes keep you planted, but the wind up in the canopy likes to mess with anything loose. If you have long hair, pull it back in a braid or ponytail, or tuck it under your helmet so it can’t snag on a harness strap. Skip bulky clips and hairpieces so your helmet sits flush and comfy. Guides also run through brakes and harnesses during the safety briefing so you know how your gear stays secure from launch to landing.
| Item | What to do | Why it matters |
|---|---|---|
| Long hair | Braid, tie, or tuck | Prevent snags |
| Necklaces, bracelets, big earrings | Leave in locker | No dangling hazards |
| Rings, watches, medical ID | Remove or tape down | Avoid loss on fast runs |
Do this before check-in, and you’ll hear only the zipline hum and forest birds, not the clink of lost jewelry as you glide between green branches.
North Shore Zipline Tour Harness-Friendly Bottoms
You’ll want snug pants or shorts so the harness sits flat and nothing bunches or snags when you step off the platform and hear the cables hum. Pick chafe-free bottoms that feel fine when you’re seated and let your legs move, and skip skirts or wide legs since loose fabric is a no-go. If anything pinches, rides up, or leaves numb spots, speak up and ask for a harness fit check before you zip. Look for pockets with secure closures for your small stuff, and if you’re under about 80 lbs and might ride tandem, bring a pair that works with either harness setup.
Snug, Non-Baggy Fit
While the rainforest views and ocean breeze steal the show on a North Shore zipline tour, your bottoms do quiet, important work in the harness. Pick pants or shorts that sit close at your waist and thighs without squeezing. Skip baggy clothes and extra fabric that can bunch, flap, or snag near straps and lines. Leave skirts and dresses at the hotel, and avoid cargo pockets that balloon out.
Do a squat before you gear up, then notice if the pair stays put through the 8 line course and the ATV ride. Since tours run from check-in through your last line, you’ll want a pair that stays comfortable and secure through the full check-in to landing flow. If you’re under about 80 lbs, you might ride tandem, so keep things snug but easy for a guide to clip in. When in doubt, ask the crew, and adjust between runs.
Chafe-Free Harness Comfort
Sometimes the best part of a North Shore zipline tour is forgetting your harness is even there. You can get close by choosing lightweight, stretchy bottoms that don’t bunch. Think athletic leggings or fitted hiking shorts that feel smooth when you sit back and hear the trolley hum on the zip line.
Skip baggy fabric and extra seams that rub when you shift. Pick a shirt with real shoulder coverage, not thin straps or sleeveless cuts, so webbing doesn’t scrape your skin. Since North Shore ziplining in summer can be hot, plan for summer heat with breathable fabrics and a little extra water. If you’re under about 80 pounds and might ride tandem, make sure your bottoms let the staff snug the harness for two setups. Ask CLIMB Works for local tips and expect a little trial and error. Small adjustments now beat blisters later.
Pockets And Secure Storage
Once your harness sits smooth and chafe-free, the next goal is keeping your stuff from turning into a flying souvenir. Pick snug shorts or pants with clean lines so fabric won’t bunch or snag. Skip cargo pockets and flappy legs. Most tours provide gloves and helmets as part of your gear, so you can focus on packing only what’s truly necessary.
| Keep on you | Store in lockers |
|---|---|
| Zippered pocket meds | Phone, keys, wallet |
| Strapped camera or GoPro | Loose hats and extras |
Use zippered or buttoned pockets, or a tiny waistband pocket, for the few items to bring. Anything loose gets blocked by guides for safety. If you carry a phone or camera, add a wrist or neck strap and ask staff to tug-test it during fitting. You’ll hear the click of carabiners and feel the breeze, not your keys bouncing under you today at all.
North Shore Zipline Tour Chafe-Free Shirts
You’ll almost always feel the harness more than you expect on a North Shore zipline tour, so start with the right shirt. Skip sleeveless tops. Bare shoulders and underarms rub fast during a 2.5 hour run of zips and sky bridges, and that scratchy pinch is hard to ignore.
Pick a snug, breathable tee that stays smooth under the waist and chest straps. A shirt that bunches can twist the fit and distract you mid glide when the wind roars in your ears. Choose lightweight moisture wicking fabric like a polyester blend so sweat won’t turn into sandpaper, and it dries quickly after mist or rain. Look for UPF, because sun flashes between trees. If you chafe easily, pack a thin long sleeve rashguard. Guides who specialize in nervous beginners can also help you adjust straps and positioning so the harness sits more comfortably against your shirt.
North Shore Zipline Tour Close-Toe Shoes That Grip
Close-toe shoes almost always make or break your comfort on a North Shore zipline tour. You’ll step onto wood platforms slick with mist, climb stairs, and cross uneven dirt where roots grab at your feet. Most operators require close-toed shoes to shield you from line contact and falling twigs.
Pick sneakers or hiking shoes with a firm rubber sole and deep tread so you stick the landing on ladders and sky bridges. Lace them tight or fasten straps securely. Anything loose can fly off and it’s usually banned. Skip sandals, flip-flops, open toes, and barefoot-style pairs like FiveFingers. Prioritize deep tread for better traction on wet platforms and muddy patches. If you’ll walk the half mile between runs, wear broken-in shoes that won’t rub. Your feet should feel ready, not loud with blisters by the end.
North Shore Zipline Tour Hair Ties and Helmet Fit
How do you keep your hair from turning into a windy mess when you’re stepping onto misty wooden platforms and clicking into a helmet? Start with a low ponytail or a tight braid. Use a snug fabric elastic so nothing bulky bumps the shell. If your hair’s very long or thick, twist it into a braid or bun at the nape. That leaves space for the chin cup and strap so they sit comfortably.
Pack spare hair ties for the 2.5 hour tour. Between ziplines and sky bridges they can snap or vanish easily. Confirm any zipline height rules ahead of time, since they exist for safety and can be verified with your tour operator before you arrive. Once you’re geared up, check helmet fit. It should sit level with the front edge one finger above your eyebrows. Tighten the strap so it won’t shift. Skip dangling jewelry.
North Shore Zipline Tour Sun Kit (Reef-Safe SPF)
While the forest air stays cool and damp, the sun still breaks through the canopy and hits your hands, cheeks, and knees as you wait on those misty wooden platforms. Bring reef-safe mineral sunscreen, SPF 30+, to meet Hawai‘i guidelines and protect exposed skin for the 2.5-hour tour.
Apply before check-in. Carry a travel-size tube under 3.4 oz in a pocket or locker for touch-ups after the ATV ride or sweat. Pick a water-resistant cream, not a spray, so it won’t mist into your face during the ZIPLINE. Add SPF 30+ lip balm in a tube, because wind at speed can rough up your grin. Wear sunglasses and a brimmed hat before and after. Then stash them or clip them down before you launch. Remember 2026 is the DLNR Year of our Coastal Kuleana, so pack and apply sun protection in a way that keeps Hawai‘i’s natural resources in mind.
North Shore Zipline Tour Wind/Rain Layer
Pack a lightweight rain jacket or poncho that stuffs small, because the North Shore can flip from warm sun to quick showers while the tour keeps rolling for about 2.5 hours. Bring a snug, breathable windbreaker so it won’t flap loudly in the trees or snag near your harness lines, and wear it under the harness if the air turns cool. Even in light showers, tours often continue under rain-or-shine policies, so plan on staying comfortable while you’re moving. At check-in, tuck it into a small locker or secure bag since loose layers can’t come on course unless they’re properly stowed.
Lightweight Rain Jacket
A lightweight, packable rain jacket earns its spot on a North Shore zipline tour because the weather can flip fast and the ride goes on rain or shine. You might launch under blue skies then hear tapping on leaves. When that squall rolls in, you’ll stay focused on the views instead of getting soaked. In winter, quick showers can also turn trails into deep mud, so a shell helps when you’re moving between platforms and getting in and out of gear.
Pick a breathable, water-resistant shell in thin nylon or ripstop so it layers easily and won’t bunch under your harness straps. A hood that slips under your helmet helps, and adjustable cuffs or a cinch hem block spray as you zip at speed. Choose one that stuffs into its own pocket or a small sack. Then it disappears into the locker or your bag between the ATV ride and platforms.
Packable Windbreaker Layer
Often the breeze hits first, right when you step onto the ridgetop platform and hear the trees hiss and the cables sing. A packable windbreaker layer keeps that chill from sneaking under your shirt while you wait your turn. Pick one that folds tiny for the free locker or a small daypack, and fits smoothly under the harness. Make sure it’s snug with no loose flaps that could catch or snap like a flag.
Morning runs can feel cooler and breezier than afternoon ziplining. Tours run rain or shine, so look for a water-resistant or waterproof rating around 1,000 to 5,000 mm. Choose breathable, quick-dry fabric and vents so you don’t steam up on the ATV ride or short hikes. Bring a hood, or pack a compact rain hood for gusty surprises up there.
Bug Spray, Sweat Wipes, and Hand Sanitizer
Slip a travel-size bug spray into your day bag and you’ll thank yourself when the shaded farm roads and forest edges start to buzz before and after your zipline run on warm, still afternoons. Aim for 20–30% DEET or choose a reef-safe option. If your skin runs sensitive, test it at home and go fragrance-free so your harness doesn’t turn into an itch machine.
Between runs, peel open an individually wrapped sweat or cooling wipe. You’ll feel the grit of salt and sunscreen lift away, especially after the ATV ride. Finish with hand sanitizer that’s at least 60% alcohol before snacks or after shared gear and lockers. Stash everything in a zippered pocket or a small locker. Loose bottles can’t join your zipline adventure. If you’re ziplining with limited mobility, confirm the operator’s accessibility questions before you book so you can pack any personal support items they recommend.
North Shore Zipline Tour Phone/GoPro You Won’t Drop
Before you step onto the first platform, lock down your phone or GoPro like you mean it because guides won’t let anything ride loose on the course. You want footage of the green ridgelines and the zip trolley’s whir not a sinking feeling in your stomach. Set up a sturdy wrist or chest mount with a locking buckle, then back it up with a tether leash. For extra security, use a secondary tether so if the mount fails your device still stays attached. On-site helmet GoPro connectors give you clean POV without juggling gear. Tighten every strap and test it during the safety briefing. Add a waterproof case if mist rolls in. You’ll thank yourself when you glide over treetops and hear birds.
- Locking mount
- Tether leash
- Helmet connector
- Zippered pocket for your phone
Would highly recommend.
North Shore Zipline Tour Lockers and What to Leave
While you’re signing waivers and hearing the first clink of carabiners, you can stash your essentials in the free small lockers at check-in. At CLIMB Works Keana Farms, staff want the course quiet and snag free, so loose phones, cameras, and jewelry can’t ride along unless they’re strapped tight. If you’re coming from Waikiki, plan around transportation from Waikiki so you only bring what you can comfortably manage at check-in. Lock up what you won’t use mid line, and leave bigger stuff at home or secured in your vehicle. There’s no storage once you step onto the first platform, just wind in the trees and the soft squeak of harness webbing.
| Pack it? | Where it goes |
|---|---|
| Phone | Locker or tether |
| Wallet and car keys | Locker |
| Sunglasses | Strap or locker |
| Large bags | Car or home |
If you’re unsure, ask at check-in and travel lighter, happier today.
Frequently Asked Questions
Are There Age, Height, or Weight Limits for the Zipline Tour?
Yes, Age limits start at 5; if you’re under 18, you must ride with an adult and bring guardian’s signature. You must be 42 inches, weigh under ~270 lbs (sometimes 250), and <80 lbs may tandem.
Do I Need to Book in Advance, and How Far Ahead?
Yes, you should do Advance booking for CLIMB Works Keana Farms, since morning and weekend spots fill fast. Book several days to a few weeks ahead in seasons, and add Waikīkī transport at checkout if needed.
Is the Tour Safe for Pregnancy or Recent Injuries?
Why risk it? You shouldn’t zipline if you’re pregnant, and operators won’t allow it. If you’ve had recent surgery, concussion, broken bones, or injuries, wait until you’ve got medical clearance or you’ll get turned away.
Can I Bring Snacks, and When Can I Eat Them?
Yes, you can bring small, non-perishable snacks, but secure them in a zippered pocket or locker. Snack timing: eat before check-in or after the tour; you can’t eat while clipped in. Tell staff for medical needs.
If Weather Cancels the Tour, Do I Get a Refund or Reschedule?
If weather cancels your tour, you’ll usually get a reschedule option; if they can’t fit you in, their Refund policy provides a full refund. Staff often notify you ahead, check your confirmation or call reservations directly.
Conclusion
Pack smart and the canopy does the rest. Closed-toe shoes bite the boards, quick-dry layers feel light, and a rain shell hushes the wind. Braid your hair, stash jewelry, and clip in a tethered phone or GoPro before you step out. Keep sunscreen, bug spray, and a tiny zippered pocket for meds on you. Remember the adage, “travel light.” Lock your big stuff at check-in, because platforms don’t wait. You’ll hear zips and smell pine.