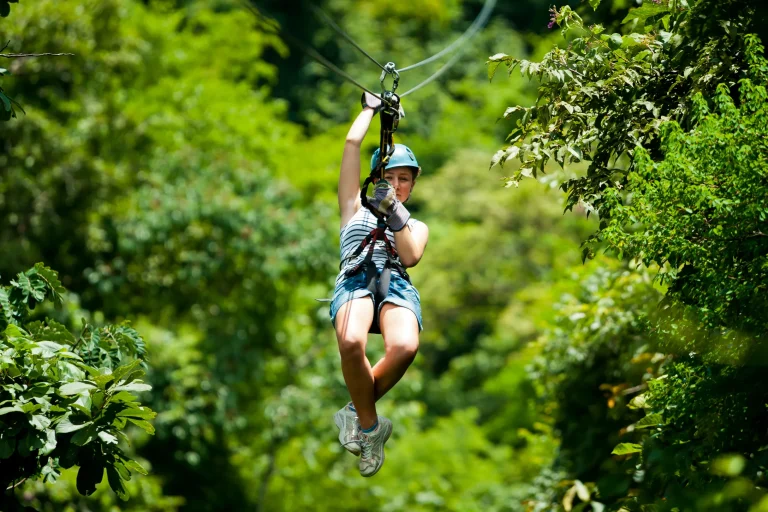
You show up ready for flight, but you still wonder what you’ll actually wear on the line. The guides hand you a helmet, harness, trolley, and gloves that smell faintly of leather and last week’s rain. You bring the closed toe shoes with real grip and clothes that won’t bunch under straps. Your phone needs a zip pocket, not your hand. One choice can turn confidence into chaos, so what’s the smartest setup?
Key Takeaways
- Most tours provide and fit helmets and full-body harnesses; guides inspect gear and handle final safety checks before each run.
- Carabiners, lanyards, and the trolley pulley are supplied and clipped by guides at every launch and landing, participants don’t rig themselves.
- Leather zipline gloves are usually provided for braking; ask for a different size if they’re loose, torn, or cause numbness.
- Bring closed-toe, grippy shoes and harness-friendly clothing like long pants or knee-length shorts to prevent slips and webbing rub.
- Only use approved, guide-verified camera mounts; store unsecured phones or loose items with ground crew or in provided vehicle storage.
Zipline Gear Checklist: What’s Provided vs Required
Before you clip in and step off the platform, it helps to sort out what the operator hands you and what you need to show up wearing. Guides fit an adjustable helmet that meets safety standards. It should hug your forehead and stay put when the cable starts to sing. They also size a full body harness with waist and leg loops. Staff inspect it and tighten straps so your weight spreads evenly.
You’ll get leather Zipline gloves,helmets protect. They shield your palms and help you brake without rope burn. Many North Shore lines also use backup systems alongside primary brakes for added safety. High strength carabiners and a trolley pulley attach you to the line, and guides handle the clicks and clacks. You bring comfy clothes that won’t bunch under the harness, like long shorts or pants.
Zipline Shoes Required: Closed-Toe, Grippy, Secure
You’ll need closed-toe shoes for every zipline course, and sturdy sneakers or hiking shoes work best when you’re stepping onto wood platforms and rocky trails. Pick a pair with a grippy sole so you don’t skid on wet planks, and you’ll feel that solid bite underfoot at takeoff and landing. Look for good traction even in mud or wet conditions so you stay steady on the course. Make sure they fit snug and stay on your feet, because loose sandals or flimsy heels can go flying faster than you do.
Closed-Toe Shoes Only
Almost every zipline operator insists on closed-toe shoes, and it’s easy to see why once you hear the clink of carabiners and step onto a damp platform. Your toes sit inches from cables and metal. One bumped step can sting, and a loose shoe can become a souvenir for the floor.
Plan to wear close-toed shoes that feel like they’re part of your feet. Pick sturdy sneakers or hiking shoes and make sure the heel doesn’t slip when you climb ladders or walk short trail sections between lines. On the North Shore, it also helps to dress in light layers so you’re comfortable from shaded forest sections to sunny platforms. Leave sandals, flip-flops, Crocs, water shoes, and anything open-toed at home. Show up without approved closed-toe shoes and the staff may bench you or send you to rent or buy a pair before you clip in.
Grippy Soles For Platforms
Step onto a zipline platform and you’ll feel right away why grippy soles matter. Wood can be slick from mist, and metal can ring under your feet. You want closed-toe shoes with grippy rubber soles and a lugged, textured outsole so you don’t skate at the edge while you clip in. Guides may glance down before they let you go, so choose sturdy sneakers or trail shoes.
- Look for deep tread that bites wet boards.
- Pick rubber that grips painted metal.
- Skip sandals, Crocs, flip-flops, and loose slip-ons.
- Tighten laces or straps so nothing flaps.
- Remember a flying shoe becomes everyone’s problem.
On short walks between lines, that traction keeps you steady. You’ll hear the harness carabiner click, not your shoes sliding at all. Along with the right footwear, the packing list matters so you’re prepared from check-in to the final line.
Still comparing Zipline Gloves, Helmets, And Gear: What’s Provided Vs What To Bring?
Ask for tour ideas, hotel suggestions, or a simple trip plan that combines both.
Trip Helper
Secure Fit For Hikes
Because most zipline courses stitch the lines together with short hikes, your shoes need a secure fit as much as they need grip. Pick closed-toe shoes with real tread, like hiking shoes or trail runners, so you don’t skate on wooden platforms or dusty steps.
Lock in a secure heel. Skip Crocs, sandals, and anything loose-backed, unless you want to watch a shoe launch into the trees. If you’re booking short zipline tours on the North Shore, you’ll still want the same secure, grippy footwear for the in-between trail sections. You’ll walk 5 to 30 minutes between lines, sometimes uphill on muddy rock, roots, and wet leaves. Choose a grippy rubber sole with multi-directional lugs and decent ankle support for those wobbly approaches. Avoid chunky heels, open mesh, and smooth soles. Wear socks that won’t bunch, and make sure nothing rubs under your harness on the trail.
What to Wear Ziplining (Harness-Friendly)
Dress for the harness first, and everything else gets easier once you’re clipped in and the forest drops away below you. On a zipline, comfort comes from simple choices that let the straps sit flat and the hike feel light. Think of your outfit as necessary gear, not fashion.
Because speed and views shape what makes a great zipline tour, dress in layers so you can stay comfortable as wind and sun conditions change from platform to platform.
- Wear sturdy closed-toe sneakers or hiking shoes for grippy landings.
- Pick long pants, capris, or knee-length shorts so webbing won’t rub.
- Choose moisture-wicking leggings or lightweight joggers instead of heavy jeans.
- Add a light jacket or sweatshirt, and stash a raincoat if clouds build.
- Tie long hair back, skip dangly jewelry, and keep pockets tidy.
You’ll hear pulleys hum and feel cool air rush, and you’ll stay focused on the view all the way downrange.
What Not to Wear on a Zipline (Snags & Drops)
Once you’re clipped in and the trolley starts its soft metal hum, anything loose can turn from “no big deal” to a snag or a sudden drop. You’ll want clean lines and secure layers, so avoid baggy clothing and skip oversized hoods or long drawstrings that whip in the wind. One of the most common zipline tour mistakes is wearing loose, dangling items that make the day harder than it needs to be.
| Risky item | What can happen |
|---|---|
| loose straps and scarves | catch on buckles or branches |
| Sandals or Crocs | slip off and fly |
| Loose pocket items | drop on people below |
Also, remove dangly jewelry like long necklaces or hoop earrings. They can hook a carabiner right when you least expect it. Before you step to the edge, zip pockets, stash your phone and sunglasses, and leave the floppy hat for the café. It’s fun, not fetch.
Zipline Helmet Provided Onsite: Fit and Coverage
Before you even clip into the line, your guide will hand you a helmet and dial in the fit so it feels snug, not squishy. You’ll try a few sizes until the shell sits level and low, about one to two finger-widths above your eyebrows. Shake your head. It shouldn’t wobble or slide, even when the platform creaks and the forest hums below.
Your guide fine-tunes a snug helmet fit, level and low above your brows, so it won’t wobble when you shake your head.
- It covers your forehead without blocking your view.
- The chin buckle stays firm without pinching.
- Straps lie flat so you don’t feel hot spots.
- The outfitter inspects and maintains helmets before every tour.
- If you add a small camera mount, your guide checks it’s locked tight.
If anything feels painful, loose, or distractingly uncomfortable, speak up right away, those are key comfort cues.
On your Zipline,helmets like these meet strict standards, so you can focus on wind noise.
Zipline Harness Fit: How Guides Adjust Straps Safely
Before you even step to the edge, your guide gives the harness a quick once-over and lines up the webbing so it lies flat and untwisted against your clothes. Then they snug the waist belt above your hips, tune the leg loops evenly, and clip any chest or shoulder straps so there’s no slack but you can still breathe and turn your head when the platform creaks. You’ll do a simple tug-and-sit test, and they’ll re-check buckles and strap length at each transfer, especially if you’ve added a jacket or a small pack. This same check-and-adjust routine is part of the standard check-in to landing flow most zipline tours follow.
Pre-Fit Safety Check
As you step up to the launch platform and hear the soft clink of metal on metal, your guide kicks off a quick pre-fit safety check that’s all about comfort and control. You sit into the harness as they snug the waist belt above your hips and confirm it can’t slide past your pelvis. They check thigh loops for even pressure and you lean back to test comfort. Your helmet gets tuned to cover your forehead and moves less than two fingers when you shake. Then they scan connectors and your braking system hand. A second guide cross-checks quietly. This is the guide’s way of turning the briefing into plain English so you know exactly what each check is for before you launch.
- Waist belt high, firm
- Thigh loops snug, even
- Shoulder straps flat, buckles doubled
- Carabiners locked, lanyards routed, trolley clipped
- Buddy check: helmet, harness, brake hand
Strap Adjustment Procedure
Next, your guide dials in every strap so the harness feels like it was made for you, not borrowed from a gear closet. After a helmet check, you stand while they snug the waist belt to sit at or just above your hip bones, so it won’t creep up. They tighten each leg loop until it’s snug, then slide a flat hand between webbing and your thigh to confirm there’s no slack. On a 5-point setup, they smooth shoulder and chest straps so they lie flat with no twists.
They inspect buckles, webbing, and stitching, then do a load test. Guides handle trolley and carabiners, call “locked,” and re-check tension once you’re clipped in. These checks also help prevent issues that could lead to zipline rescue procedures if someone gets stuck mid-line. Make sure you listen as guides will demonstrate proper braking.
Comfort And Mobility Tests
Once the straps feel snug, your guide has you move around to prove the harness fits in real life, not just while you’re standing still. You squat, sit back, and swing your feet as the webbing creaks. The waist belt stays above your hip bones, and you fit one or two fingers under the leg loops. Your guide visually checks double-backed buckles, tugs each strap, and confirms carabiners face out and lock.
- Waist strap won’t slide
- Leg loops don’t numb
- Shoulder straps lie flat
- Padding feels smooth
- Helmet clears your neck
For nervous beginners, guides use calm coaching to keep the experience comfortable while they fine-tune the fit. You breathe deep and the chest strap gives room without loosening today. If anything rubs, you say so, and they tweak it until you’re safe and comfortable. Then guides will demonstrate proper braking.
Carabiners & Trolley: Guides Clip You In and Out
Even though the cable looks simple from the platform, a small team of hard-working hardware makes your glide possible. Your trolley is a multi-wheel pulley that hums on top of the line and carries you to the next deck. Steel carabiners link your harness lanyard to that trolley and they’re rated for thousands of pounds, so each click matters.
You won’t clip yourself in. Professional guides clip and unclip you at every launch and landing, keeping you facing the right way and shifting you between lines. They inspect gates, locks, wheels, and connection points before each ride. For some runs they use one trolley, for others a dual setup or a Y-lanyard with two carabiners. Guides will demonstrate proper braking before you step off. When you compare tours, note whether the operator explains and double-checks these systems as part of a simple checklist.
Zipline Gloves Provided: Braking, Grip, and Sizing
You’ll get a pair of leather zipline gloves from the outfitter, and they’re not just for looks because they help you grip the trolley and act like a brake pad when you hand-brake. Make sure they fit snug with no bunching so you can feel the cable’s hum and keep steady control, and enjoy the small bonus of warmth on cooler runs. If you have back, knee, or shoulder issues, ask your guide about joint or back concerns before you ride so they can suggest the most comfortable braking and riding position. If they’re torn or feel wrong, tell your guide and they’ll swap them out and show you the braking move before your first zip, no guesswork required.
Gloves As Braking Tool
Slip on the zipline gloves and you’ll feel right away why guides treat them like part safety gear and part speed dial. In Zip Lining, those leather or leather-reinforced palms become your main braking surface, taking the heat so your skin doesn’t. Your guide will demonstrate proper braking. You’ll press the glove to the line in a smooth, progressive squeeze, not a panicked grab, so you slow without jolting the system.
If you plan on ziplining with your phone, secure it with a phone strap so you’re not tempted to adjust or grip it while braking.
- Use your palm, not your fingertips, to add friction
- Listen for the soft hiss that says you’re braking evenly
- Keep your other hand steady on the trolley lanyard
- Swap gloves if they’re loose, torn, or don’t cover fingers
- Stay dexterous for carabiners and straps, even midair
Ask staff for a fresh pair always.
Grip, Fit, And Comfort
Once the guide hands you a pair of zipline gloves, pay attention to how they feel because fit and grip shape your whole ride. Leather or leather-reinforced palms are your braking surface, so they should feel snug, never numb, and not loose. When you brake, keep your gloved hand behind the trolley and wrap your fingers around the rope or lanyard, just like the demo. You’ll hear a soft hiss as leather meets line. For natural-looking photos, keep your shoulders relaxed and hands tidy on the line or lanyard so you don’t look tense mid-ride.
| Check | What you want |
|---|---|
| Glove fit | Snug, full finger control |
| Brake grip | Hand behind trolley, steady squeeze |
| Helmet feel | Level, 1 inch above brows |
On zipline tours, set the helmet so wind won’t shift it. For a zipline adventure, skip liners unless they stay thin. Keep hair and straps clear too.
Sizing And Guide Support
Before the first launch, the guide sizes your leather zipline gloves like they’re fitting a climbing shoe, because braking depends on feel as much as courage. You’ll flex your fingers and press leather to cable. If it pinches or slides, they’ll swap sizes until you can brake with steady control and no rope-burn drama.
- Snug gloves let you sense heat and speed
- Loose gloves twist and steal grip
- Tight gloves numb your brake hand
- Your helmet gets dialed low on your forehead
- Every clip and carabiner gets a last look
During the briefing, guides will demonstrate proper hand braking and helmet fit. Most operators require closed-toe shoes on tour, so don’t count on sandals even if the walk to the platform feels short. If you bring your own gear, they’ll check condition and compatibility. Pack long shorts if sun or harness rub worries you too.
Weather Layers for Ziplining: Wind, Cold, Rain Gear
Up in the Colorado mountains, the weather likes to change its mind mid-zip. Start with a moisture-wicking base layer in merino or synthetic so sweat doesn’t turn chilly when you step onto a high platform. Add a fleece or light insulated mid-layer you can peel off fast when the sun pops out.
Carry a packable waterproof rain jacket in breathable fabric like Gore-Tex, and you’ll stay dry without feeling like you’re in a sauna. On exposed cables, wind can bite 10 to 20°F colder, so bring a windproof outer layer or soft shell. If you’re ziplining in peak summer, plan for heat and humidity with extra water and breathable layers. Tuck a thin hat or buff and liner gloves in your small backpack. Your leather brake gloves come from the operator, so keep your extras slim and simple for sudden squalls.
Phones & Cameras on Ziplines: Pockets, Straps, Rules
Pull your phone out for a quick ridge-line shot and you’ll learn fast that ziplines have a zero-tolerance policy for loose gear. On the platform, wind hums in the cables and anything dangling can smack trees or vanish below. Follow Zip,phones & cameras on ziplines: pockets,straps,rules and you’ll ride stress-free.
- Zip it away in a zippered pocket or a tiny pack under your harness
- Add a wrist or neck strap, even for quick selfies
- Never hold a device in your hand on the line
- Skip clips, lanyards, and carabiners that can swing
- Ask about staff-approved helmet mounts or a chest GoPro
For smooth footage, use two-handed filming only on the launch/landing platforms with your guide’s okay, then stow the phone before you clip in and ride.
You’ll hear the forest rush past. If you can’t secure it, your guide will park it in the vehicle or with ground crew.
Frequently Asked Questions
What Are the Minimum Age, Height, and Weight Requirements to Zipline?
You’ll usually need to be 7–10+ years old, at least 42–48 inches tall, meet the minimum weight of 60–70 lb, and stay under 240–275 lb; a maximum height limit’s uncommon, verify policies with your local operator.
Can I Zipline if I’M Pregnant or Have a Heart or Back Condition?
Better safe than sorry: you usually can’t zipline if you’re pregnant, and you shouldn’t with serious heart or back issues. Ask the operator about pregnancy considerations, bring doctor clearance, and expect medical waivers or denial.
Can I Wear Prescription Glasses or Contacts While Ziplining?
Yes, you can wear prescription glasses or contacts while ziplining. Secure glasses with a retainer as safety eyewear, and you’ll tell guides for fit. Contacts work too; plan contact maintenance: bring drops or backups if needed.
Are Tours Accessible for Guests With Mobility Limitations or Disabilities?
Yes, if you plan ahead, you can zipline with mobility limitations. Call first to confirm wheelchair access, transfer help, and platform support. Guides’ll brief you one-on-one and can add sensory accommodations if needed at check-in.
Is Tipping Guides Expected, and What’s the Typical Amount?
Yes, tipping guides is typically expected. Follow local gratuity expectations and service etiquette: tip 15–20% per group or 10–20% per guest. Budget tours: $5–10 each; premium/full-day: $10–25. Bring small bills.
Conclusion
You’ll show up with grippy closed-toe shoes, long pants, and a jacket you can peel off. The guides handle the serious hardware: helmet, harness, carabiners, trolley, and those leather brake gloves that smell faintly like new saddles. They’ll clip you in, check every strap, and send you toward the treetops. Wind hums in your ears, cables sing, and your phone stays zipped away. Nice and tidy. If you forget layers, the sky will remind you.