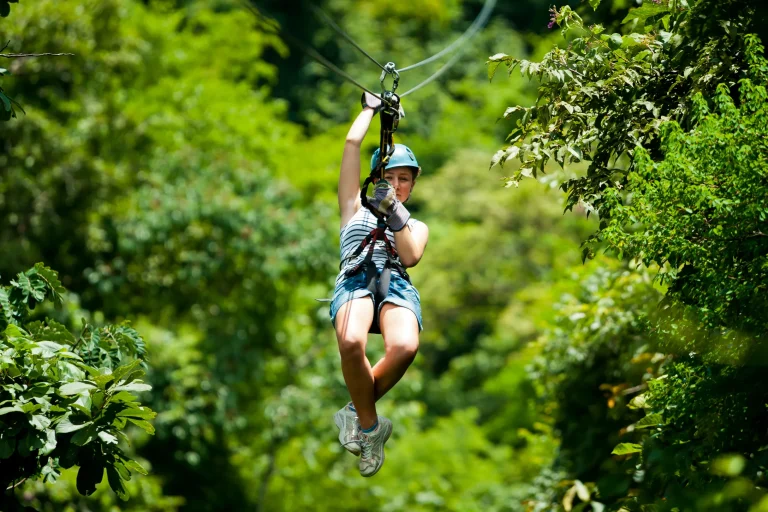
You can zipline on Oahu’s North Shore without turning it into a toughness test, even if you like a steady pace. You’ll clip into a snug harness, hear the pulleys buzz, and step along short groomed trails between platforms with breaks built in. A light jacket can feel perfect when ridge wind kicks up. The real question is how much walking and stair time you want before that first glide over green farmland.
Key Takeaways
- Most North Shore zipline tours last 2–3 hours, with frequent platform rests and a guide-controlled pace.
- Expect short walks on packed dirt or gravel between lines, plus stairs and raised platforms; use handrails and watch footing.
- Many tours include an ATV ride to the first line, reducing uphill hiking and making the experience more comfortable.
- Standing is required for about 30 minutes during check-in, harness fitting, and safety briefing; arrive 30 minutes early.
- Ask about age and medical restrictions in advance, especially if over 68 or managing back/neck, heart/lung issues, or mobility limits.
Is North Shore Ziplining Senior-Friendly at Keana Farms?
Sometimes the biggest question isn’t “Is it fun?” but “Can you actually do it comfortably?” At Keana Farms’ North Shore Zipline, the first checkpoint is the age rule since they don’t allow riders over 68, so it won’t work for older seniors past that line. If you’re within the limit, the pace feels manageable. You’ll hop on an ATV ride up to the ridgetop, then take short guided hikes between platforms on packed dirt and rooty forest patches. The tour runs about three hours. Guides clip you into a continuous belay system, handle the braking, and supply all safety gear, so your hands can stay relaxed. At check-in, you’ll sign a waiver, get fitted for your harness and helmet, and go through a quick safety briefing before the first line. You listen, step carefully in closed toe shoes, and double check height and weight limits before you arrive.
Who Should Skip the North Shore Zipline Tour?
While the North Shore Zipline at Keana Farms feels smooth and well-guided once you’re clipped in, a few hard “nope” categories mean you should sit this one out. If you’re over 68, the operator won’t send you up, even if you feel spry. If you’re pregnant, it’s also an automatic pass.
Play it safe if you’ve had recent major surgery, you deal with recurring injuries, or you have serious medical issues, especially neck or back trouble. If you have ongoing joint or spine concerns, understand that braking, short drops, and harness pressure can aggravate symptoms, so consider back, knee, or shoulder issues a reason to skip or get medical clearance first. You also need enough stamina for short hikes, repeated platform steps, and standing through gear fitting and safety talk. Plan to check in 30 minutes prior to tour time, then stay out for about 2 to 3 hours. If you can’t, choose a chair under ironwoods and relax.
North Shore Zipline Limits: Age, Weight, and Height
Before you hear the first pulley hum and feel the harness snug at your hips, you’ll want to check the North Shore rules on age cutoffs and minors, since many operators cap riders around 68 and anyone under 18 needs a parent or guardian to sign. Next, confirm weight and height limits at check-in because caps often sit around 250 to 275 pounds and some courses won’t take anyone taller than about 6 foot 8. These limits exist for safety and braking so guides can control speed, clearance, and harness fit from platform to landing. If you’re close to the line, call ahead so you don’t show up in closed-toe shoes ready to fly and get grounded by a tape measure.
Age Cutoffs And Minors
Because every North Shore zipline course runs its own show, the age rules can feel like a quick puzzle you solve at the check-in desk with the ocean breeze in your face and harness straps snug across your hips. Minimum participant ages shift by operator. You might see 7+ on many courses, 8+ on a specific tour, and occasionally 4–5+. Zipline age limits can vary for kids, teens, and adults depending on the North Shore operator. If you’re bringing kids, plan for paperwork. Anyone under 18 needs a parent or guardian signature, and some 16–17 year olds can go solo only if you sign ahead of time. Many tours require minors under 16 to ride with an adult. Younger children may need to tandem with a guide. Some operators set upper age or health cutoffs, so call before you book.
Weight And Height Limits
Once you’ve picked your course and you’re eyeing that first platform above the ironwoods, the next thing to check is whether the harness can fit you safely. On the North Shore, maximum height is 6′8″. Your weight limit often depends on height: about 270 lbs if you’re 5′10″ or taller, and 250 lbs if you’re under. Some tours cap anywhere from 250 to 275. Hawaii operators may also include zipline weight rules that vary slightly by company and course design.
Many courses also set minimum height and reach rules, and riders under 70 lbs may go tandem with a guide. Confirm the chart before you drive up the dirt road.
- Hearing the trolley click can calm you.
- Snug straps feel like a steady handshake.
- A quick scale check keeps your smile easy.
- Tall pines whisper while you wait your turn.
Medical Restrictions for North Shore Ziplining
Safety is the quiet guide riding along with you on every line above the North Shore’s green canopy. Before you clip in, operators check medical restrictions as carefully as they check cables. You can’t ride if you’re pregnant, recovering from major surgery, or dealing with recurring injuries. Neck or back problems often mean a no. Many tours also turn away guests with serious heart, lung, or orthopedic issues, so call ahead and get your doctor’s okay if you’re unsure.
On the course, guides also rely on backup systems like secondary tethers and braking setups to keep every ride controlled from platform to platform.
Age caps, often around 68, plus weight and height limits, act as built in safeguards. You’ll sign a disclosure and waiver, and guides may stop you on site if a condition or medication, like seizure disorders, looks risky. Better to watch birds than test gravity.
How Strenuous Is North Shore Ziplining (Walking and Stairs)?
On most North Shore courses, you’ll stroll about a quarter mile between lines on easy trails and gentle grades, with the whole outing running 2 to 3 hours with quick breathers built in. You’ll also climb stairs and step onto raised platforms that can reach around 150 feet, and you might meet slick mud and knobby roots after rain so grippy closed-toe shoes feel like a smart move. Many operators run tours in light showers under rain-or-shine policies, though heavy weather can still cause delays or cancellations. Your guides set the pace, handle the gear, and can slow things down or offer spectator or assisted options if you’d rather save your knees for the view and the whoosh.
Walking Distance And Terrain
Although the zips feel big and bold, the walking on many North Shore courses stays pretty manageable. On some 7 line Maui style zipline tour setups, you’ll cover a quarter mile, mostly on smooth dirt or packed gravel with gentle rises. You’ll check in about 30 minutes early, then spend another half hour in ground school and a practice line, standing and taking a few easy steps on flat ground. If you’d rather conserve energy, ask about walk along viewing areas, or reduced walking options like ride up access or tandem runs. Pack closed-toe shoes so you feel stable on packed gravel and red soil, and keep small items secure while you move between platforms.
- You’ll hear palm fronds hiss above you.
- Your shoes crunch softly under red soil.
- You can pause to watch friends fly by.
- You’ll finish feeling steady, not spent.
Stairs, Platforms, And Breaks
Easy trail walks are only part of the North Shore zipline story, because the real “workout” comes in short bursts at the towers. You’ll climb several sets of stairs and step onto wooden platforms. Tower heights vary, but guides stay close, offer a hand, and pick routes that avoid long, steep slogs.
Plan for 30 minutes of standing at check-in, the safety talk, and harness fitting. Then the 2 to 3 hour tour moves line to line with short rests at every platform. Most guests find the real timelines include small buffers for photos and group transitions, so the pace stays comfortable even with breaks. You can pause to hear wind in the pines and glimpse waves through the trees. On many Challenge Course sites, gazebos and picnic tables let friends sit and cheer. If stairs worry you, ask ahead about tandem launches or access lines.
Bridges and Rappels: What to Expect (and Opt-Outs)
When the zip lines pause between runs, that’s usually your cue to tackle a few sky bridges and a couple of rappels. Many tours add three short bridges and two drops, sometimes 150 feet. The walkway feels steady but you still watch your footing and use the handrail. For rappels, a guide clips you in, checks your brake, and can lower you in a controlled descent.
If your harness pinches, rides up, or creates numbness, speak up so staff can adjust for proper harness fit.
- Your pulse lifts at the first step out.
- Your palms cool on the rail.
- You hear carabiners click and ropes whisper.
- You touch down and laugh at yourself.
If it feels like too much, you can opt out, wait on a platform, or choose seated or guide-assisted descents. Disclose surgeries or neck, back, or mobility limits to staff.
North Shore Zipline Pace: How Long and How Busy?
Before you even clip into a harness, it helps to know the North Shore pace runs like a well-timed outing, not a quick thrill sprint. Most runs take 2 to 3 hours total, so you’ll want a half-day window. You usually check in about 30 minutes early, then wait your turn as groups are staggered, so your actual zip time can stretch or shrink. Plan for parking and a little extra arrival time when driving in, since finding a spot can take longer than you expect.
On busy weekends and holidays, spots can vanish weeks ahead, so book 4 to 8 weeks out and expect bigger groups that move like a parade. Between lines you’ll walk short trails, often under a mile total, with damp roots and a little mud. Morning slots often feel calmer and breezier, and every tour can pause for winds or lightning.
Safety Systems and Guide Support on the Course
You’ll clip into a continuous belay system that stays locked from platform to platform, so you remain connected as you step across damp boards and hear cables hum overhead. Guides handle the big safety moves, checking your harness, managing backups, and setting up each launch so you don’t have to fuss with gear midair. If you ever pause mid-line, guides can use rescue procedures like a retrieval rope or guided haul to bring you safely to the nearest platform. When you roll in for a landing, they control the braking or coach simple hand-brake cues, and you can focus on steady footing and enjoying the view.
Continuous Belay Safety System
Often, the biggest comfort boost on a zipline course comes from a continuous-belay system that keeps you clipped in from start to finish. With continuous-belay systems, a backup lanyard or locked trolley stays on the safety line, so you never unclip between platforms. Guides manage shifts and do fast harness checks, handy if your hands are stiff. You’ll practice 10 to 30 minutes on a ground “always-locked-on” line, listening for the click as it locks and rolls. When you compare operators, ask about certification, 40+ training hours, and padded 3-point harnesses. It can also help to ask whether the course follows ANSI/ACCT 03-2019 standards for challenge courses and canopy/zip line tours. It’s a small detail, yet the whole course feels kinder today.
- The steady tether feels reassuring.
- Fewer clips quiet your mind.
- Practice turns jitters into focus.
- You savor the pines and lake air.
Guide-Assisted Launch And Braking
Step up to the edge and let the guides do the heavy lifting. On some North Shore lines, you can choose a tandem or guide-assisted launch, so a pro controls your first glide while you focus on the cedar scent and the cable hum. Before you go, you’ll spend about 30 minutes in ground school. You practice posture, smooth starts, and braking on a short line while staff watch closely.
When it’s time to land, guides often handle the slowdown with guide-assisted braking. If you want, they’ll also teach gentle hand-braking and meet you at the platform to steady the stop. Expect strap checks, pulley clips, and a calm release routine from staff with 40 plus hours of training. In plain English, the safety briefing is simply staff explaining what to do, what not to do, and what to expect so you feel steady and prepared. You just smile and roll.
What to Wear: Shoes, Layers, and Sun Protection
Dial in your outfit before you clip to the line, and the whole tour feels smoother from the first platform to the last. Guides recommend wearing closed-toe, grippy shoes, since dusty steps and damp planks can get slick fast. Skip sandals, flip-flops, and toe shoes. Aim for shoes with good traction so your footing stays steady on mud, wood, and uneven ground between platforms. Dress in breathable, quick-dry layers and add a thin rain shell because showers can roll in mid-canopy. On higher platforms, a light fleece or windbreaker keeps the breeze from biting.
Wear grippy closed-toe shoes and quick-dry layers, plus a thin rain shell and windbreaker for canopy shifts.
- Steady soles that feel glued to the wood
- Soft layers that dry while you listen to birds
- A cap, SPF 30+ reef-safe sunscreen, and UV shades for bright ridgelines
- Tied-back hair and no loose jewelry so nothing flutters or snags
You’ll move easier, smile more, and hear surf below.
What to Bring (and What You Can’t Bring)
Before you buckle into the harness, take two minutes to pack like someone who doesn’t want to juggle stuff 50 feet up. Wear closed toe grippy shoes and skip Chacos, flip flops, and FiveFingers. Bring sunscreen and sunglasses with a strap, so canopy gaps don’t steal them. Add a small reusable water bottle. You’ll often find complimentary water onsite.
For your Zipline Adventure, travel light. Leave phones, keys, and loose jewelry in the car or in the small lockers. If photos matter, ask about a point and shoot and use a wrist strap. Most tours provide helmets and gloves onsite, so you don’t need to pack your own. Don’t bring cigarettes and don’t smoke in a harness. Heavy bags stay on the ground. If pregnancy, recent surgery, or serious injuries apply, don’t show up. Operators will turn you back.
Weather on the North Shore: Rain, Wind, and Comfort Tips
Once your gear is pared down to the basics, the next thing to pack for is the North Shore sky. Tours run in light rain, but lightning, torrential downpours, or sustained high winds can pause the course, so build in patience for delays. Slip on a lightweight waterproof jacket and quick-drying layers; a warm shower can turn to a cool, windy ridgeline fast. Guides may call it “too windy” when sustained wind speeds cross safety limits, because gusts can increase line sway and affect braking and landings.
- Hear rain tap your hood, then birdsong returns.
- Feel mud tug at your closed-toe shoes.
- Grip a camera strap when gusts shove.
- Catch sun between showers, sunscreen on, grinning.
Guides track wind speeds and may change launch order or skip the highest lines on blustery days. Check the 48-hour policy and reconfirm by email within 24 hours.
Getting to CLIMB Works Keana Farms + Check-In Tips
On the drive up Oahu’s North Shore, the road opens to green fields and salty air, and then CLIMB Works Keana Farms appears at 1 Enos Rd in Kahuku. From central Honolulu, plan 45 to 60 minutes, and add a little buffer for traffic and chickens.
Show up for check-in 30 minutes before your three-hour guided tour. You’ll sign waivers, get your harness fitted, and sit through the safety briefing. Bring photo ID, closed-toe shoes, sunscreen, and a light jacket for ridgelines. Leave Chacos and FiveFingers at home. If you’re 16 or 17, you can come solo only with a parent-signed waiver, and anyone under 18 needs that signature. Reconfirm by email within 24 hours and ask about restrictions, especially if you’re over 68.
If you’re following a Zipline Morning plan, it’s easy to build in a relaxing beach afternoon on the North Shore afterward.
Frequently Asked Questions
Are There Discounts for Seniors or KamaʻāIna Rates Available?
Yes, you can often get kamaʻāina and military discounts, and you may find Senior Savings, though they’re rarely advertised. You should ask when booking, confirm ID requirements, check if add-ons apply, and inquire about promos midweek.
Can I Zipline if I Use a Cane, Walker, or Trekking Poles?
Yes, you can often zipline with a cane or trekking poles, but you’ll walk uneven trails and stand briefly for harnessing. Full walkers/rollators usually won’t work. Ask about Mobility accommodations, shuttles, and guide assistance when booking.
Is There a Restroom Available on the Course or Only at Check-In?
You’ll find restroom access at check-in/base only, not on platforms or mid-course. Like Odysseus, you commit once you launch, so use facilities before briefing. Tell staff about medical needs; emergencies only interrupt when you ask.
Can Family Members Watch From the Ground Without Ziplining?
Yes, you can often bring family for Ground viewing without ziplining. You’ll use designated viewing areas and short walk‑along paths, but they can’t follow beyond platforms. You should confirm policies, check-in timing, and camera rules beforehand.
Are Photos Included, or Should I Bring My Own Camera?
Photos usually aren’t included, you’ll buy a package for you on-site or afterward, like souvenirs in the sky. For Camera options, ask about discounts and policies; bring a small tethered camera, but phones may be restricted.
Conclusion
You’ve checked the age and weight limits. You’ve asked about knees, heart meds, and dizziness. Now the only question left is simpler. Can you take a few short walks on groomed dirt and climb a couple of steps between platforms? You zip in small groups, rest at every station, and let guides steady your launch or lower you down. Then the wind comes up on the ridge. The ocean flashes. You laugh, surprised you’re ready.