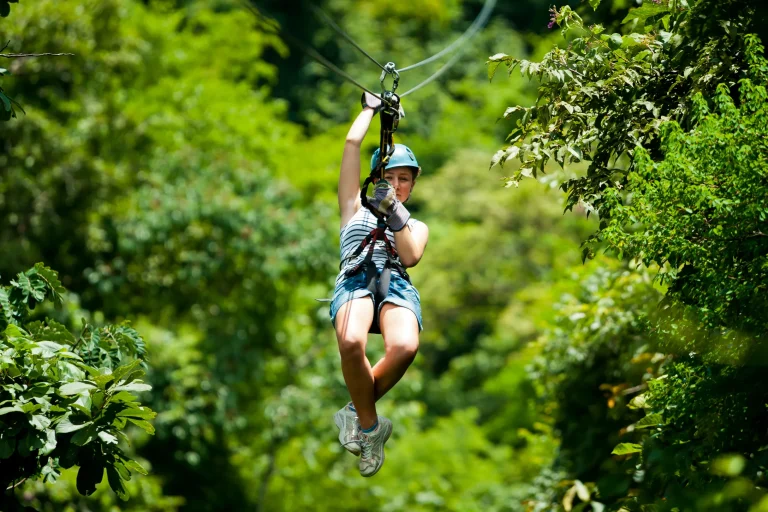
You’re clipped in above a wet green canopy, and your GoPro has to handle glare, shadow, and a sudden rush of speed. Start with Protune and a Flat profile so the leaves don’t turn neon and your face doesn’t go pale. Lock white balance at 5500K, set EV to -0.5, and keep ISO tight so the vines stay crisp. Then choose 4K/30 or 1080p/60 and trust HyperSmooth. But the one setting people forget can ruin the whole run…
Key Takeaways
- Use Protune with Flat profile, highest bitrate, and locked white balance at 5500K for consistent greens and grading flexibility.
- Set Exposure EV to -0.5 to protect bright canopy highlights and preserve bark and leaf detail in harsh jungle sun.
- Record 4K/30 for maximum detail or 1080p/60 for smoother motion; keep HyperSmooth on for stable POV footage.
- Keep shutter on Auto for fast sun-to-shade transitions; in even shade, lock shutter between 1/120 and 1/250.
- Set ISO Min 100 and ISO Max 800 (400 in bright light) to reduce noise and keep stabilization performance strong.
Baseline GoPro Ziplining Settings (Bright Jungle)
Often, the jungle looks calm until you launch off the platform and the canopy turns into a flickering mix of sunbursts and deep shade. Turn Protune on, pick Flat color, and set white balance to 5500K so the greens stay real and you can grade later.
For motion, shoot 1080p/60 or 4K/30 and keep HyperSmooth on so Rope dynamics don’t turn your clip into a shaky noodle. Cap ISO at 100–800, and start with a 400 max in bright daylight to keep noise low. Use the highest bitrate, then do a quick playback check for blown canopy gaps. If highlights look crispy, nudge exposure lower. Nail Helmet framing before you step off, or you’ll film mostly sky and your own delighted breathing pretty nonstop. For the most stable point-of-view on the line, a helmet mount usually beats chest or handheld options.
Set Protune Exposure: EV -0.5, Shutter Auto/Lock
Because the jungle canopy flips from bright sunbursts to cool green shade in a heartbeat, set Protune Exposure (EV) to -0.5 before you clip in and push off. EV -0.5 saves leaf highlights and keeps bark detail on the line below. In your exposure workflow, keep Shutter on Auto when light snaps from sun patches to deep shade so the camera adapts fast. Before you roll, double-check shoes and layers so you can stay steady on platforms and comfortable through breezy canopy sections on the North Shore.
| Light | Feeling | Setting |
|---|---|---|
| Sunburst | Squinting, cable singing | Auto Shutter + EV -0.5 |
| Even shade | Smooth glide, damp air | Lock 1/120–1/250 + EV -0.5 |
Your shutter strategy can change by section. If ISO jumps in darker pockets, quick record a short test clip at the platform. If blur stays pleasant, try a slightly slower lock on the next run.
GoPro Ziplining Color: WB 5500K + Profile Choice
As you roll off the platform and the canopy flickers from sunlit gaps to deep green shade, lock your white balance at 5500K so skin tones stay natural and the leaves keep their true color instead of drifting cool and bluish like they can at 6000K.
Then choose a color profile. Flat works best if you’ll edit later in your color grading modes. It preserves highlight sparkle and shadow detail in the vines, but it demands careful saturation handling and a little contrast work. Keep WB locked at 5500K and expose about -0.5 EV. GoPro Color is the easy route. It pops right away, yet foliage can look darker or oversaturated. Do a profile comparison with a short test clip before the big ride. For sharp action shots, pair this setup with a faster shutter so motion stays crisp as you zip through bright gaps and shaded canopy.
Stabilization-Ready ISO Limits and Quick Grading Fixes
Once you switch on GoPro stabilization, ISO stops being a boring menu item and starts acting like your safety line for clean, steady footage. In bright jungle light, give the sensor room. Turn on Protune, set ISO Min 100, and cap ISO Max at 800 for gyro headroom. Push to 1600 only if the canopy is bright and you can live with grit. Keep shutter around 1/60 to 1/120 at 30 to 60 fps so leaves streak naturally while the ride stays smooth. A fast, polished workflow in editing helps you turn that stabilized zipline footage into reels quickly without losing a clean, finished look.
Shoot Flat, then grade fast. Drop highlights 20 to 40, raise shadows 20 to 35 for shadow lifting, add +0.1 to +0.2 saturation, and set WB near 5500K. If it’s dim, bump exposure +0.3 to +0.7 and denoise lightly in editing.
Frequently Asked Questions
Can I Mount the Gopro on My Helmet, Chest, or Harness Safely?
Yes, you can, if the operator allows it. Prioritize helmet stability with a mount and tether. Use chest mounts for safer falls but expect swing. Choose harness comfort with rated hardware and a safety leash.
Should I Use a Windscreen or External Mic for Better Audio?
Use an external windscreen first; it’s simplest and helps a lot. If you want cleaner voice, add a wireless microphone on your chest and tuck cables. Test levels, keep peaks under -6 dB, enable high-pass.
What Frame Rate Is Best for Slow-Motion Zipline Footage?
Use 60 fps for most zipline shots, why overcomplicate it? You’ll get smooth slowmo at half speed with manageable files. Switch to 120 fps only in bright light, since you’ll need a high shutter and ISO.
How Do I Prevent Fogging or Water Spots in Humid Jungle Conditions?
You’ll prevent fogging by adding an anti-fog insert, applying anti fog spray inside housing, and keeping camera sealed with silica gel until launch. Don’t breathe on it, acclimate, wipe spots with a lens cloth quickly.
What Accessories Should I Bring to Avoid Losing My Gopro Mid-Ride?
Bring leash tethering: a rated wrist strap tethered to the housing, plus a second safety tether on a screw-tight mount. If clips fail mid-zip, you’ll still have it. Pack a harness carabiner and padded pouch.
Conclusion
You’re ready to slip into the treetops without your footage going a little wild. Keep Protune on Flat, lock white balance at 5500K, and start EV at -0.5 so sun patches don’t blow out. Let shutter ride on Auto, or pin it around 1/120 to 1/250 in steady shade. Cap ISO at 400 when you can. Hit HyperSmooth, check your helmet framing, then listen for cables singing over wet leaves.