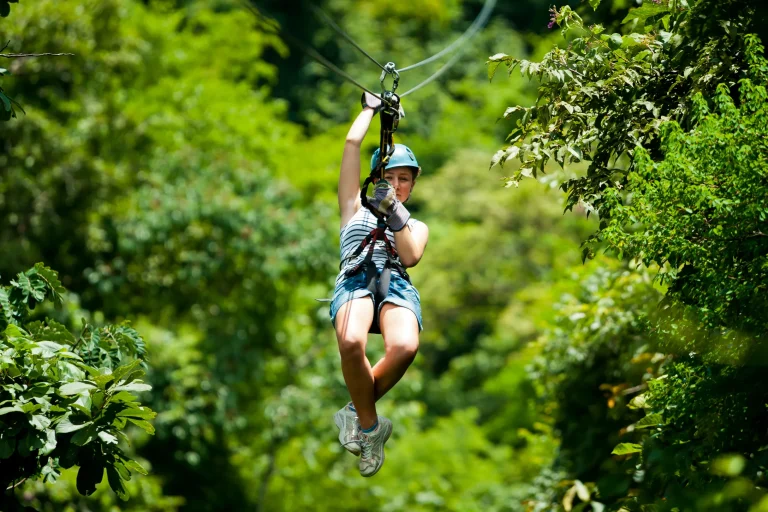
Nearly 1 in 5 phones gets damaged on outdoor adventures, and ziplines don’t exactly whisper “safe pocket.” You want that smooth swoop shot as cables hum overhead and wind snaps at your sleeves. First, you check the operator rules. Then you tether your phone to a real harness D-ring with a short lanyard and a locking carabiner, because gravity loves expensive gear. Now comes the big choice: chest mount or helmet?
Key Takeaways
- Check the operator’s phone policy; many require a secured tether, two-point attachment, and ban handheld filming or selfie sticks.
- Use a chest or helmet mount with a snug case; keep it low-profile and 10–15 cm clear of harness hardware.
- Add redundancy: certified 50–100 kg lanyard to a harness D-ring plus a secondary tether or wrist leash with locking carabiners.
- Keep the tether short (6–12 inches), tighten all screws, and tug-test every connection before launch and after adjusting settings.
- Enable stabilization and airplane mode, lock exposure/focus, and use wide angle; if phones are banned, use the operator photo service.
Is Phone Video Allowed on This Zipline?
So, can you actually film phone video on this zipline? Often yes, but the answer lives in the operator’s rules, not your courage. Before you clip in, check the policy on the website, the waiver, and the signs by the harness racks. Many tours let you record if your phone is secured with a tether or wrist strap, and the guides may call for a two point attachment and a hard no on selfie sticks. Using a secure strap is often the deciding factor between being allowed to film and being told to stow your phone.
Some outfits ban loose handheld phones altogether. They’ll tell you to keep it zipped away, or they’ll offer pro photos instead. If your setup isn’t approved, they can bench you. Drop a phone and you might pay a retrieval fee, so make sure your clip whirs like a pulley.
Choose the Safest Mount for Zipline Phone Video
You’ll get the steadiest, safest zipline video when you pick a mount that hugs you tight, so compare a chest setup with a low-profile helmet mount and think about what you want to see. For many riders, helmet, chest, or handheld mounting is the key decision that shapes both safety and the perspective you capture. Add a locking clamp and a backup tether so a bump or a rattling cable hum can’t send your phone swinging or flying. Before you launch, check the fit and clearance around straps and guide gear, then do a quick test hang and tighten every screw like you’re packing for a bumpy ride.
Chest Harness Vs Helmet
While the zipline hums and the trees whip by in a green blur, the safest place to mount your phone comes down to two popular choices: chest harness or helmet. Pick a chest harness when you want calmer footage and a level horizon. It sits low on your torso, so your arms can relax and your view stays clear. If you Use A GoPro style mount with a phone adapter, test it before you ride. Pay attention to comfort cues, if the harness pinches, chafes, or restricts breathing, speak up to staff before you launch.
Choose a helmet mount for true POV. You’ll see the cable, the pulleys, and the river below, but every head turn shows up as shake. Good padding and stabilization help. For the safest choice, ask the operator what’s allowed, then run chest as your main clip. Add helmet shots.
Lanyards And Tethering
A chest or helmet mount decides the angle, but a good tether decides whether your phone makes it back to the platform. Use a certified lanyard rated for 50 to 100 kg and clip it with locking carabiners to your harness, not just your wrist. High-speed runs tug like a sudden gust and a wrist strap can snap or twist your shot. Add a redundancy mindset like zipline operators use with backup systems so your phone stays attached even if one connection fails.
Pick a rugged low-profile case with tether points or a GoPro style adapter so you don’t stress the charging port. Add a second backup cord or wrist leash and double-lock every clip. Before you ride, hang a weighted phone replica and shake it. If you’re tempted to film with a selfie stick, tether that too. Listen for rattles and fix them.
Mount Fit And Clearance
Dial in your mount before you clip in, because on a zipline your phone swings through a world of straps, carabiners, and that humming pulley overhead. Choose the right wrist or chest mount, and check the rating. Aim for 3 to 5 times your phone’s weight, so a 300 g phone gets a 900 to 1500 g mount. In bright jungle light, lock in GoPro settings like a simple setup before you ride so your footage doesn’t blow out while you focus on staying secure.
- Keep it low profile so it clears harness metal by 10 to 15 cm.
- If you go helmet, center it and keep side vision open. Don’t pinch the chin strap.
- Add a secondary lanyard to your harness with a rated sling or carabiner.
Do a static harness check, then a slow practice run. If it taps or rubs, reset the angle before launch.
Clip and Tether Your Phone to the Harness
Clip your phone into a rugged lockable holster with a climbing-rated carabiner and connect it to a load-bearing harness ring, not a flimsy fabric loop that looks tough but isn’t. Add a second tether like thin Dyneema cord to another harness point so if one clip pops open mid-zip you still hear only wind and your own laugh, not a phone clatter far below. Before you push off, tug-test every connection and check fit and clearance so nothing snags when the cable starts to sing, and make sure your guide’s cool with the setup. Most tours provide helmets and gloves as part of the zipline gear you’re issued, but they won’t supply a secure phone tethering system, so pack your own.
Choose A Secure Clip
Lock your phone down before you step off the platform and hear that pulley start to sing. On a zipline tour, pick a carabiner style phone clip that’s rated for 5 to 10 kg and snap it onto a reinforced loop on your harness. Go low profile with a chest or harness mount so the wind can’t pry at it. Pair it with a rugged case that locks into the clip and covers the buttons so bumps won’t trigger a surprise launch. You’ll hear the cable hum and grip relax. Your guides can add comfort from guides by doing a quick gear check and walking you through the clip-and-tether setup before you launch.
- Feel the metal gate click shut
- See the phone ride tight against your webbing
- Give it one firm tug and a fast visual check
Follow the operator’s rules and you’ll film with calm confidence.
Use A Safety Tether
A solid phone clip gets you most of the way there, but a safety tether gives you that backup line when the wind starts to tug and the cable starts to sing. Choose a high-strength harness tether rated for 50–100 pounds and clip it to a reinforced harness D-ring with a locking carabiner. A locking spring snap works too, but clip only to the maker’s attachment point so it can’t unclip. Consider confirming your setup aligns with ANSI/ACCT 03-2019 as the current industry standard for canopy/zip line tours.
Connect the other end to a case tether loop or add a sticky anchor pad for redundancy. Before you launch check every gate then do a gentle tug test. Replace frayed straps and skip elastic cords. Keep it short, about 6–12 inches, so it won’t whip around like action cameras on a lanyard.
Check Fit And Clearance
Start with a quick ground check and make sure your phone rides close and clean, not dangling like a tiny wrecking ball. Ask your guide where you’re allowed to clip in, then use a UIAA rated carabiner on the harness belay D-ring, never on loose webbing. Keep the tether short about 6 to 12 inches so it can’t swing into pulleys. A good safety briefing in plain English should make it clear where attachments are allowed and what “secure” really means before you launch.
- Picture the phone tucked to your hip like a stone in a pocket
- Route the tether under your jacket or gear so it won’t snag on towers or branches
- Hang the phone and give it a firm tug to mimic 1 to 2 g, then check the lock
Adhesive anchors can work well, but back them up with a lanyard.
Set Phone Settings Before You Launch (Stabilization, Airplane Mode)
Before you step off the platform and the pulley starts to sing, take 30 seconds to set your phone so you won’t need to fiddle with it mid-flight. Start by turning on stabilization, whether it’s optical, gyro EIS, or Action mode. Pick 4K at 60fps, or 1080p at 120fps if you want silky slow motion later, and you’ll cut motion blur on fast lines. Flip on airplane mode so calls and popups don’t make you flinch, but leave Bluetooth on if you’re using a remote or mic. Tap and hold to lock AE/AF, then choose a fixed wide view and skip digital zoom. Turn on wind noise reduction. For more natural-looking footage (and photos), keep your shoulders relaxed and your hands calm instead of stiff or splayed in midair, aim for natural posture. After settings, recheck your strap, clamp, and safety tether. Future you will thank you at landing.
Record Hands-Free: Chest vs. Helmet Mount
On a zipline, the best footage often comes when you stop trying to be a camera operator and let a mount do the work. A purpose-built chest harness keeps your phone snug at torso level, so your hands stay on the line and your view feels natural. Helmet mounts lift the camera about 12 to 20 cm above your eyes for a taller, swooping look, but they can amplify head turns, so pick a low-profile plate. For sharp action footage, use burst mode to increase your chances of capturing crisp frames during fast movement.
- Chest: you see your gloves, the steel cable, and the valley opening ahead
- Helmet: you skim above the treetops and spot birds before you hear them
- Both: add a rated 50–100 kg safety tether, tighten every screw, and do a slow test glide before launch.
Reduce Shake and Wind Noise on a Zipline
Often the biggest upgrade you can make on a zipline video is cutting the shake and taming that roaring wind that turns every laugh into static. Skip the handheld grip and lock your phone securely into a chest or harness mount rated for action sports. Keeping it tight to your torso cuts that spinning wobble, and wide-angle lenses make the ride feel faster without exaggerating shake.
Turn on stabilization. Set a fast shutter near 1/1000s or shoot 60 to 120 fps. If you need reach, use an extension and add a wrist tether with a carabiner. For audio, use a mic with a deadcat, or enable wind reduction and tuck the mic behind your collar. Do a test run to confirm mount and levels. Pack a lightweight layer from your North Shore zipline packing list so you can cover the mic area if the wind is ripping.
If Phones Aren’t Allowed: Photo Service, Buddy Filming, Action Cam
If the guides say phones stay in your pocket, you’ve still got a few solid ways to bring home the ride. Ask about the operator’s photo service. Many run helmet or trolley cameras and sell single shots or digital bundles for $10-$50, so you can focus on the hum of the cable and the treetops rushing by. Before you book, remember that a great tour isn’t just about the footage, it’s also about length, speed, views, and guides working together.
- Let a buddy film from the launch deck and the landing zone using a gimbal or steady mount, and stay behind the marked lines.
- Strap on an action cam like a GoPro on your chest or helmet, add a secondary tether, and use a quick release the guides approve.
- Split roles. One rider captures first person videography, another grabs reaction photography at the end for everyone’s laughs.
Frequently Asked Questions
What Phone Case Works Best for Gripping Mounts and Lanyard Attachment Points?
You’ll get the best grip and lanyard options with a rugged TPU/rubber case like OtterBox Defender, Spigen Tough Armor, or a Peak Design Anchor case, since they add Rugged attachment points and non-slip ridges securely.
Will Cold Weather or Altitude Reduce Battery Life During a Zipline Recording?
Yes, cold will cut your runtime, and altitude mostly worsens it indirectly. You’ll see Battery Drain rise with 4K/stabilization. Keep a warm power bank, dim the screen, close apps, and test-record briefly before you commit fully.
How Can I Protect My Phone Lens From Scratches on Cables or Pulleys?
Protect it with Lens Shielding: add a model-fit tempered protector, use a closed action case with a raised bezel, apply a peelable PET film, tether it to your harness, and check pulleys for burrs first.
What Resolution and Frame Rate Are Best for Slow-Motion Zipline Footage?
Use 1080p at 120 fps for most shots; switch to 240 fps only in light for High speed capture. If your phone supports it, pick the highest resolution at that fps and keep ISO low.
How Do I Back up or Transfer the Video Quickly After the Ride?
Once you land, once you breathe, you start an Immediate Transfer: plug into a fast USB‑C/Lightning cable and copy to a laptop/SSD. If service’s good, upload to iCloud/Drive, or AirDrop/Nearby Share to a friend now.
Conclusion
You’re ready to roll, as long as the operator says yes and your phone’s clipped to a real D‑ring with a short tether and locking carabiner. Double-check every screw and mount before you step off. Turn on stabilization and airplane mode, then hit record. On the line, the cable hums and the wind snaps at your mic, so tuck it in. Your view feels as wide as the whole sky. If phones are banned, grab the photo service or a buddy.