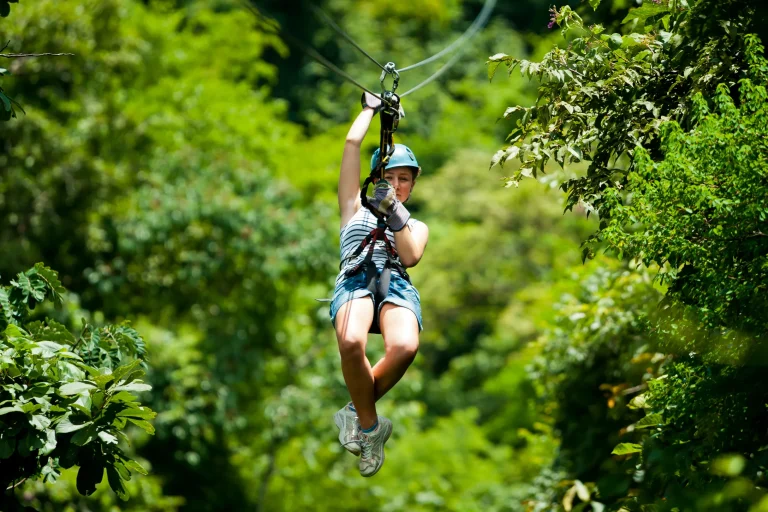
Most zipline group photos fail because you’re staged on a narrow platform where the wide lens stretches the people on the edges. You can fix that by choosing a level deck, locking harness straps flat, and having a guide steady the line while you step back a few meters. Switch to 0.5×, hold your phone just above chest height, and build two staggered rows so every face clears a helmet brim. Now, timing is everything…
Key Takeaways
- Stage on a wide, level deck with 10–15 feet of clear space, keeping everyone behind safety lines and off active launch ramps.
- Shoot during calm pauses: pre-launch lineup or final platform, and ask guides to hold the group still 10–15 seconds for burst mode.
- Use 0.5× ultra-wide, step back 3–6 feet, and hold the camera slightly above chest height to fit helmets, railings, and scenery.
- Minimize wide-angle distortion by centering the group, forming a gentle arc, and keeping key people out of the outer frame edges.
- Arrange two rows with staggered heads, use one simple pose cue, and keep hands, hair, and visors off faces for clear expressions.
Choose a Safe, Stable Photo Spot
Start by staking out a wide, level staging area where everyone can bunch up without bumping helmets or tangling lanyards. You want 10 to 15 feet of clear deck so packs and pulley trolleys don’t sprawl into the frame or the edge. Keep your group behind the safety lines and harness points while you step onto stable ground or a secured platform. Choose the Right spot with a grippy surface and a handrail nearby. Gloves and winter boots make balance feel like a comedy sketch. Set up where guides can reach you within an arm’s length to tighten straps and tuck loose scarves. Skip active launch ramps or any hanging platform. Pick a bridge landing or the post tour meetup before anyone clips in. For the smoothest timing, snap the photo during check-in or the pre-launch staging when everyone is still grouped together and not yet moving down the line.
Time the Shot for Calm Moments
Often, the best group photo happens when nobody’s moving. On a zipline tour, grab that calm in the harnessed lineup before the first run, or in the final photo spot after the roughly two-hour course. You’ll hear carabiners clink and boots scrape, but bodies stay still and smiles read clearly.
Ask your guides to hold everyone on the launch deck or a wide platform for 10 to 15 seconds. Flash shaka signs and let the photographer fire burst mode. Wait for a lull in the wind and tame hair into ponytails so faces don’t vanish. Bright solid shirts pop against Douglas fir greens and Columbia Valley browns. When views open to Fairmont Creek, shoot. Remove bulky gear only when the guide says it’s safe. Guides can also use comfort cues to help nervous beginners relax so expressions look natural.
Plan Your Zipline Group Photo Before Launch
Before you step onto the launch deck, pick the exact group photo you want so your guides can line up harnesses and clip points to match the frame. Choose a full platform lineup, staggered heights at the edge, or a mid-zip chain, and say it out loud. Then sort your crew by height and harness angle. Put taller friends behind. Keep faces toward the camera or turned over a shoulder so nobody hides under a helmet rim.
Ask for one helper guide and one friend to run spacing, smooth hair, and tap burst mode or a remote. Bright solid shirts like pink or orange pop against fir greens and valley browns, and your zipline adventure suddenly looks like a magazine spread in the wild. For the sharpest results, ask your guide about the best seat angles on the platform so everyone’s face catches the light and stays in frame.
Use Wide-Angle (0.5×) for Everyone
Switch your phone or action cam to 0.5× and you’ll grab the whole crew on the launch platform, plus the railings, helmets, and that sweep of treetops behind you. Step back about 3 to 6 feet and lift the camera a little above chest level so faces stay natural while the wide view still feels big and breezy. Since ultra-wide stretches the edges, put the tallest riders near the center and have everyone lean in slightly so nobody ends up with rubbery arms. Before anyone clips in, set up a secure phone grip so you can focus on framing the group without worrying about drops.
Still comparing Group Photos On Zipline Tours: How To Get Everyone In The Shot?
Ask for tour ideas, hotel suggestions, or a simple trip plan that combines both.
Trip Helper
Enable 0.5× Wide Lens
Tap into your phone’s 0.5× wide lens and watch the whole launch deck snap into view, helmets and all. With wide-angle lenses you can grab roughly 120 to 130 degrees of scene, so the full crew fits on a tight platform. Step in close, about 1 to 3 meters, and you’ll keep faces big enough to read the grin under the chin strap.
Turn your phone sideways. Line up the widest part of the group across the center, then lift the camera about half a meter to a meter above head height. You’ll catch tall friends, boots, and the forest drop behind them. Shooting on a GoPro? Pick Wide for maximum coverage or Linear for a straighter look. Hear zips as you count down. Add a quick burst mode right as everyone leans in and the guide calls “3, 2, 1,” so you can choose the sharpest frame if someone wiggles.
Reduce Edge Distortion
Wide mode makes it easy to fit everyone on that skinny launch deck, but it also loves to stretch faces at the edges like a funhouse mirror. Use 0.5× wide-angle mode and step in closer, then keep the group centered. Arrange people in a gentle arc or staggered rows so edge faces angle toward the middle. Keep your VIPs out of the outer 10–15% of the frame, where barrel distortion bites hardest. Before you tap the shutter, remind everyone to keep relaxed hands and a natural posture so the group shot looks effortless. If you must use 5× wide-angle mode for a massive crew, plan a quick fix later in the tour photo portal with lens distortion or transform tools.
| Do | Why |
|---|---|
| Center the cluster | Less edge stretch |
| Arc the lineup | Faces turn inward |
| Leave frame margins | Protect key people |
| Apply distortion fix | Straighten rails |
Build Two Rows That Show Every Face
Line everyone up like you’re setting a scene on a tiny jungle stage. Put the front row seated in their harnesses, then place a second row 2 to 3 feet behind them. Have the back row stand or kneel a bit higher, or step onto a small board, so every face sits in its own clear window. After the photo, remember that tipping zipline guides fairly is a thoughtful way to thank the crew who kept your group safe and smiling.
- Stagger shoulders so heads alternate like trail markers.
- Ask everyone to lean slightly inward and keep chins a touch down.
- Step back 8 to 12 feet, go wide angle, and shoot burst mode to capture the perfect moment.
Pick one simple pose for all, like a shaka or thumbs-up. You’ll hear the platform creak, then click, click, click. Check the screen once and reset if anyone hides.
Keep Hair, Helmets, and Hands Off Faces
Before you clip in and the platform starts to creak, take a quick second to clear your face like you’re framing the shot. Tie long hair into a high ponytail or a braid so the wind doesn’t whip it over your eyes. Set your helmet just above your browline and snug the chin strap so it won’t slide down mid-zip.
Before the photo, do a quick harness fit check and speak up if anything pinches, rides up, or feels loose so you’re not grimacing in the shot.
When you pose keep the arm farthest from the camera relaxed and use the other hand for a wave. Don’t let elbows, gloves, straps, or ropes cross your cheeks. Tuck sunglasses or a visor up, and ditch scarves, hoods, and anything that throws shadow. Ask the guide for a 2 to 3 second “chin up, face forward” call so they can capture the grin.
Wear Bright Solids to Stand Out
A few smart color choices can turn a busy forest backdrop into your personal spotlight. On a Zipline tour, wear bright solid shirts like neon pink, orange, or turquoise so you pop against mossy greens and bark browns. Skip loud patterns and giant logos. They turn you into camouflage and steal attention from your grin as the pulley hums. Before you harness up, follow what to wear guidance like choosing sturdy shoes and light layers so you’re comfortable while posing between platforms.
- Pick high contrast shades like coral in evergreens to help phones and GoPros lock focus and exposure.
- In snow or glare, choose saturated royal blue or red, not pastel, so you don’t fade into the white.
- Coordinate matching solids or bold color blocks so your group looks intentional at takeoff and landing, not like a bag of trail mix.
You’ll spot everyone instantly in previews.
Include Guides for Framing and Scale
Ask a guide to stand at the far end of the platform or on a small raised spot so you’ve got a clean frame and an instant scale marker. You can even place one or two guides beside or slightly behind your group to add depth, and suddenly the 2,000-foot line and the tall Douglas firs feel real in the shot. If you’re capturing this with a GoPro, choose between a helmet mount, chest mount, or handheld setup so the wide-angle perspective matches the framing you want. If you time it right, they’ll step back or climb a short ladder and hold a helmet or carabiner at chest level, and you’ll capture your whole crew plus that big Columbia Valley backdrop in one wide-angle click.
Guide As Scale Marker
Your guide can double as the tour’s human measuring tape in group photos. Put them at one end beside the nearest rider so their known height and helmeted silhouette set a scale against the canyon, cables, and zippers. Ask them to stand tall, arms relaxed or flashing a shaka, so no faces or carabiners get hidden. Their bright jacket or helmet pops against trees and sky, helping your camera judge distance and highlight the thrill. Remember that modern tours prioritize backup safety systems, so your guide can pose confidently without distracting from safe spacing and gear checks.
- Line the guide up with the platform edge or a bridge post to show span.
- Use harness anchor points behind them as a steady reference.
- For long-line shots, place two guides at known intervals, one on the platform and one mid-bridge, to sell that 2,000-foot depth.
Guide-Led Group Framing
Lean on the guides to build a group shot that feels big and still looks clean. Ask one to stand at the platform edge or on a nearby tower so you get instant scale and a hint of height. For guide-led group framing, have them line you up in staggered rows, front crouch and back stand, then signal the camera so every face shows and helmets don’t steal the spotlight.
Let a guide grab the wide-angle or a GoPro on a pole from higher up to help you capture the whole crew plus Douglas firs and the Columbia Valley beyond. They’ll time it right after you’re clipped in. Make sure bright shirts pop against the greens and browns. Action photos sell your zipline experience. Great guides also help highlight key tour qualities like speed and views in one clean, high-energy frame.
Use One Simple Cue for Real Smiles
Often, the best group photo on a zipline tour comes from one simple cue you can hear over the clink of carabiners and the whir of the line. Pick one shout that carries, like “3-2-1 Big Shaka!” and stick with it all day. You’ll feel the timing tighten and the smiles look less posed. Arriving a little early for check-in and waivers gives your group a calm buffer to agree on the cue before the first platform.
Choose one loud cue, 3-2-1 Big Shaka!, and use it all day; timing tightens and smiles stop looking posed.
- Say the cue once, then shoot, so nobody burns out on forced laughing.
- Match the words with Action: the guide lifts an arm or flashes a shaka so helmeted riders can read it across platforms.
- Practice it right after you strap in, when nerves buzz and the forest smells sharp, so mid-zip and finish line photos click into sync.
You’ll hear it, grin, and fly together always.
Shoot Burst Mode to Beat Blinks
You’ll beat blinks on a zipline group shot by switching to burst mode and holding the shutter as the cable hums and everyone whoops past. Start firing a split second before takeoff and keep it going for about 2 to 3 seconds so you snag 10 to 30 frames with crisp faces instead of surprise winks. Then you just pick the best frame where every helmet is in view and every smile is actually open, like you planned it on purpose. This same rapid-fire approach also makes it easier to pull clean stills later when you’re doing a fast, polished workflow for reels.
Burst Mode Basics
Sometimes the best way to beat blinks on a zipline platform is to let your phone spray a quick burst of photos. In Burst Mode, you can grab 10 to 30 frames each second while helmets clack and cables hum. Start holding the shutter about a half second before takeoff or the group cheer. That tiny head start catches real smiles and wind tossed hair. If you’re filming with a GoPro in bright jungle sun, lock in bright jungle light settings so your burst frames stay crisp and evenly exposed. To keep the sequence usable, stack the odds in your favor:
- Switch to ultra wide so everyone stays in frame.
- Brace with both hands, a floating grip stick, or let a guide hold the camera.
- Keep your elbows tucked and breathe out as you shoot.
You’ll freeze the moment without turning the platform wobble into blur.
Pick The Best Frame
Dial up Burst Mode, then comb through the sequence while the platform still vibrates and the cable sings. You’ve just grabbed 10 to 30 frames a second, so one blink won’t ruin the hero shot. Look for the moment when every chin is up and every harness strap sits flat. Crop later, so leave extra headroom and space on the lead line side in case someone leans back or pops their feet.
Before the next rider launches, ask for one quick pose and hold it 3 to 5 seconds. Shoot from slightly above or level with the deck and use a wide setting. Make sure zipline helmets don’t cast harsh shadows across faces by nudging the group into even light before you fire. Experiment with different angles. Review right away in your portal or editor, trash the blur, and save 3 to 5 winners.
Fix Forest Lighting (Shade, Backlight, Glare)
Even if the forest feels like a giant green lampshade, you can still get bright, friendly faces in a group shot with a few quick moves. Step to a spot where the sun is behind you, not behind your crew, and aim for a 10 to 2 o’clock angle for soft light.
- Walk a few paces up or down the trail until the canopy opens and you see sky above you.
- Pop a fill or low phone flash to lift faces in deep shade, about +0.7 to +1.5 EV.
- Encourage bright solid tops like pink, orange, or blue so everyone stands out from mossy browns and greens.
While you’re waiting, stay cooler with platform shade and a bit of water so no one looks flushed or squinty in the shot.
If you can, plan near golden hour. Warm light cuts glare and helps you capture the excitement.
Phone Settings That Work On-Course
Usually the best zipline group photos happen when you set your phone before the guide clips you in and the platform starts to hum with pulleys and nervous laughs. Switch on burst mode and keep your finger on the shutter so you catch an action shot mid-flight, ideally 10 frames per second or more. Turn on HDR or Smart HDR so bright sky and dark pines keep their detail. Go wide at 0.5x or 0.6x, or try panorama for big crews and a sweeping valley backdrop. Before anyone launches, tap a mid-tone shirt and hold for AE/AF lock. That keeps exposure steady as riders whoosh past. For peace of mind, use a secure phone strap so your camera settings stay ready without risking a drop while you ride. If your camera has sports mode, use it, and aim for 1/1000s or 60 to 120 fps video.
Download, Save, and Share After the Tour
Wrap up your harness, brush the pine needles off your sleeves, and check your phone because your tour photos show up automatically after the roughly two-hour course. They’ll land in the inbox tied to the email and phone number you used to book, while cables hum in your ears. Open the link to the photo portal and you can grab high-resolution files, then share to social with one tap. Sample guest shots guide poses. Stay Safe and scroll after you park. When you read through reviews later, look for photo delivery timing comments because they often reveal how smoothly the post-tour download process goes.
- Download your favorites right away so they don’t get buried.
- Use the portal’s share tools to post or leave a quick review.
- Order prints for your wall or as a gift.
No message? Email [email protected] with booking, or visit zipmineral.com.
Frequently Asked Questions
Can the Tour Company Provide Professional Photos Instead of Using Our Phone?
Yes, your tour includes a Professional Photographer, so you won’t need your phone. Guides capture group and solo shots across the two-hour course, then email them automatically and post them in a portal for sharing later.
Are There Privacy Rules for Posting Other Guests or Children on Social Media?
Yes, follow Privacy Considerations: you should get explicit consent before posting identifiable guests, and always get a parent/guardian’s OK for children. If strangers appear, blur or crop. Honor opt-outs, and don’t tag names without approval.
What’s the Best Way to Label and Organize Photos for a Large Group?
Use a consistent Filename convention: ReservationName_Date_Initials_Order. Store files in Year/Month/Day/TourID with Raw and Edited subfolders. Embed EXIF/IPTC tags for location and guide, and share a CSV mapping filenames to guests so you’ll search everything later.
How Do We Get a Group Photo if Someone Skips the Zipline Section?
Like herding cats, you’ll nail a group photo: tell your guide before the briefing, pause at the photo point for a platform shot, or do a Ground meeting portrait with matching shirts, then combine sets.
What Happens if a Phone or Camera Is Dropped During the Tour?
If you drop a phone or camera, it can smash or vanish down steep terrain. Follow Safety protocol: tell your guide immediately and don’t retrieve it yourself. Use tethers and mounts; operators may restrict devices.
Conclusion
Congrats, you’ve staged a tiny summit meeting on a wooden platform. You check harness buckles, spread two rows, and lift your phone at chest height with 0.5× wide angle. The guides call for a 10 second ceasefire and the forest goes quiet except for pulleys. You fire burst HDR and nobody blinks on purpose. Later, you download and share proof that humans can cooperate, at least until the next launch. Gloves smell of damp pine.