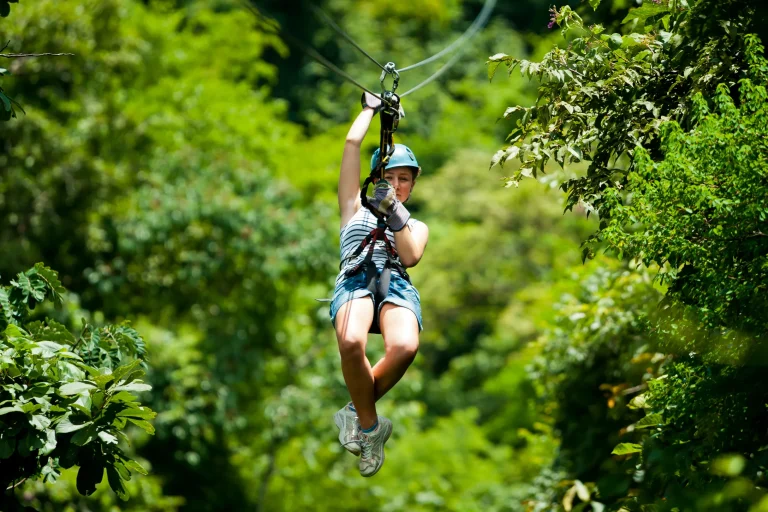
You don’t need to be fearless to zipline on the North Shore, you just need ten calm minutes. You show up 30 minutes early for waivers and a snug harness check, then you watch the safety demo and practice “clear, stop, go” until it feels automatic. Gloves on, you rehearse the launch stance and soft braking while the pulleys click overhead. Before you step out, you ask about weight limits, photos, and water stops, and then… you hear the wind.
Key Takeaways
- Arrive 30 minutes early for check-in, harness fitting, waiver, and safety briefing before your North Shore zipline start time.
- Confirm age, height, weight, and health limits when booking, and review the 48-hour free cancellation policy.
- Choose a 7:40–9:00 AM slot for calmer winds, clearer views, and a smoother first-time experience.
- Use the practice line to learn “clear,” “stop,” and “go,” plus proper body position and hands-on-trolley technique.
- Trust the safety system: dual-cable trolleys, guide double-checks, controlled braking, and backup tethers until guides unclip you.
North Shore Zipline Quick-Start: 10-Minute Plan
Show up early and you’ll feel like a pro before your feet leave the ground. Arrive 30 minutes before your Climb Works Keana Farms time on the Oahu North Shore. Tours run Mon to Sat from 7:40 AM to 1:40 PM. You’ll check in, get fitted in a harness, and hear the safety briefing.
10 minute plan: Confirm age, height, and weight rules now so nobody’s surprised. Lace closed toe shoes. Wear knee length shorts or light pants. Pack a small camera and skip loose items. Expect water on course, but plan to buy snacks later. Choose a North Shore zipline booking with free cancellation up to 48 hours. Scan verified reviews and ask about pro photos. If you want a quieter, customized pace, ask about private zipline tours and compare what’s included against the pricing before you book. Then you’re set for your Zipline Adventure.
What Does a North Shore Zipline Feel Like?
Step off the platform, take a breath, and you’ll feel the North Shore zipline catch you into a smooth, steady glide instead of a stomach-drop plunge. Wind presses your cheeks while the cable sings above you. First runs last 20 to 60 seconds so you’ve got time to loosen your grip and look around. You hear birds and smell wet leaves.
On longer lines up to 2,400 feet the view opens over tropical farmland ridges and the coastline of Oahu’s North Shore. Guides talk you through the launch then you roll out like you’re on rails. Dual lines let you race a friend and debate who was faster. Between zips you cross sky bridges and boardwalks then smile at how calm your legs feel. If you’re craving more speed and height, the North Shore also has zipline tours designed for thrill seekers.
Is North Shore Ziplining Safe for First-Timers?
You start with a guide-led safety briefing where you’ll clip in, check your harness, and practice braking while the wind rustles the ironwoods nearby. You ride on certified gear like helmets and gloves, and many North Shore lines run on modern dual-cable systems with built-in backup so you can focus on the view instead of the what-ifs. Many tours also use dual-cable backups and modern braking systems to reduce risk and keep riders secure. If you’re wondering about heights, speed, or “what if I’m not super fit,” you’ll see clear age and weight limits and you’ll stay in sight of guides on bridges, rappels, and every launch platform.
Guide-Led Safety Briefing
Before the first cable hums above the treetops, the guides run a hands-on safety briefing that makes the whole thing feel more like a well-planned adventure than a leap of faith. You’ll check in 30 minutes early, then get fitted for a helmet harness and gloves, with straps snug and buckles clicked. The instructors teach you where to place your hands, how to sit back, and when to brake, then you practice on a short training line until it feels automatic. They also confirm age, height, and weight limits, and they’ll pair lighter kids with a guide when needed. On course, you’re never on your own. Guides watch from platforms and pull stations, and water waits along the 2.5-hour loop. You’ll also do a final gear double-check during the check-in process before heading to the first platform. Hear the jungle breathe.
Still comparing North Shore Ziplines For First Timers: Confidence Plan In 10 Minutes?
Ask for tour ideas, hotel suggestions, or a simple trip plan that combines both.
Trip Helper
Modern Gear And Systems
Although the jungle looks wild from the launch platform, the gear and systems on North Shore ziplines feel calm and modern the moment the helmet clicks and the full-body harness hugs your hips. Dual-line trolleys give you a backup on every run, and you can travel side by side as the cables sing above the trees. Gloves and helmets are standard, and the full-body harnesses stay snug. For travelers on tight schedules, short zipline tours on the North Shore make it easy to get the full experience without carving out an entire day.
Guides control clip-in and platform swap, so you focus on the view. You’ll ride eight dual zip lines up to 2,400 feet, cross three sky bridges, and descend two rappel lines, all built to industry standards. Water stations and ATV rides to ridgetop keep logistics simple. Weight, age, and health limits help the system perform as intended.
Common First-Time Concerns
Modern helmets, snug full-body harnesses, and those twin cables humming over the treetops can still leave first-timers with one big question: is this actually safe? On the North Shore, vetted operators run courses with guides who fit your gear, give gloves, and deliver a safety briefing before you clip in. Guides also keep things comfortable for nervous beginners by offering steady reassurance and clear coaching, real comfort from guides that builds confidence line by line.
Most tours set a minimum age of 5 to 7, about 42 inches tall, and a max weight near 250 to 270 pounds, so the hardware matches you. You practice braking and platform steps on short lines first, then move to longer zips, sky bridges, or a rappel. You can ride dual lines next to a friend. Water, photos, and 48 hour cancellation keep your Shore adventure calm and curious. It’s pure adventure.
North Shore Zipline Rules: Age, Weight, Health
If you’re picturing yourself stepping off a wooden platform and hearing the pulley hum over the jungle, you’ll want to check the basics first. On the North Shore, most courses take kids from about 5 to 7 up, usually at least 42 inches tall. Zipline age limits on the North Shore can differ for kids, teens, and adults depending on the course. If you’re under around 80 pounds, you may ride tandem with a guide. Weight caps vary, often 250 pounds if you’re 5’10” or shorter, and up to 270 if you’re taller. Skip it if you’re pregnant, healing a spinal injury, or managing serious heart issues. Wear closed toe shoes and bring knee length shorts or pants so the harness sits right. You’ll still stroll scenic boardwalks between lines. Confirm rules, waivers, and 48 hour cancellation terms when you book today.
Choose Your North Shore Zipline: Easy vs Adventure
Once you’ve checked the age, height, and weight rules, the fun part starts: picking the zipline day that matches your comfort level. “Easy” North Shore courses keep things friendly with shorter runs, lower platforms, and patient instruction that works well for first-timers and families with kids around 5 to 7 and up. “Adventure” routes turn the volume up with longer lines that can stretch to about 2,400 feet, higher takeoff decks, and extras like sky bridges or a quick rappel that makes your knees notice the breeze. For date-day ideas, look for zipline tours for couples that build in extra time together between lines. Ask about terrain accessibility. Dual lines feel calmer and add photography stops for everyone. They’re great family friendly routes.
- Warm harness, snug helmet
- Roosters, nearby ocean breeze
- Shaded platforms, soft talk
- Sky bridge clang
- Rappel rope burn
Best North Shore Zipline for Your Vibe (Haleiwa, Kahuku, Waimea)
Start by zeroing in on the vibe you want, because North Shore ziplines feel different depending on where you clip in. If you want easy logistics and a quick thrill between shave ice and sand, head to Haleiwa. Courses there run shorter and friendlier, so you’re back in town fast for local flavors and a swim.
Craving longer flight time and big-sky views? Choose Kahuku. You’ll glide over open countryside with more hang time, and it pairs well with sunset rides if your schedule leans late. If dense green is your thing, Waimea delivers jungle-forward lines near Waimea Bay, with birdsong and wet-leaf air. Compare line length, elevation, and total tour time, then match it to your comfort level and family packages for everyone. Many operators also offer transportation from Waikiki to the North Shore, which can make your day smoother if you don’t want to drive.
How to Pick a Trusted North Shore Zipline Crew
Your vibe picks the scenery, but the crew sets the tone from the moment you step onto the platform. Start with operators that show hundreds of verified reviews, instant confirmation, and a clean safety record. Booking sites make this comparison fast. Ask about local guide credentials and whether they keep instructions calm and simple, especially if you’re bringing a lighter kid who may need tandem. The North Shore Ziplines FAQ can clarify essential planning details like what to wear, weight limits, and how check-in typically works.
Picture a pro outfit that feels easy and organized:
- a snug helmet and smooth harness buckles
- gloves that smell faintly of rubber and rain
- cold water stations between lines
- free parking and a quick ATV ride up trail
- booking transparency with free cancellation and reserve now pay later
Also check group size, photo options, English guidance, and community partnerships.
What Happens at Check-In and the Safety Briefing
Before you even hear the first cable hum, check-in sets the pace and keeps things simple. Show up 30 minutes early with an arrival checklist in mind: closed-toe shoes, pockets zipped, and no dangling cameras. Build in a little extra buffer time for parking, restrooms, and any last-minute questions so you’re not rushing. You’ll move through the waiver process fast, then staff handles ID verification and confirms age, weight, and health limits. If a kid is small, they’ll explain tandem rules without making it weird.
Next comes the safety briefing. You’ll watch guides demo braking and body position for eight lines, roughly 500 to 2,400 feet. They’ll explain the dual-line trolley and how side-by-side zipping works. You’ll practice “clear,” “stop,” and “go” on a short line, then nail a calm launch and landing. Water stations and photo delivery details get a point-out.
Gear Check: Harness, Helmet, Gloves (What They Do)
Before you step onto the first platform, you’ll get a harness that spreads your weight across your waist and thighs, and your guide will snug the buckles so the clip points sit right at your hips for an easy seated glide. If anything pinches, rides up, or leaves you feeling uneven, mention it right away, those are key harness fit cues your guide can adjust before you zip. You’ll also wear a helmet that’s sized to your head and chin-strapped tight, because platforms, low branches, and windy runs don’t care if you’re distracted by the view. Then you’ll pull on gloves for better grip and happier fingertips when you brake or handle ropes, and yes, they’ll make you look a little like you’re about to fix a sailboat.
Harness Fit And Function
Step into the harness and you’ll feel the whole setup click from “tour gear” to “real adventure.” A full-body or sit harness should sit snug at your waist and thighs with no more than two finger-widths of slack, like a firm backpack hip belt that won’t wander. Ask for quick strap adjustment, then check comfort padding sits flat. Your guide will lock buckles and carabiners before you clip in. You want snug support, not a swinging seat. Pack closed-toe shoes so your feet stay stable on platforms and landing steps.
- leg loops hug like bike shorts
- belay loop sits centered and ready
- backup lanyard clicks to its anchor
- webbing looks clean with no fuzz
- gloves feel grippy, no rings snagging
Do a test tug with your guide for load testing and you’ll step to the edge calm.
Helmet Protection Basics
Once you’ve got that harness dialed, the helmet and gloves turn your setup into a tidy three-part safety system you can actually feel working. Your helmet sits level and snug. Tighten the chinstrap so it won’t shift when you shake your head. Ventilation openings help on humid North Shore platforms. Impact absorption protects you from low-clearance bumps and falling bits of bark. Ask about visor compatibility if you wear glasses. Before each run, guides recheck buckles, lanyard, and locked carabiners, then do a pull test. Many tours also follow height requirements to keep riders within the gear’s safe operating range, and you can verify eligibility by confirming the posted minimum/maximum with your guide during check-in. Gloves are for handling lines and avoiding rope burn. If anything feels loose, tell a guide.
| Gear | What you notice | Guide checks |
|---|---|---|
| Helmet | Snug chinstrap | Locked buckle |
| Harness | Even thigh load | Carabiners plus lanyard |
| Gloves | Hands covered | No tears |
Gloves Grip And Comfort
Slip on the zipline gloves and you’ll feel the whole course get easier to handle. Your material choice matters, leather feels classic, synthetic dries fast, and both boost tactile feedback when you pinch the line to brake. Guides show a two-handed brake, so your palms stay cool and your sweat management stays sane. Most tours provide core safety gear like helmets and harnesses, but check the what to pack list so you’re not missing personal comfort items.
- Snug harness hugging waist and thighs, no pinches
- Lightweight helmet cinched, chin strap clicked
- Locked carabiners facing the right way, no twists
- Gloves gripping warm cable, a soft squeak as you slide
- Signs and guides confirming weight and height fit for long zips
Do a quick check before you clip in. If anything rubs or slips, speak up. You’ll ride smoother and laugh more at the whoosh over green cliffs below.
First Zipline Launch: Step-by-Step
Lean into the platform rail and listen for the click as your guide runs a quick gear check on your helmet, harness, and gloves. You’ll clip in at two points, then roll a few feet on a practice line to feel the trolley’s pull. Do your mental prep now. Try breathing exercises and a quick visual rehearsal of a calm push and steady glide.
Choosing a small-group zipline can make this first launch feel more personal, with more guide attention and less waiting between turns. On North Shore platforms you’ll launch seated or in a reclined T position. Your instructor clips your tether to the main cable and says “locked.” You hear wind in the trees, ocean below. A countdown follows. Lift your feet, keep your hands still, and step off onto a 500 to 800 foot dual line. If your buddy’s beside you, race.
Braking and Landing: How Guides Keep It Smooth
As you roll toward the landing platform, you’ll spot the guide waiting in a helmet and gloves and you’ll hear clear countdown calls over the hum of the cable. You’ll learn how hands-off braking systems work, plus when you use your glove and tether to slow yourself, and you can even try a short practice zip first so the motion feels familiar. If you ever stop short on the line, guides follow rescue procedures to reach you and bring you in safely. You’ll also get the simple guide signals for when to brake and when to step off, so your feet come forward and knees bend for a smooth finish instead of a surprise stop.
Landing Platforms Explained
When you come zipping in from a long run that can stretch to 2,400 feet, the landing platform feels like a neat little dock in the trees. It’s a level timber walkway with railings and a gritty non-slip deck under your shoes. Guides run controlled friction brakes and an assistant belay line so you slow in a steady glide. Your arrival choreography is simple: sit upright, feet forward, then stand when told. A great tour also balances speed and views so the finale feels thrilling without ever feeling rushed. If you’re light, they may add a quick hand-brake or a spring-assisted capture to skip any jolts. You stay on a backup tether until they unclip you, usually in seconds, following assistant protocols and smart platform ergonomics.
- Cable singing softly
- Sunlit cedar rails
- Rubber mat grip
- Guide’s gloved hand
- A calm “step”
Hands-Off Braking Systems
That calm “step” off the landing platform doesn’t happen by luck. On many North Shore lines you glide into passive deceleration, with spring blocks, bungee stops, or a gentle gravity runout doing the work so you don’t have to grab a cable. Guides rig dual lines and set your lanyard and harness angle before you launch. Your body naturally rotates into better landing ergonomics, feet forward, knees soft, eyes wide. On longer runs, even 2,400 feet, you also get redundant energy absorption. A primary brake catches first, then a backup friction or bungee element smooths the last meters. You’ll hear a quiet thump and feel a cushy tug. Rain usually doesn’t automatically cancel tours because most operators follow rain-or-shine policies and adjust pacing, braking checks, or line choice for wet conditions. Guides still steady you onto the platform and through any rappel. It’s polished, like valet parking.
Guide Signals And Practice
Even if the line uses passive braking, your guides still teach you how to land like you meant it. In the briefing you slip on leather gloves, snug your chin strap, and learn a flat-glove pull-down brake. You test it on a short training line so you feel the sweet spot between glide and stop. One key part of the talk is a plain-English safety briefing that translates each rule into what you should actually do with your hands, feet, and body.
- A guide’s verbal cues: “hands on trolley, not the cable”
- Crisp nonverbal signals, a thumbs-up or palm-down
- Partner rehearsals at the platform, knees bent, step forward
- A tandem guide or guide line keeping speed calm on long runs
- Staff at the landing deck counting down and catching if you’re light or jittery
They’ll run the sequence again until you roll off smoothly, laughing at how pro it feels today.
How High and Fast Are North Shore Ziplines?
Launch off the platform and you’ll feel the North Shore open up beneath your feet. Some lines run about 500 feet, then the course ramps up to 2,400 feet of glide over valleys and patchwork farmland. You’ll climb to ridgeline platforms that sit hundreds of feet above the valley floor, so ridge perspectives include ocean shimmer on one side and green mountains on the other. On the longest dual lines, your speed perception spikes as the cable hums and the air turns loud. Many riders swear it feels like 30 to 40 plus mph, and wind effects can nudge you faster or slow you down. Add sky bridges and two rappels, and you’ll notice real vertical drops between platforms. It’s a moving viewpoint tour.
What to Wear (and What to Leave Behind)
Start with closed-toe shoes like sneakers or hikers because sandals aren’t allowed and they’ll turn you away at check-in. You’ll feel the harness snug at your hips and hear the pulleys hum, so wear knee-length shorts or pants and a light layer, then tie back your hair and skip loose jewelry or scarves. Leave phones, loose cameras, and backpacks behind unless you’ve got an approved mount, and bring sunglasses on a strap plus a tiny zippered pocket item like ID and cash for the 2.5-hour course.
Closed-Toe Shoes First
On the North Shore, your zipline day begins at your feet. Closed-toe shoes are required on every tour, so pick sturdy sneakers or light hiking shoes that hug your heel. Proper footwear keeps toes safe on platforms and sky bridges and helps you feel steady when the trade winds pick up.
- Grippy tread biting into damp boardwalk planks after a quick shower
- Snug laces you can double-knot for simple Footwear maintenance
- Cushioning for short hikes and the occasional rappel landing
- Fresh Sock choices that wick sweat and block harness rub
- Knee-length shorts or lightweight pants that slide smoothly under straps
Skip sandals, heels, and floppy slip-ons. Show up without closed toes and you may sit out, listening to the zipline hum instead all day.
Leave Loose Items Behind
Before you clip in, strip things down to the essentials because the North Shore breeze loves to steal souvenirs. Wear closed-toe sneakers or hikers and knee-length shorts or light pants, then skip scarves, backpacks, and anything that flaps. Guides will check you before each line, and loose items get pulled fast for safety.
Plan for vehicle stowage or a locked base bin for your phone, hats, sunglasses, and jewelry. Bulky belts and dangling lanyards can snag on platforms, so ditch them and tie long hair back. If the operator allows photos, bring one small camera in secure pockets only while gearing up, then clip it as a tethered camera to your harness or wrist. Otherwise, enjoy the zip and let the guides shoot too.
Timing It Right: Morning vs Afternoon + Honolulu Traffic
In the early hours, the North Shore feels like it’s still stretching awake, and that’s a great time to zip. Book a 7:40 to 9:00 AM start and you’ll catch calmer winds and clear views after the first sun. From Honolulu, plan early departures with traffic buffers. Leave 60 to 90 minutes before check-in, then add 30 minutes to park.
- Cool air on your cheeks as palms rustle
- Roosters calling near Haleiwa storefronts
- Blue ridgelines clear before clouds build
- A quick shower tapping leaves in the afternoon
- A relaxed plate lunch that fits your post zipline plans
Afternoon slots from noon to 1:40 PM can turn windier, and fast showers may haze the 2,400 foot lines. Pick the earliest slot for bright photo light.
What’s Included on the 8-Line North Shore Zipline Tour
Climb into the ATV and let it buzz for about 10 minutes as it carries you two miles up the mountainside to the ridgetop course. Up top, you gear up with helmet, harness, and gloves, and your guides run safety and help with every launch and landing.
You’ll fly eight parallel dual ziplines about 500 to 2,400 feet, so you can zip side by side. Mix in two rappel lines, three sky bridges, and boardwalks while you hear Hawaiian culture and farm history. Water stations keep you going. Pro photos are taken; review the photo policies for purchase and email delivery. Your price covers all taxes, fees, handling, and free parking. Ask about accessibility options, group discounts, the 270 lb limit, and closed-toe shoes.
Frequently Asked Questions
Can I Zipline if I’M Afraid of Heights or Have Anxiety?
Yes, you can zipline even if you’re afraid of heights or anxious. You’ll use Breathing techniques, Guided visualization, and stepwise Exposure therapy on short lines, with guides checking your harness and coaching you beside a partner.
Are Photos or Videos Available, and Can I Bring My Own Camera?
Yes, you’ll get pro photos emailed via Dropbox after, like catching lightning in a bottle. You can bring action cameras, but you’ll secure them with a tether. You may sign photography waivers; buy souvenir packages too.
What Happens if It Rains or the Weather Changes Mid-Tour?
If rain hits mid-tour, you’ll pause on sheltered bridges or continue while staying clipped. Guides adjust routes for winds and lightning; you may face tour delays or a weather cancellation. Bring rain gear, and reschedule/refund.
Are There Restrooms, Water Stations, or Snacks Available On-Site?
Just as you start thinking about a bathroom break, you’ll find restroom locations at the check-in/gear-up area before briefing. You’ve got hydration options via water stations on platforms. Snack availability isn’t guaranteed, so bring one.
Do Guides Accept Tips, and What’s the Recommended Tipping Amount?
Yes, guides accept tips. You should follow gratuity etiquette by giving cash tips when possible: $10–$20 per person for a 2.5–3 hour tour, or 10–20%. Add $5–$10 for extra guide appreciation.
Conclusion
You show up 30 minutes early, sign the waiver, and get your harness checked. Then you take ten minutes to lock in your plan: “clear, stop, go,” gloves on, feet up, breathe. On my first North Shore line, the guide tapped my tether twice and said, “Two lines, one backup.” That tiny data point felt like a seatbelt click. You hear the pulley hum, smell wet ironwood, and glide out steady.